In the last tutorial, we've laid out the basics of loading images into Glide targets. If you haven't read it yet, please review the it in order to learn the basics for this tutorial. This week, we're continuing with two additional special purpose targets: notifications and app widgets. If you need to load images into either one of those, keep reading!
Glide Series Overview
- Callbacks: SimpleTarget and ViewTarget for Custom View Classes
- Loading Images into Notifications and AppWidgets
Loading Images into Notifications
![]()
Notification icons give important context to the user. Setting the large notification image with the NotificationCompat.Builder is straight-forward, but the image has to be in form of a Bitmap. If the image is already available on the phone, that's no problem. However, if the image is not on the device and needs to be loaded from the Internet, it's impossible to use the standard tools.
This is where Glide comes in. In the last tutorial, we've looked at a method how to download the image as a Bitmap with BaseTarget (Glide 3.x SimpleTarget). Theoretically, you could utilize that way to load the image into your notification. But it's not necessary, since Glide makes it much more comfortable for you by providing a convenient NotificationTarget.
NotificationTarget
So, let's look at some code. You know by now how Glide targets work, thus we won't go over it again. In order to display a large image in the notification, you could use RemoteViews and display a custom notification.
Our layout for the custom notification is simple:
<?xml version="1.0" encoding="utf-8"?>
<LinearLayout
    xmlns:android="http://schemas.android.com/apk/res/android"
    android:layout_width="match_parent"
    android:layout_height="wrap_content"
    android:background="@android:color/white"
    android:orientation="vertical">

    <LinearLayout
        android:layout_width="match_parent"
        android:layout_height="wrap_content"
        android:orientation="horizontal"
        android:padding="2dp">

        <ImageView
            android:id="@+id/remoteview_notification_icon"
            android:layout_width="50dp"
            android:layout_height="50dp"
            android:layout_marginRight="2dp"
            android:layout_weight="0"
            android:scaleType="centerCrop"/>

        <LinearLayout
            android:layout_width="0dp"
            android:layout_height="wrap_content"
            android:layout_weight="1"
            android:orientation="vertical">

            <TextView
                android:id="@+id/remoteview_notification_headline"
                android:layout_width="match_parent"
                android:layout_height="wrap_content"
                android:ellipsize="end"
                android:singleLine="true"
                android:textSize="12sp"/>

            <TextView
                android:id="@+id/remoteview_notification_short_message"
                android:layout_width="match_parent"
                android:layout_height="wrap_content"
                android:ellipsize="end"
                android:paddingBottom="2dp"
                android:singleLine="true"
                android:textSize="14sp"
                android:textStyle="bold"/>

        </LinearLayout>
    </LinearLayout>

</LinearLayout>
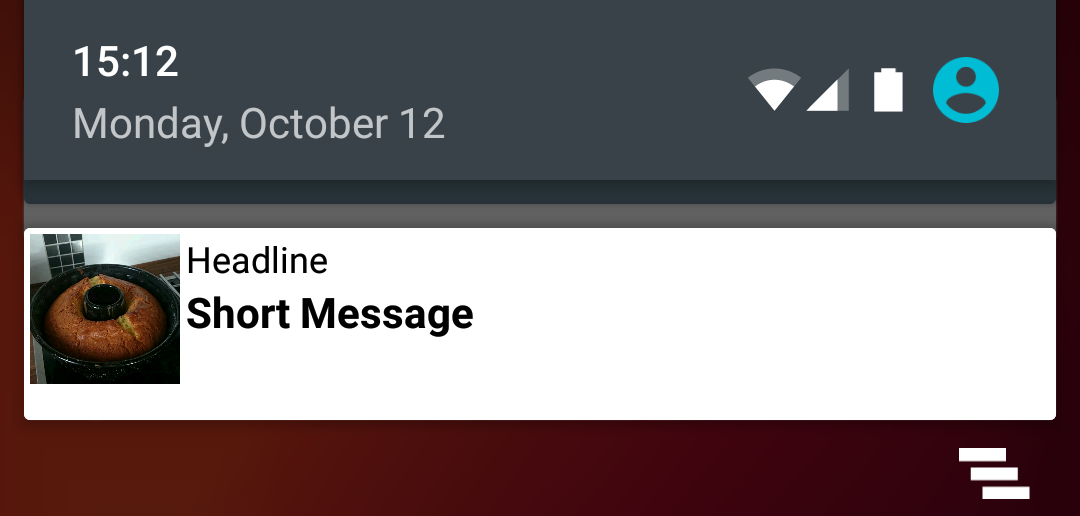
The following code creates a custom notification with the layout above for us.
final RemoteViews remoteViews = new RemoteViews(context.getPackageName(), R.layout.remoteview_notification);

remoteViews.setImageViewResource(R.id.remoteview_notification_icon, R.mipmap.future_studio_launcher);

remoteViews.setTextViewText(R.id.remoteview_notification_headline, "Headline");
remoteViews.setTextViewText(R.id.remoteview_notification_short_message, "Short Message");

// build notification
NotificationCompat.Builder mBuilder =
    new NotificationCompat.Builder(context)
        .setSmallIcon(R.mipmap.future_studio_launcher)
        .setContentTitle("Content Title")
        .setContentText("Content Text")
        .setContent(remoteViews)
        .setPriority( NotificationCompat.PRIORITY_MIN);

final Notification notification = mBuilder.build();

// set big content view for newer androids
if (android.os.Build.VERSION.SDK_INT >= 16) {
    notification.bigContentView = remoteViews;
}

NotificationManager mNotificationManager = (NotificationManager) context.getSystemService(Context.NOTIFICATION_SERVICE);
mNotificationManager.notify(NOTIFICATION_ID, notification);
This snipped creates three important objects for us, the notification and the RemoteViews and our constant NOTIFICATION_ID. We'll need those to create the notification target:
Glide 4.x
private NotificationTarget notificationTarget;

...

notificationTarget = new NotificationTarget(
    context,
      R.id.remoteview_notification_icon,
      remoteViews,
      notification,
      NOTIFICATION_ID);
Glide 3.x
private NotificationTarget notificationTarget;

...

notificationTarget = new NotificationTarget(
    context,
    remoteViews,
    R.id.remoteview_notification_icon,
    notification,
    NOTIFICATION_ID);
Lastly, we need to call Glide itself and as we've done in the previous tutorials, set the target as the .into() parameter:
Glide 4.x
GlideApp
    .with(context.getApplicationContext())
    .asBitmap()
      .load(eatFoodyImages[3])
      .into(notificationTarget);
Glide 3.x
Glide
    .with(context.getApplicationContext())
    .load(eatFoodyImages[3])
    .asBitmap()
    .into(notificationTarget);
The result is that as soon as Glide has the image loaded, it'll get displayed in our custom notification. Awesome 😃
App Widgets
Let's move to another Glide target. App widgets are a part of Android since quite a while. If your app provides app widgets and contains images, this should be interesting to you. The AppWidgetTarget of Glide can help significantly to make this very straight-forward.
Let's look at a simple sample AppWidgetProvider:
Glide 4.x
public class FSAppWidgetProvider extends AppWidgetProvider {

    private AppWidgetTarget appWidgetTarget;

    public static void pushWidgetUpdate(Context context, RemoteViews remoteViews) {
        ComponentName myWidget = new ComponentName(context, FSAppWidgetProvider.class);
        AppWidgetManager manager = AppWidgetManager.getInstance(context);
        manager.updateAppWidget(myWidget, remoteViews);
    }

    @Override
    public void onUpdate(Context context, AppWidgetManager appWidgetManager,
                         int[] appWidgetIds) {

        RemoteViews remoteViews = new RemoteViews(context.getPackageName(), R.layout.custom_view_futurestudio);

        appWidgetTarget = new AppWidgetTarget(context, R.id.custom_view_image, remoteViews, appWidgetIds) {
            @Override
            public void onResourceReady(Bitmap resource, Transition<? super Bitmap> transition) {
                super.onResourceReady(resource, transition);
            }
        };

        GlideApp
                .with(context.getApplicationContext())
                .asBitmap()
                .load(GlideExampleActivity.eatFoodyImages[3])
                .into(appWidgetTarget);

        pushWidgetUpdate(context, remoteViews);
    }
}
Glide 3.x
public class FSAppWidgetProvider extends AppWidgetProvider {

    private AppWidgetTarget appWidgetTarget;

    @Override
    public void onUpdate(Context context, AppWidgetManager appWidgetManager,
                         int[] appWidgetIds) {

        RemoteViews rv = new RemoteViews(context.getPackageName(), R.layout.custom_view_futurestudio);

        appWidgetTarget = new AppWidgetTarget( context, rv, R.id.custom_view_image, appWidgetIds );

        Glide
                .with( context.getApplicationContext() ) // safer!
                .load( GlideExampleActivity.eatFoodyImages[3] )
                .asBitmap()
                .into( appWidgetTarget );

        pushWidgetUpdate(context, rv);
    }

    public static void pushWidgetUpdate(Context context, RemoteViews rv) {
        ComponentName myWidget = new ComponentName(context, FSAppWidgetProvider.class);
        AppWidgetManager manager = AppWidgetManager.getInstance(context);
        manager.updateAppWidget(myWidget, rv);
    }
}
The important lines are the declaration of the appWidgetTarget object and the Glide builder. Good news here: you don't need to customize AppWidgetTarget any further with overriding the onResourceReady method. Glide does everything automatically for you. Very nice!
Outlook
With this tutorial, we're concluding our adventure into Glide targets. You've learned how to load images asynchronously for all kind of purposes, ImageViews, notifications, Bitmap callbacks etc.
Next, we'll look how to deal with errors. What happens when something went wrong? What happens when the URL doesn't exist or isn't valid? Stay tuned for exception handling.