The last two posts in this series have shown how to load a single image into an ImageView. This post will demonstrate a ListView implementation, where each row contains a single ImageView. This is similar to many image gallery apps.
Picasso Series Overview
- Getting Started & Simple Loading
- Advanced Loading
- Adapter Use (ListView, GridView, ...)
- How to Deal with Null/Empty Values (in ListViews)
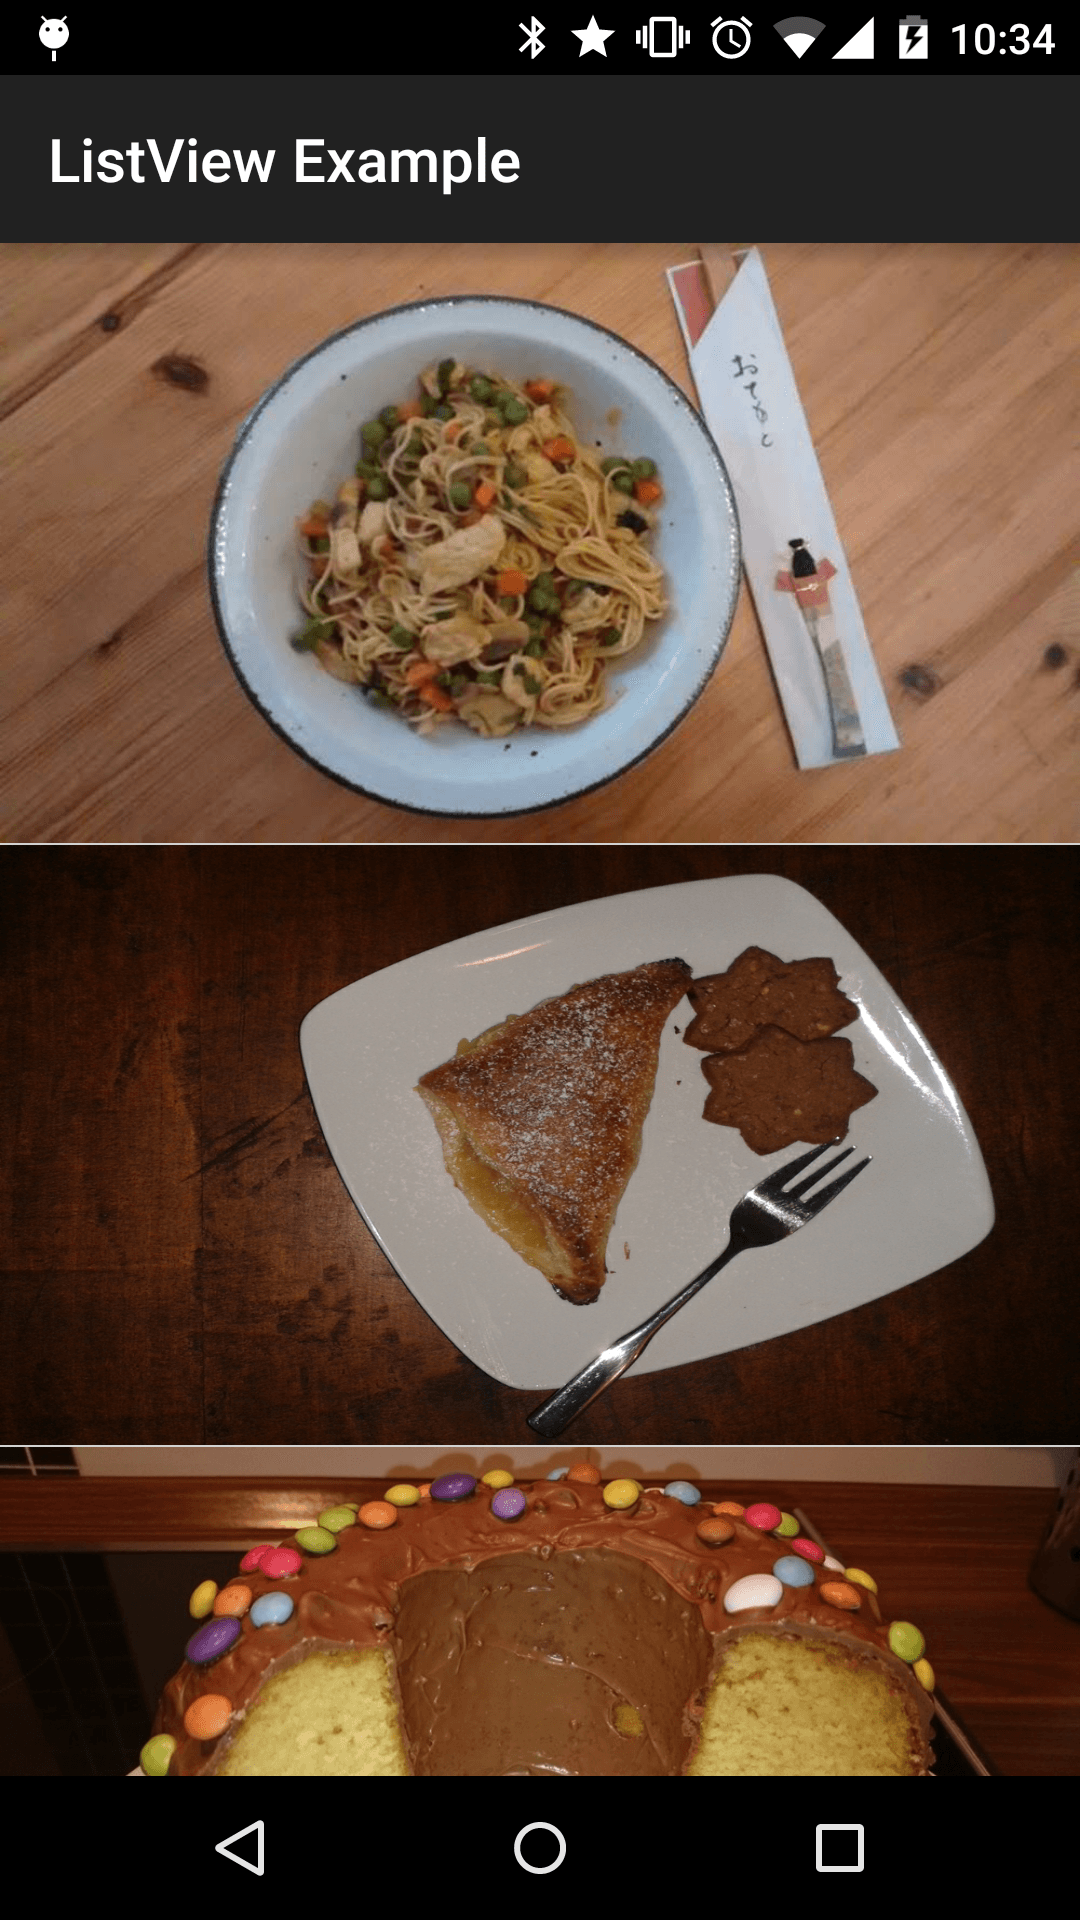
Sample Gallery Implementation: ListView
First, we'll need some test images. We uploaded a selection of the best recipe images from our eatfoody.com project to imgur:
public static String[] eatFoodyImages = {
        "http://i.imgur.com/rFLNqWI.jpg",
        "http://i.imgur.com/C9pBVt7.jpg",
        "http://i.imgur.com/rT5vXE1.jpg",
        "http://i.imgur.com/aIy5R2k.jpg",
        "http://i.imgur.com/MoJs9pT.jpg",
        "http://i.imgur.com/S963yEM.jpg",
        "http://i.imgur.com/rLR2cyc.jpg",
        "http://i.imgur.com/SEPdUIx.jpg",
        "http://i.imgur.com/aC9OjaM.jpg",
        "http://i.imgur.com/76Jfv9b.jpg",
        "http://i.imgur.com/fUX7EIB.jpg",
        "http://i.imgur.com/syELajx.jpg",
        "http://i.imgur.com/COzBnru.jpg",
        "http://i.imgur.com/Z3QjilA.jpg",
};
Second, we'll require an activity, which creates an adapter and sets it for a ListView:
public class UsageExampleAdapter extends ActionBarActivity {

    @Override
    protected void onCreate(Bundle savedInstanceState) {
        super.onCreate(savedInstanceState);

        setContentView(R.layout.activity_usage_example_adapter);

        listView.setAdapter(new ImageListAdapter(UsageExampleAdapter.this, eatFoodyImages));
    }
}
Third, let's look at the layout files for the adapter. The layout file for a ListView item is very simple:
<?xml version="1.0" encoding="utf-8"?>
<ImageView xmlns:android="http://schemas.android.com/apk/res/android"
       android:layout_width="match_parent"
       android:layout_height="200dp"/>
This will result in a list of images, which each will have a height of 200dp and match the device's width. Obviously, this will not result in the prettiest image gallery, but that's not the focus of this exercise.
Before we can jump to the result, we'll need to implement an adapter for the ListView. We'll keep it simple and bind our eatfoody example images to the adapter. Each item will display one image.
public class ImageListAdapter extends ArrayAdapter {
    private Context context;
    private LayoutInflater inflater;

    private String[] imageUrls;

    public ImageListAdapter(Context context, String[] imageUrls) {
        super(context, R.layout.listview_item_image, imageUrls);

        this.context = context;
        this.imageUrls = imageUrls;

        inflater = LayoutInflater.from(context);
    }

    @Override
    public View getView(int position, View convertView, ViewGroup parent) {
        if (null == convertView) {
            convertView = inflater.inflate(R.layout.listview_item_image, parent, false);
        }

        Picasso
            .with(context)
            .load(imageUrls[position])
            .fit() // will explain later
            .into((ImageView) convertView);

        return convertView;
    }
}
The interesting stuff happens in the getView() method of the ImageListAdapter. You'll see that the Picasso call is exactly the same as in the previously used 'regular' loading of images. The way to utilize Picasso stays the same, no matter what application you're trying to cover.
As an advanced Android developer you will know that we need to re-use layouts in ListViews to create a fast & smooth scrolling experience. One awesomeness of Picasso is that it automatically takes care of the request canceling, clearing of the ImageViews, and loading the correct image into the appropriate ImageView.
Side note: there is an option to further optimize adapter use with fit() and tags(). We'll talk about those in an upcoming blog post.
A Strength of Picasso: Caching
When you scroll up and down a lot, you'll see that the images are displayed much faster than previously. As you can guess, these images come from cache and are not loaded from the network anymore. Picasso's cache implementation is well rounded and will make things for you a lot easier. The size of the implemented cache depends on the device's disk size.
When loading an image, Picasso uses three sources: memory, disk and network (ordered from fastest to slowest). Once again, there is nothing you'll have to do. Picasso hides all that complexity from you, while creating intelligently sized caches for you. Of course, aligned with Square philosophy, you can influence or replace the caching component. We'll take a closer look at the caching in a later blog post.
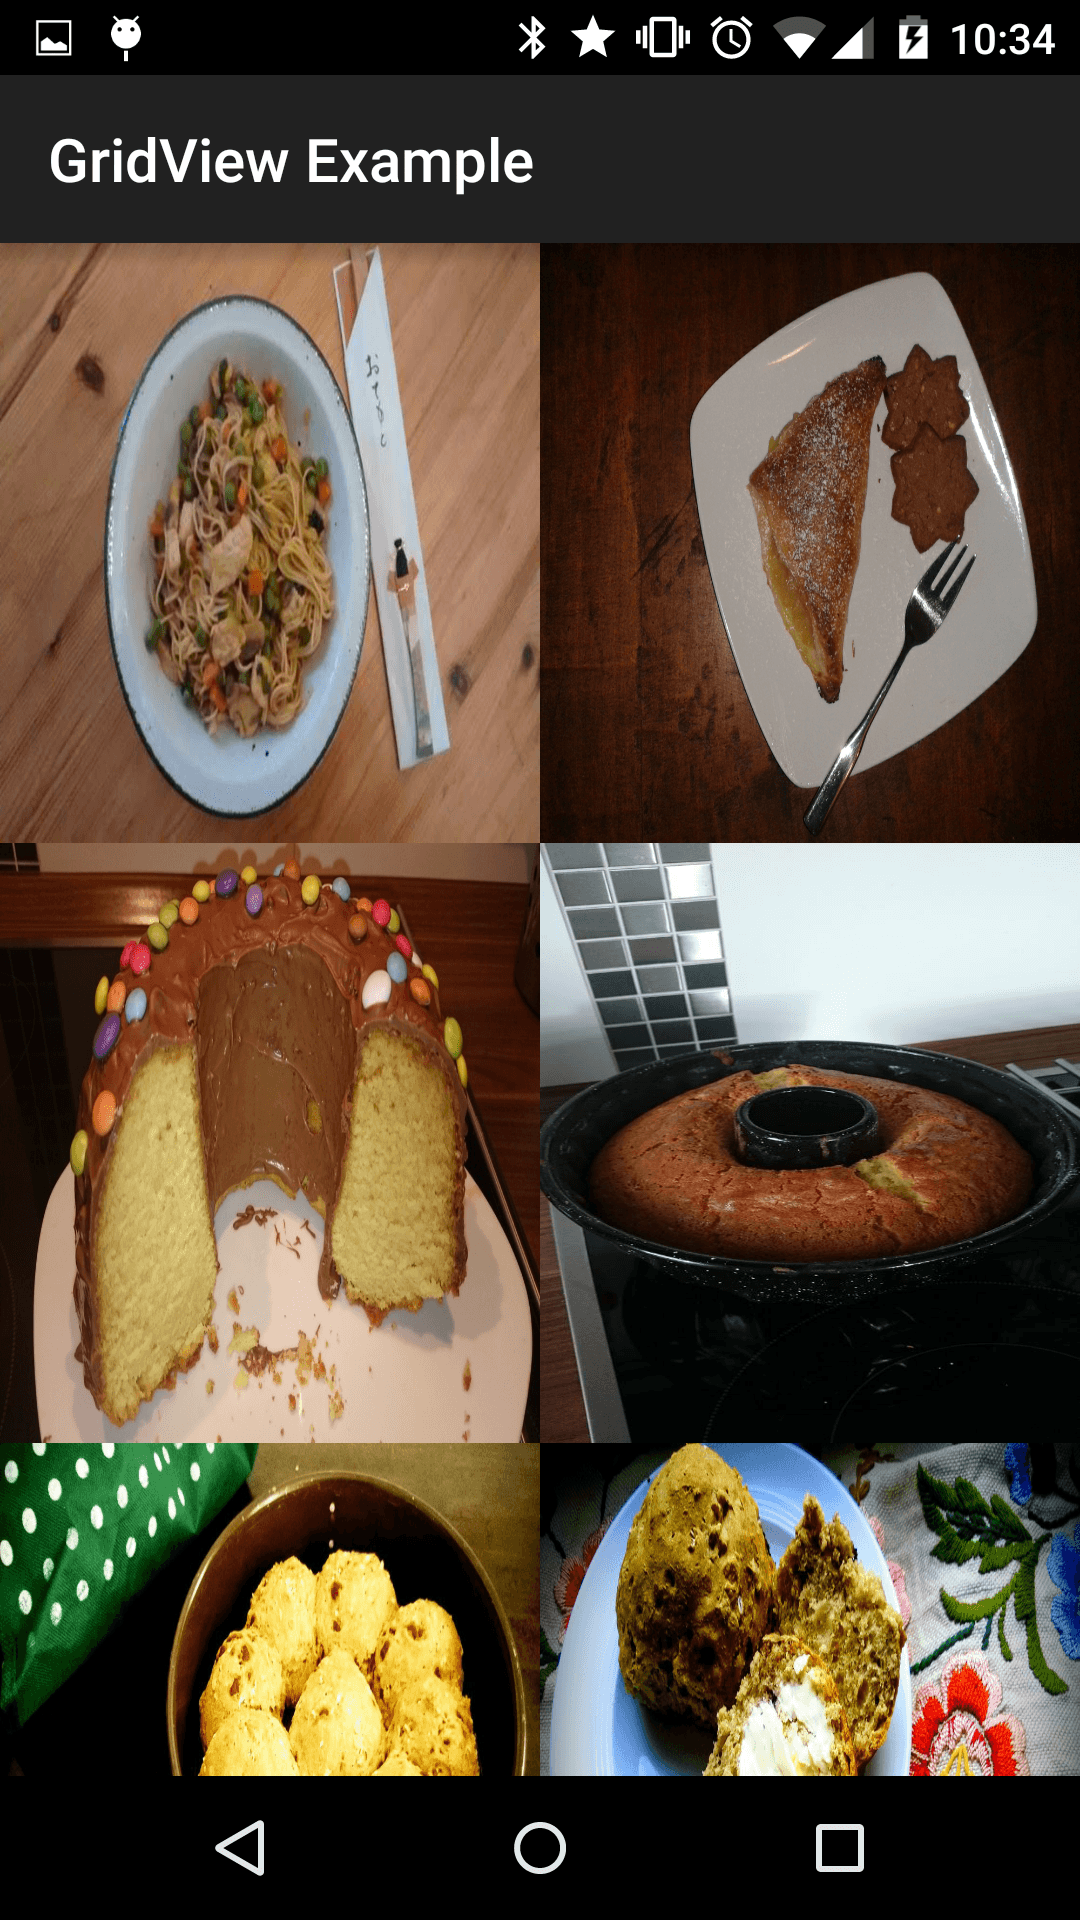
GridView
The implementation for a GridView with image elements is not any different from a ListView implementation. You actually can use the same adapter. Just switch out the activity layout to a GridView:
<?xml version="1.0" encoding="utf-8"?>
<GridView
    android:id="@+id/usage_example_gridview"
    xmlns:android="http://schemas.android.com/apk/res/android"
    android:layout_width="match_parent"
    android:layout_height="wrap_content"
    android:numColumns="2"/>
This will result in the following design:
Other Applications: ImageViews as Elements
So far, we've only looked at examples where the entire adapter item is an ImageView. The approach still applies if one or more ImageViews are only a (small) part of the adapter item. Your getView() code will look a little different, but the loading of the Picasso item would be identical.
Outlook
At this point, you've learned how to load images with Picasso in 90% of the Android use cases. Before we cover the edge cases, we'll explain additional capabilities of Picasso (besides image loading and caching). Namely, next week will be all about placeholders.