This is the fifth post in our custom fonts series. This week is going to be a little different than the last posts. While the last four topics focused on implementation details, we'll look at an usage example. A while ago, we had a project where the customer uses the Android Gradle Build Variants to compile different versions for each of their clients. One of the possible customizations was a different font for each client. In this blog post we'll demonstrate our solution to this challenge.
Just in case you missed it, here are the previously published blog posts:
Custom Fonts on Android Series Overview
Build Variant Preparations
At this point, we know where we want to go. Let's go through the implementation steps. The first step, in case your project doesn't have it already, is to add different flavors to your build.gradle:
android {

    ...

    productFlavors {
        customerWithFontSourceSans {
            applicationId "io.futurestud.tutorials.customfont.a"
            versionCode 1
            versionName "1.0.0"
        }

        customerWithFontRaleway {
            applicationId "io.futurestud.tutorials.customfont.b"
            versionCode 1
            versionName "1.0.0"
        }
    }

    ...
}
For demonstration purposes, we created two flavors: customerWithFontSourceSans and customerWithFontRaleway. As you can already guess, one build variant would like to apply Source Sans Pro, while the other prefers Raleway.
Next step, as we already described in the last post, is to add the font files. Ideally, you keep the naming of different font files (Source Sans Pro, Raleway) consistent:
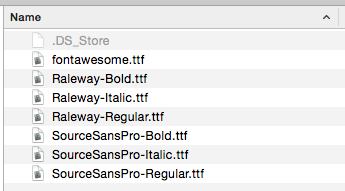
That makes the implementation a bit easier. Next, you'll need to add a string resource, which is dependent of the build variant (Tutorial). For example, we added a fonts.xml for each flavor:
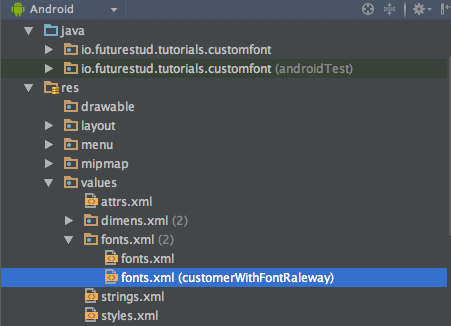
The fonts.xml is just a regular string resource. The XML for customerWithFontRaleway looks like this:
<?xml version="1.0" encoding="utf-8"?>
<resources>
    <string name="font_name_customer">Raleway</string>
</resources>
or for customerWithFontSourceSans:
<?xml version="1.0" encoding="utf-8"?>
<resources>
    <string name="font_name_customer">SourceSansPro</string>
</resources>
You should pay attention that the value is identical to the naming of the .ttf files.
Adapting the CustomFontUtils
In our last blog post, we used the applyCustomFont() and selectTypeface() methods to apply custom fonts to our TextViews. Luckily, the changes are pretty minor. The applyCustomFont() actually stays the same. The selectTypeface() method is now implemented the following way:
private static Typeface selectTypeface(Context context, String fontName, int textStyle) {
    if (fontName.contentEquals(context.getString(R.string.font_name_fontawesome))) {
        return FontCache.getTypeface("fontawesome.ttf", context);
    }
    else if (fontName.contentEquals(context.getString(R.string.font_name_customer))) {
        /*
        information about the TextView textStyle:
        http://developer.android.com/reference/android/R.styleable.html#TextView_textStyle
        */
        switch (textStyle) {
            case Typeface.BOLD: // bold
                return FontCache.getTypeface(context.getString(R.string.font_name_customer) + "-Bold.ttf", context);

            case Typeface.ITALIC: // italic
                return FontCache.getTypeface(context.getString(R.string.font_name_customer) + "-Italic.ttf", context);

            case Typeface.BOLD_ITALIC: // bold italic
                return FontCache.getTypeface("SourceSansPro-BoldItalic.ttf", context);

            case Typeface.NORMAL: // regular
            default:
                return FontCache.getTypeface(context.getString(R.string.font_name_customer) + "-Regular.ttf", context);
        }
    }
    else {
        // no matching font found
        // return null so Android just uses the standard font (Roboto)
        return null;
    }
}
Comparing it to the previous version, we adapted the FontCache.getTypeface() call to use the build variant depending string font_name_customer we created earlier. Now, depending on the build variant, it'll either load SourceSansPro-Regular.ttf or Raleway-Regular.ttf.
Adapting the Views
At this point, we're almost done. The last task is to change the XML properties, which define the font, to @string/font_name_customer:
    <io.futurestud.tutorials.customfont.CustomFontTextView
        android:layout_width="wrap_content"
        android:layout_height="wrap_content"
        android:layout_margin="12dp"
        android:text="http://futurestud.io/blog/"
        android:textSize="18sp"
        android:textStyle="italic"
        app:font="@string/font_name_customer"/>
Now, whatever you set as your build variant, it'll automatically apply the correct font. For example, the customerWithFontSourceSans build variant of our example activity would look like this:

On the other hand, the customerWithFontRaleway build variant would look like this:

Further down the Road
As always, you can clone our example project on Github, if you're interested how everything flows together. The code for this post is in a separate branch build-variant-depending-font.
Just in case your project has a lot of different .ttf files, you might want to think about putting the font files into the build variant folder (instead of the general /main).
More importantly, you are probably interested in applying custom fonts to other views than TextViews. Next week, we'll look at the solution to apply custom fonts to Buttons as a showcase for all views.
If you run into issues or have feedback, let us know in the comments or on Twitter @futurestud_io.