In the last few years, the app stores grew to marketplaces with millions of apps. In order to be successful, you'll need a combination of innovation, marketing & user-friendly design. In this series, we'll look at a small element of the latter.
Custom Fonts on Android Series Overview
Why Custom Fonts?
Android uses the well-designed Roboto font by default for all views. If you want to accentuate an element for any reason, you have many choices: colors, font sizes, and font styles. Another option is to use a different font to emphasize an element in your view.
Fast Implementation for Single Usages
Let's jump into the technical details. First things first, you've to find a ttf file for the font you want to use. A good resource is 1001 Free Fonts or Google Fonts.
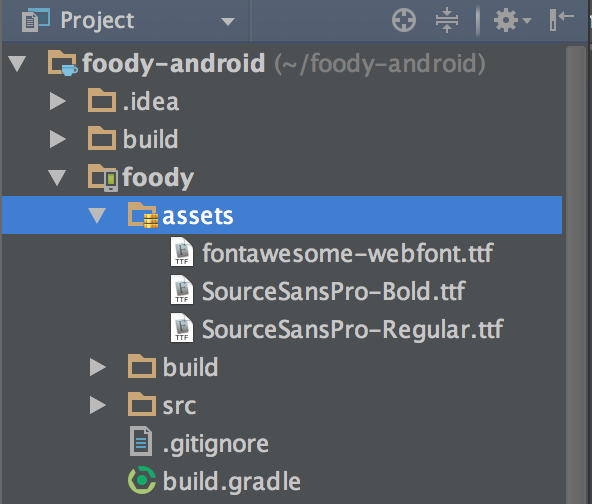
Next, add that ttf to the assets folder of your Android project.

The critical step is to apply the font to a TextView of your choice:
TextView textview = (TextView) findViewById(R.id.your_referenced_textview); // adjust this line to get the TextView you want to change

Typeface typeface = Typeface.createFromAsset(getAssets(),"SourceSansPro-Regular.ttf"); // create a typeface from the raw ttf
textview.setTypeface(typeface); // apply the typeface to the textview
And you're done! This is all you've to do to apply a custom font to a TextView. Please make sure you execute the code snippet above just once per life-cycle. Ideally, locate it in the onCreate()-method.
This approach is sufficient if you want to use it on a single instance. However, if you want to use a custom font throughout your app, this might not the best way to do it. You don't want to do the above step for hundreds of views.
Next Steps
In the next few weeks, we'll look at a better solution for a broader usage of custom fonts, font styles and custom fonts on other views.
If you've questions, let us know in the comments or on Twitter @futurestud_io.