The previous blog posts covered how to connect Strider with repository hosting services and automatically run tests. This article takes your Strider build pipeline a step further and illustrates the steps to activate email notifications for build statuses.
First, let’s start with an overview of related Strider blogposts in this series.
Strider Series Overview
- Getting Started and Platform Overview
- How to Install the Platform and Plugins
- Configuration Guide and Available Options
- Configure and Activate Email Notifications
- How to Create Your Own Plugin
- Series Round-Up
Configure Strider Server for Email Notifications
Strider email notifications require a proper server setup with SMTP configuration. You can use services like Mailgun, Mandrill, Postmark or whatever you prefer for sending emails.
You have to configure the Strider server and pass the SMTP credentials as environment variables to the server process. You can pass the SMTP configuration as parameters for the start command like SMTP_PORT=587 SMTP_HOST="smtp.mailgun.org ./bin/strider or set the environment variables using export SMTP_HOST="my.smtp.server".
Required SMTP parameters are SMTP_HOST, SMTP_USER and SMTP_PASS. SMTP_PORT is set to 587 by default. SMTP_FROM has noreply@stridercd.com as standard address.
SMTP_HOST: SMTP server hostname (e.g smtp.mailgun.org)SMTP_PORT: SMTP server port (default: 587)SMTP_USER: SMTP server auth usernameSMTP_PASS: SMTP server auth passwordSMTP_FROM: emails from address (default: Strider noreply@stridercd.com)
The strider start command will look like this:
SMTP_HOST="smtp.mailgun.org SMTP_PORT=587 SMTP_USER="youruser" \
SMTP_PASS="yourpassword" SMTP_FROM="your@mail.com" \
./bin/strider
(Re)start your Strider server with SMTP configuration and proceed the following steps to activate email notifications for your builds.
Add Strider Email Notifications to Your Project
The Strider platform is build around a powerful extension loader. The Strider ecosystem provides many extensions for different services. Extensions are called: plugins.
We use the strider-email-notifier plugin to enable email notifications for successful or failed builds.
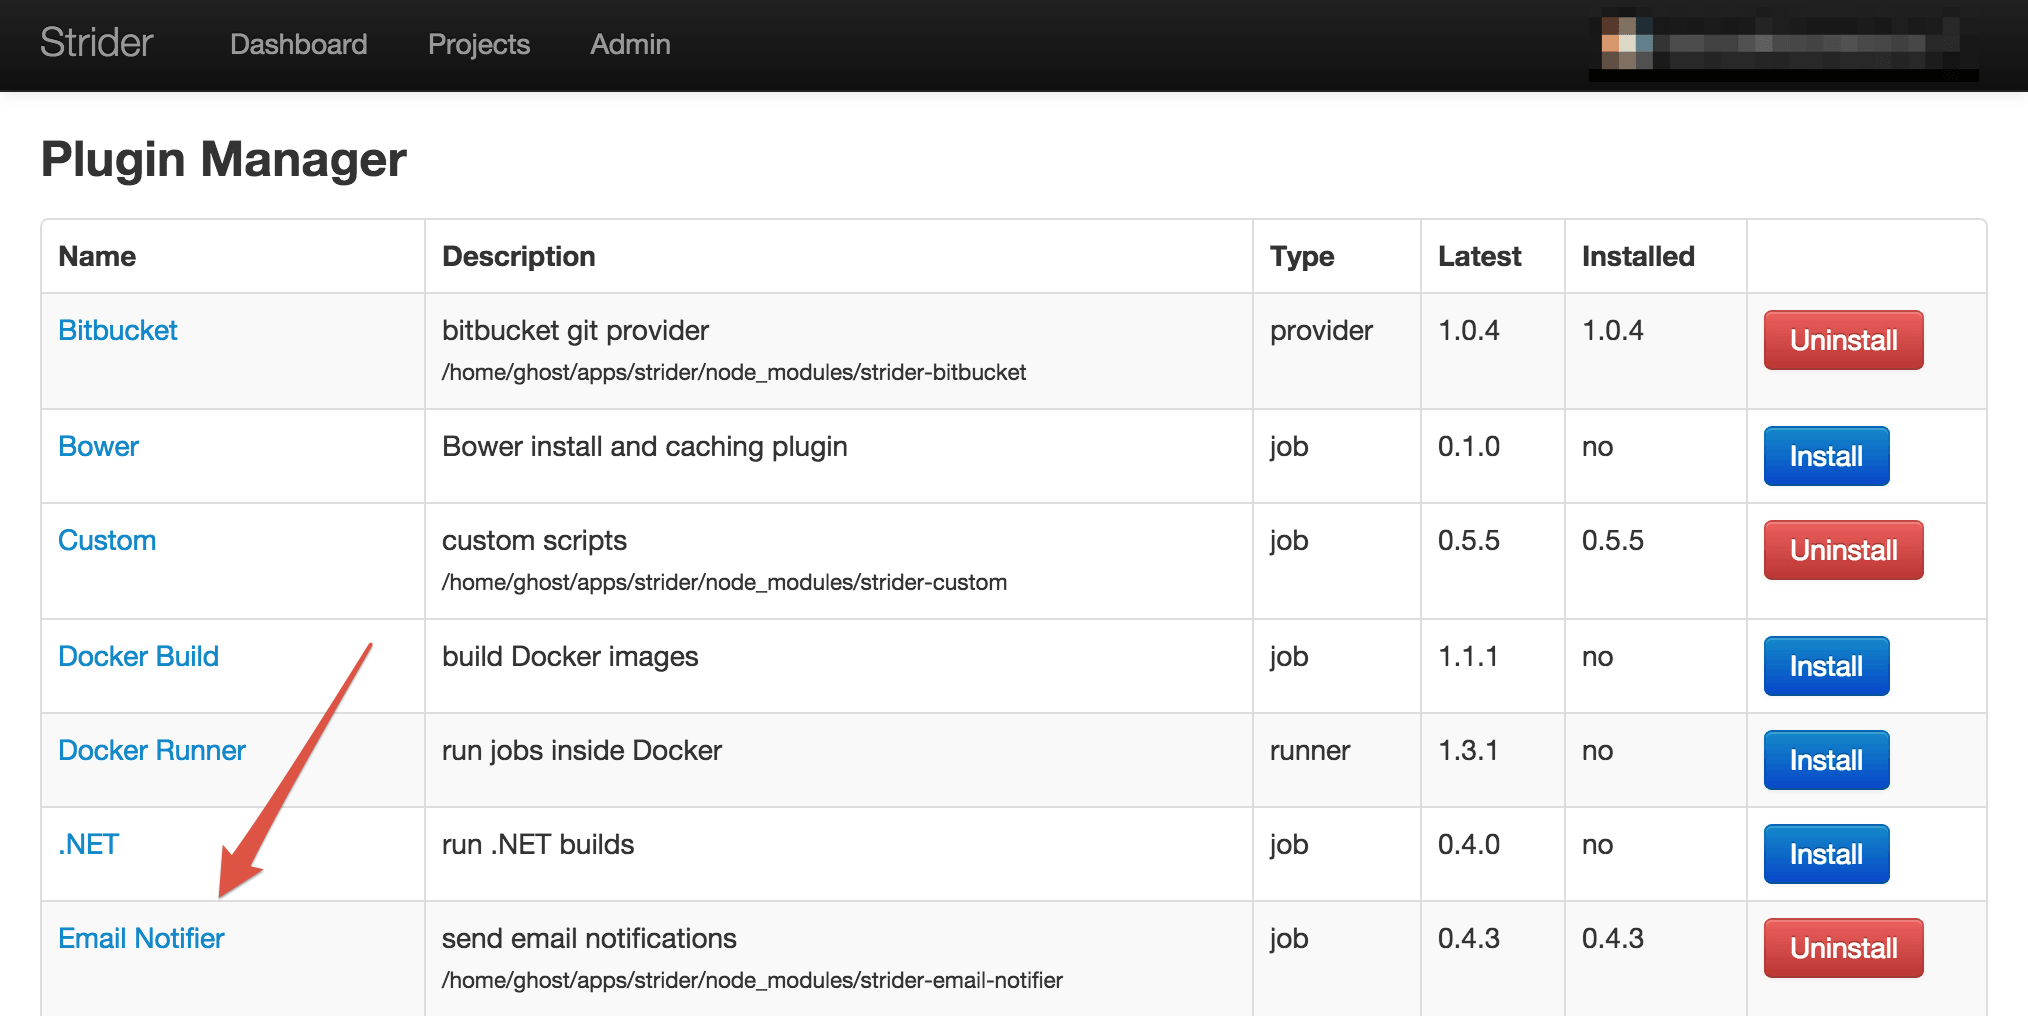
First, you need to install the Email Notifier plugin in the Strider admin panel. Head over to Admin -> Plugins and hit the Install button if the plugin is not already installed.
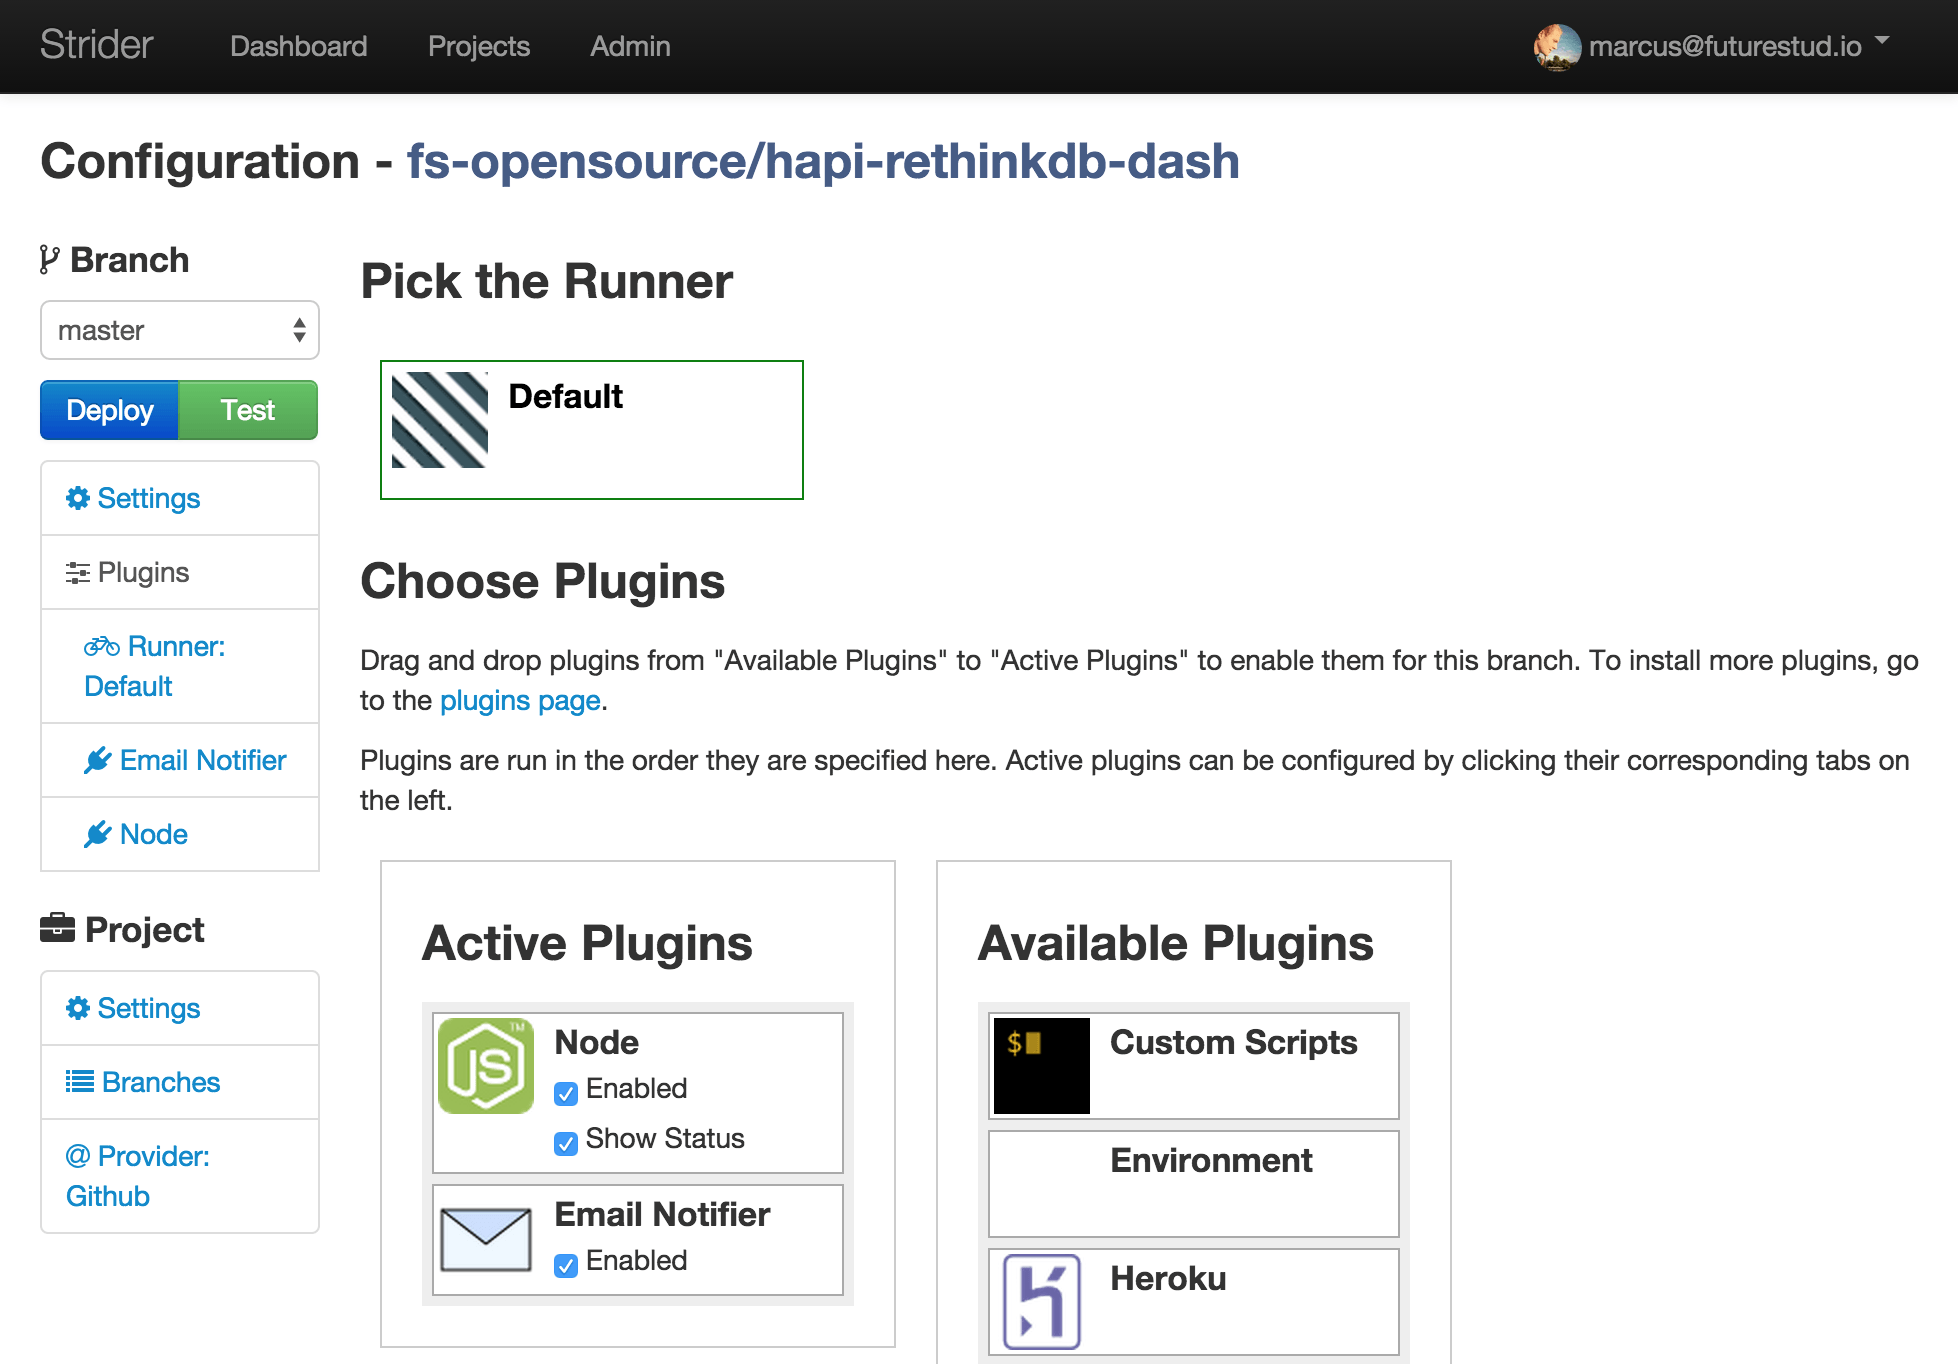
Afterwards, go to the settings page of the project you want to have email notifications enabled.
The Email Notifier plugin is now available in the Available Plugins box. Drag and drop the Email Notifier plugin from Available Plugins to Active Plugins.
That’s it. You’ve activated email notifications for your project. Easy going, Bro!
Test Build Notifications
By default, notifications are only send if the build status changes. In case your last build succeeded and you’re building again on the same code, there won’t be any notification. Change the plugin configuration to inform you on every build about the result.
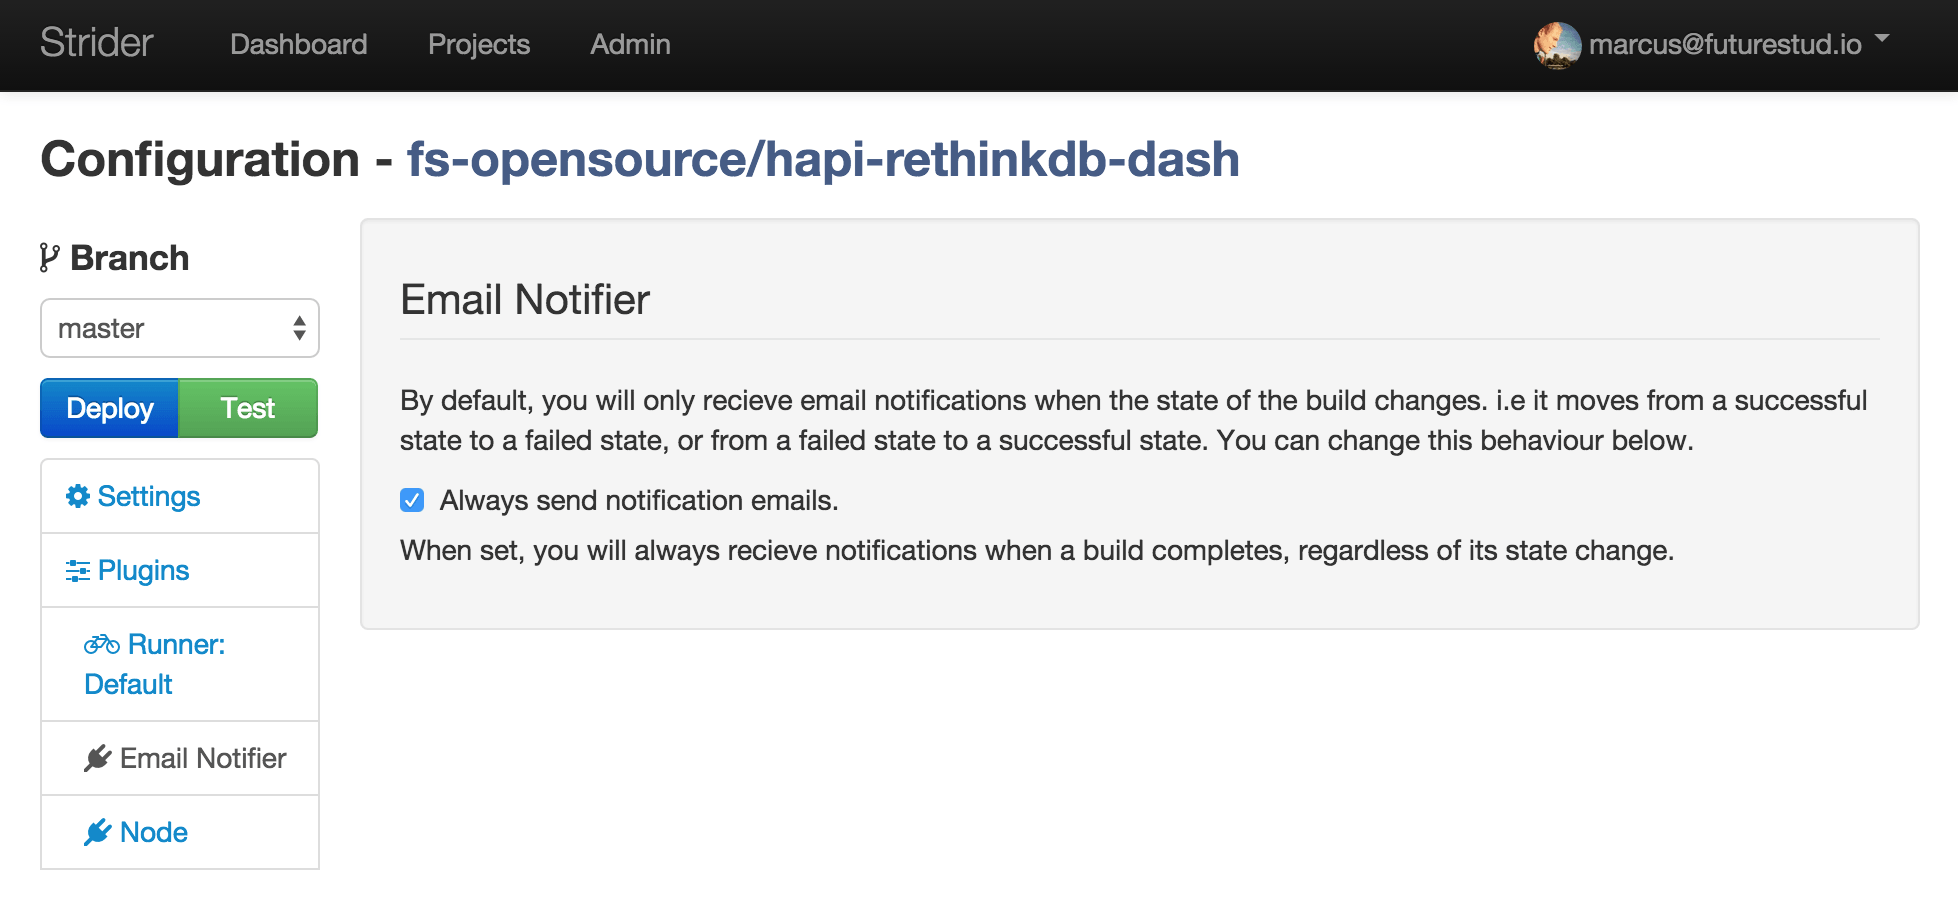
This way, you can verify successful email notification configuration. If everything is fine, you can change the previously made plugin setting to send emails for every build. If you want to receive email for changing build statuses only, adjust the notification settings.
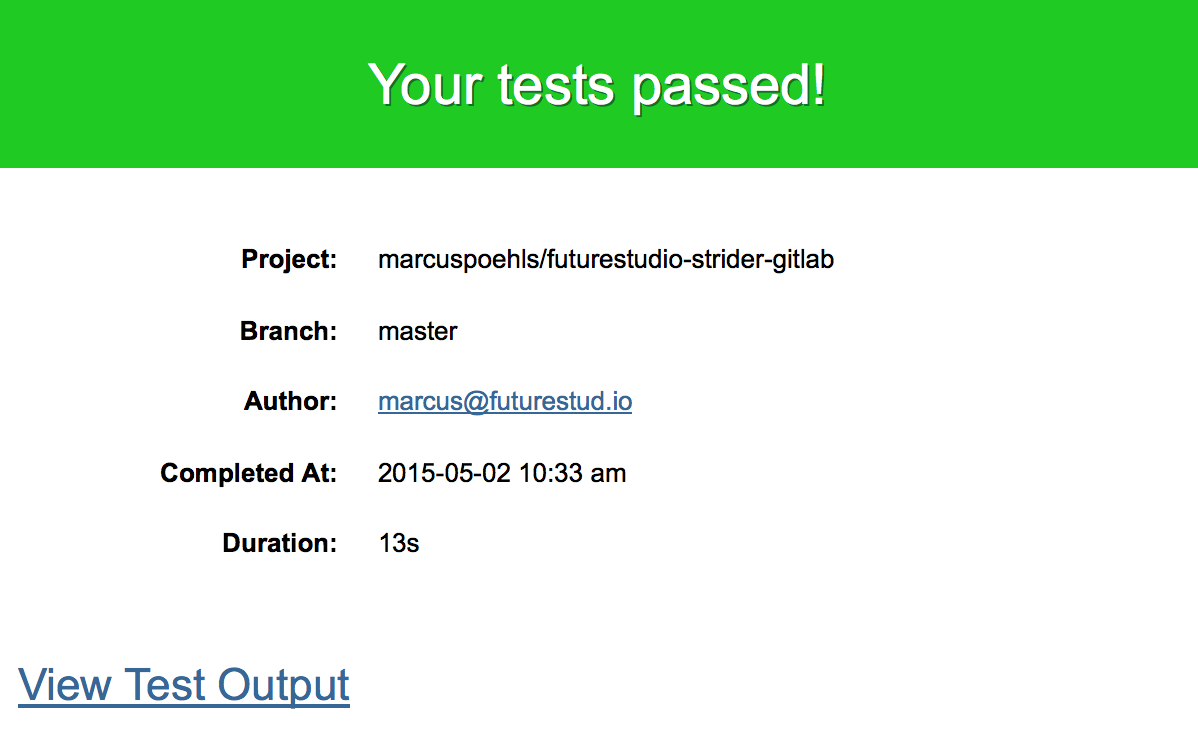
Relax and test your code! Now you’ll know if something breaks.
What Comes Next
In this article you've learned how to configure Strider to activate email notifications. Further, Strider is able to send invitations and other mails using the SMTP configuration. You see, this configuration unintentionally enabled features of Strider you didn’t thought of before :)
Within the next posts, we'll guide you through the integration of Slack and HipChat notifications. Sending messages to a Slack channel or HipChat room may be more appropriate for your workflow.
Having questions or comments? Use the comment form below this post or shoot us @futurestud_io.