During the last weeks we’ve looked at multiple topics like connecting Strider with GitHub, GitLab, Bitbucket and test projects automatically. Additionally, we set up notification services as email, Slack and HipChat. Now it’s time to dig deep into Strider plugins and get a fundamental understanding how they work and how to create your own plugin.
Strider Series Overview
Create Plugin Template
Strider by default ships with the command line tool strider-cli which offers the ability to create a basic plugin template. You don’t have to check documentation (which doesn’t really exist at the time of writing) how to structure your code and which methods to implement. Another option to create your plugin is to just clone the plugin template repository and make your changes there. We’ll look at both options in the sections below.
Where Do I Have to Place Strider Plugins?
Strider is a Node.js application and composes of plugins. The plugins itself are node module as well. Just place your plugin into the node_modules folder of your Strider installation directory and Strider will recognize it during its start up (if configured correctly).
Plugin Template from Command Line
The Strider ecosystem offers the strider-cli plugin. It adds several commands to your Strider deployment like add a new user, restart the server, list all available plugins, initialize a new plugin, etc.
Creating a new plugin with command line can be done with the following command:
bin/strider init
The creation process will ask you for a plugin name, description and author.
plugin: name:  your-plugin-name
plugin: description:  test
plugin: author:  test

A strider plugin template has been prepared for you in the following directory
    /Users/marcuspoehls/Dev/JS/strider/node_modules/template
Please view the README and begin editing the package.json.
Make sure to change the git remote to wherever you’re hosting your plugin source code
When you’re ready to publish, submit a pull request to https://github.com/Strider-CD/strider-plugins
If you have any questions or need help, you can find us in irc.freenode.net #strider
Open your config.js file (located in the config directory) and search for these lines:
$scope.$watch(‚configs[branch.name].template.config‘, function (value) {
    $scope.config = value || configDefaults;
});
Adjust the first line and change template to your-plugin-name.
$scope.$watch(‚configs[branch.name].your-plugin-name.config‘, function (value) {
    $scope.config = value || configDefaults;
});
This will make your plugin work when activing for a project.
Plugin Template from Repository
Besides Strider’s command line, you can just clone the plugin template repository and make your changes from here. In comparison to the command line way, you don’t have to adjust the files to get the basic plugin working right away.
git clone https://github.com/Strider-CD/strider-template.git
Just clone this repository and adjust the code. The next paragraph describes the recommended changes you should perform for your new plugin.
What Happens If I Activate the Plugin Now?
Restart your Strider server and visit the plugin page of any project. You’ll find the newly created plugin within the list of available plugins. Of course, you can use your new extension like any other extension. Just go ahead, drag & drop your plugin into the list of Activated Plugins.
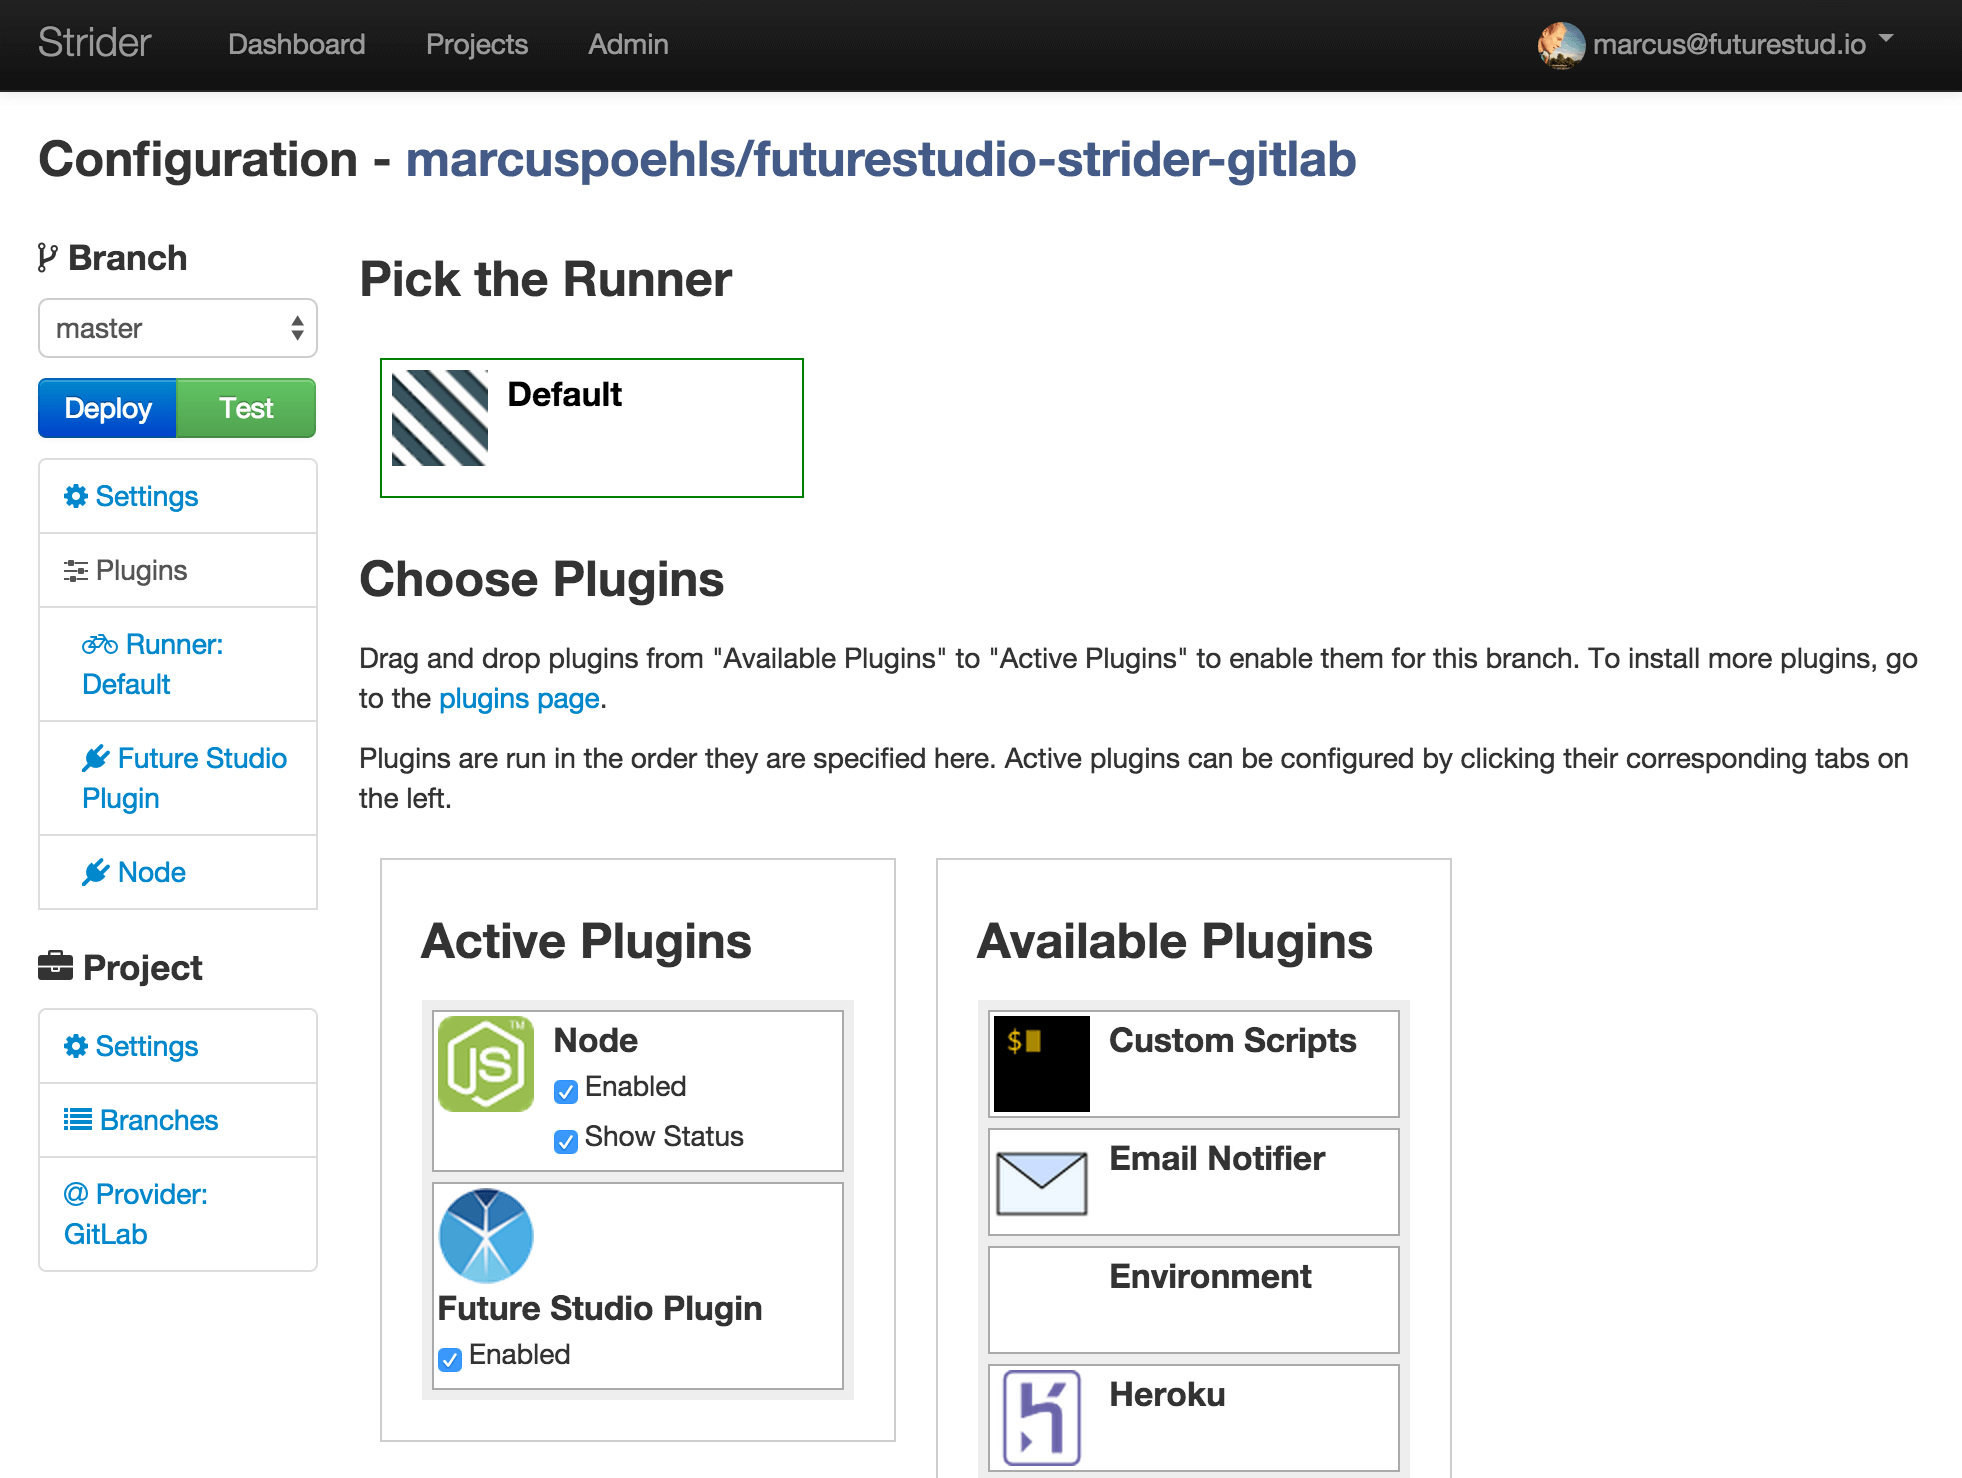
Starting a new build for the project will now output messages from your plugin in every build phase. The plugins default values are just greetings at each phase, like Hi from build-phase.

Update Plugin Information for Correct Strider Integration
Each plugin in the Strider ecosystem requires either a strider.json file in the plugin’s root directory or a „strider“ section within the package.json. The content needs to be defined as JSON. We’ll explain each option in more detail.
Default plugin package.json file
  …
  „strider“: {
    „type“: „job“,
    „id“: „futurestudio-plugin“,
    „title“: „Future Studio Plugin“,
    „worker“: „worker.js“,
    „webapp“: „webapp.js“,
    „icon“: „icon.png“,
    „config“: {
      „controller“: „FutureStudioPluginController“
    },
  }
  …
The definition above is the default one. You can add further options if you need them for your plugin. Let’s review the definition one by one.
- What plugin type to choose? This seems a tough question. After having a closer look, it isn’t. Strider’s extension loader offers four extension types to choose from. Depending on your plugin, define one in your
package.jsonastype.- runner: runner plugins run your integration jobs
- provider: provider plugins get the source code for your project from GitHub, GitLab, Bitbucket or just a git reposority hosted on your server
- job: job plugins create the test environment, run tests and deployments
- basic: this is the ”do what you want“ plugin type. You can do powerful things without any helper methods provided by Strider’s extension manager.
- id: Every Strider plugin has its own id. This is the unique identifier for Strider’s Extension Loader. The required format: lowercase, alphanumeric, no spaces.
- title: this property is just the name of your plugin.
- worker: the path to your
worker.jsfile - webapp: the path to your
webapp.jsfile - icon: the path to your custom plugin icon
- config: a nested JSON object with further definitions
- controller: the name of your AngularJS-Controler which is used to save your plugin configuration. Has to be the same name as defined in your
config.js.
- controller: the name of your AngularJS-Controler which is used to save your plugin configuration. Has to be the same name as defined in your
The readme of Strider’s Extension Loader provides additional comments for each plugin property.
Customize Plugin Functionality
Each plugin adds features to Strider and so will yours. We listed four plugin types. Strider executes different methods for each plugin type and requires them to be implemented.
Find more information which methods you need to define for each plugin type: runner, provider, job, basic.
We use the job plugin type for further explanations. Generating a new plugin from command line or using the plugin template repository will have the job type, too.
Add Plugin Options in the Webapp
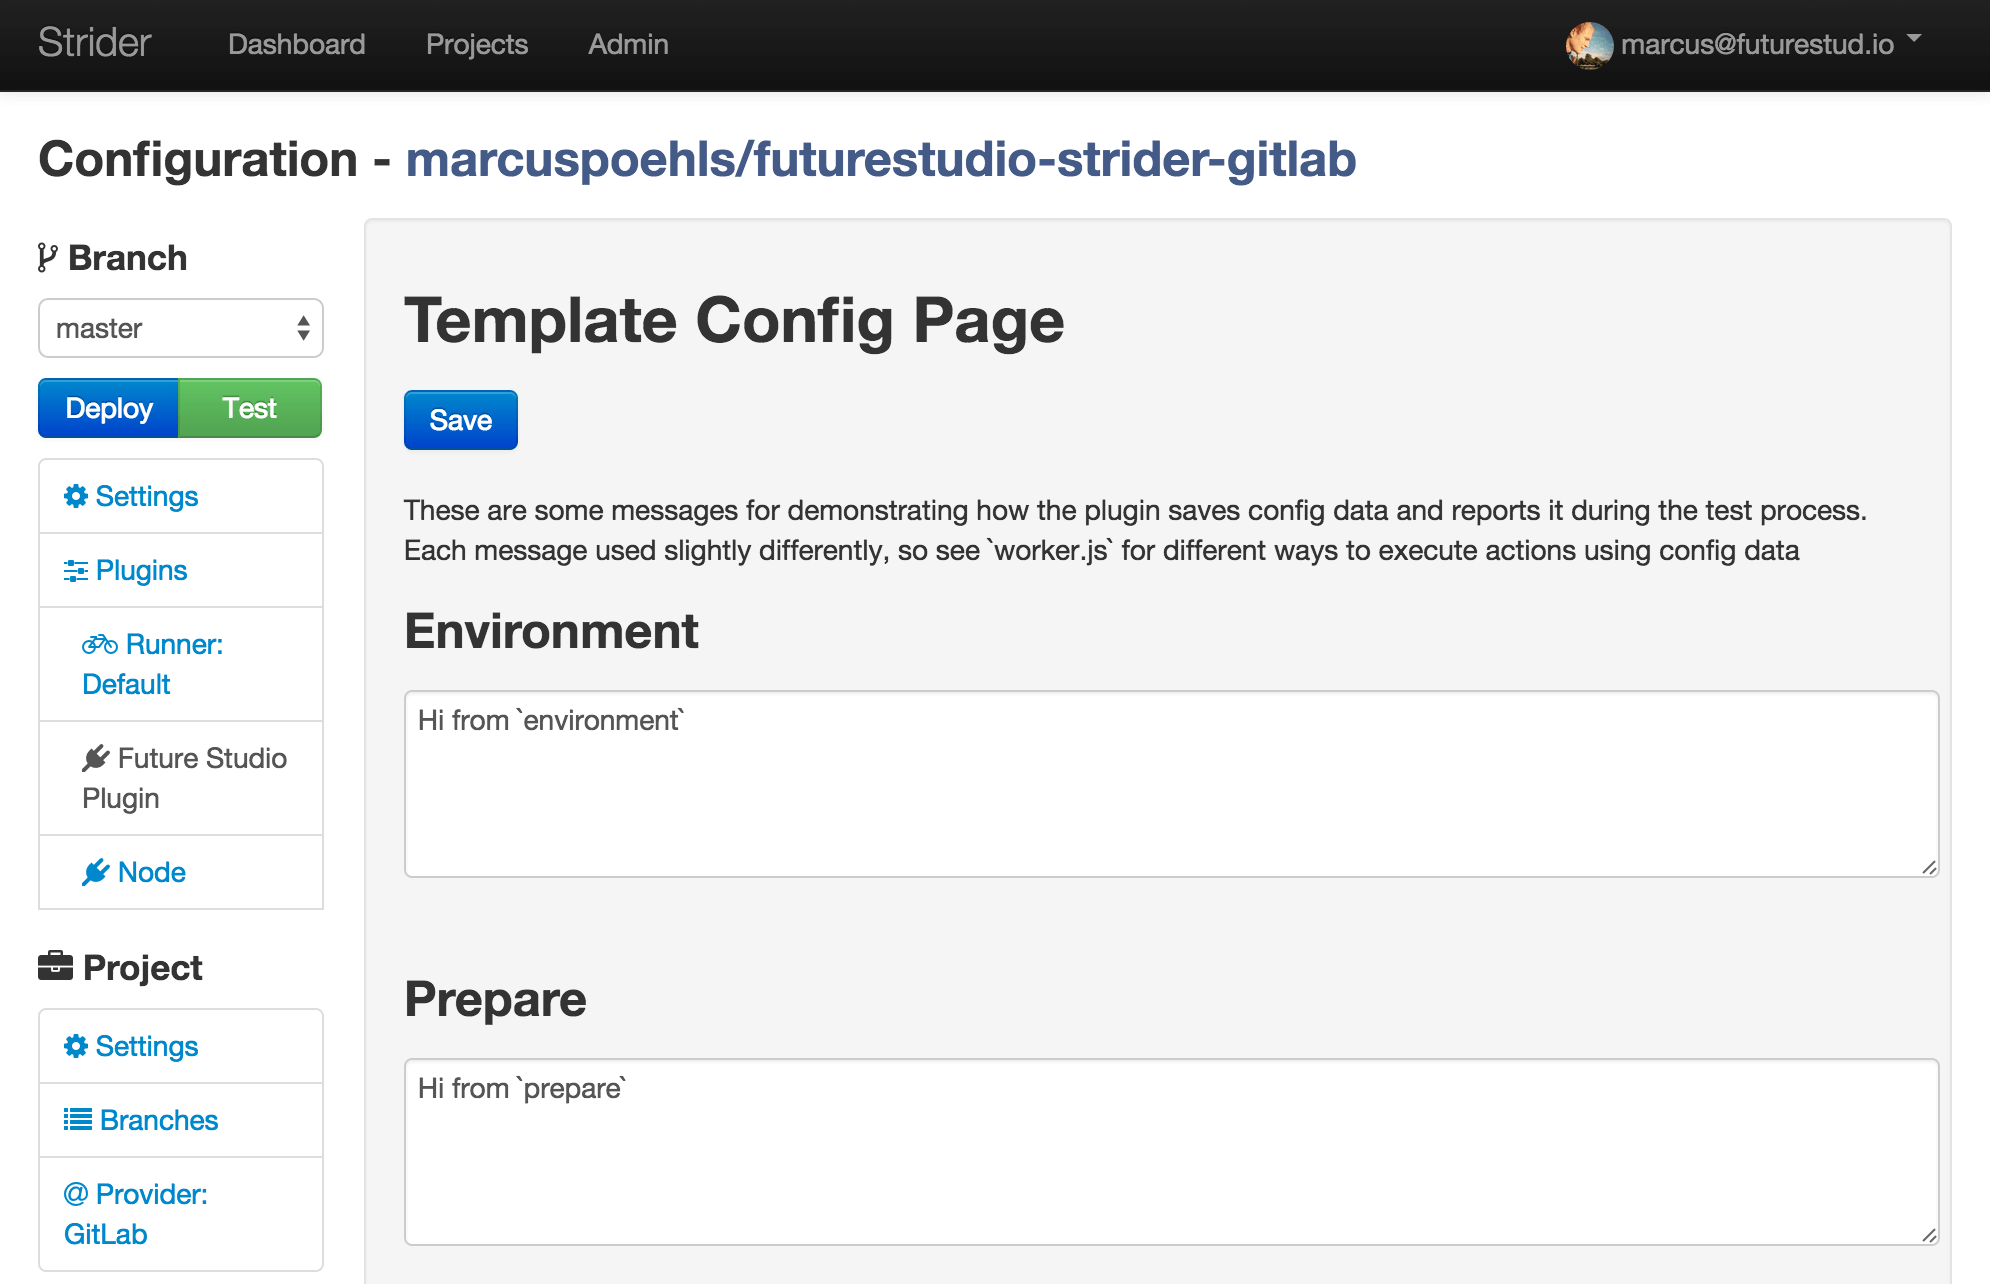
You’ve noticed the options of other plugins. If your plugin requires the user to configure something, use (or create) the config.html template and the respective config.js to save your configuration values.
The plugin template provides the basic structure and also adds the HTML template. By default, both files are located in the plugins config directory.
Add Plugin Specific Configuration, Routes and Listeners for Events
You can do all those within the webapp.js. This is the default content of the file. The comments already explain important information.
{
   // mongoose schema, if you need project-specific
   config: {},
   // Define project-specific routes
   //   all routes created here are namespaced within /:org/:repo/api/:pluginid
   //   req.project is the current project
   //   req.accessLevel is the current user’s access level for the project
   //      0 - anonymous, 1 - authed, 2 - admin / collaborator
   //   req.user is the current user
   //   req.pluginConfig() -> get the config for this plugin
   //   req.pluginConfig(config, cb(err)) -> set the config for this plugin
   routes: function (app, context) {},
   // Define global routes
   //   all routes namespaced within /ext/:pluginid
   //   req.user is the current user
   //   req.user.account_level can be used for authorization
   //      0 - anonymous, 1 - authed, 2 - admin / collaborator
   globalRoutes: function (app, context) {},
   // Listen for global events
   //   all job-local events that begin with `plugin.` are proxied to
   //   the main strider eventemitter, so you can listen for them here.
   //   Other events include `job.new`, `job.done` and `browser.update`.
   listen: function (emitter, context) {}
}
Let’s elaborate the properties in more detail.
- config: use the
configobject to define plugin specific properties. E.g. Strider’s GitHub plugin stores the repo url, owner, webhook secret, auth type (SSH or HTTPS), access token, and some more. - routes: function to extend Strider’s default routes with your plugin specific routes. Use the
appobject and declare your routes for e.g. handling incoming web hooks. - globalRoutes: use the global routes to set up authentication strategies like OAuth and request a valid access token.
- listen: use this method to listen on global job events like
job.new,job.done,browser.update. Additionally, you can use the providedemitterobject and emit events into Strider’s event loop.
Add Plugin Functionality
We’ve touched the parts on how to add plugin specific configuration options and manipulate Strider’s web UI with your new extension. Now let’s have a deeper look on how to add your plugins functionality to Strider.
The worker.js file should at least export a function init(config, job, cb). Further, you can export a more complex object. The default worker.js contains the object with init and autodetect properties. The code snippet below illustrates the default file.
module.exports = {
  // Initialize the plugin for a job
  //   config: the config for this job, made by extending the DB config
  //           with any flat-file config
  //   job:    see strider-runner-core for a description of that object
  //   context: currently only defines "dataDir"
  //   cb(err, initializedPlugin)
  init: function (config, job, context, cb) {
    return cb(null, {
      // string or list - to be added to the PATH
      path: path.join(__dirname, 'bin'),
      // any extra env variables. Will be available during all phases
      env: {},
      // Listen for events on the internal job emitter.
      //   Look at strider-runner-core for an
      //   enumeration of the events. Emit plugin.[pluginid].myevent to
      //   communicate things up to the browser or to the webapp.
      listen: function (emitter, context) {
      },
      // For each phase that you want to deal with, provide either a
      // shell command [string] for a fn(context, done(err, didrun))
      environment: 'nvm install ' + (config.version || '0.10'),
      prepare: 'npm install',
      test: function (context, done) {
        checkSomething(context, function (shouldDoThings) {
          if (!shouldDoThings) {
            // Send `false` to indicate that we didn't actually run
            // anything. This is so we can warn users when no plugins
            // actually do anything during a test run, and avoid false
            // positives.
            return done(null, false);
          }
          doThings(function (err) {
            done(err, true);
          });
        });
      },
      cleanup: 'rm -rf node_modules'
    });
  }
  // this is only used if there is _no_ plugin configuration for a
  // project. See gumshoe for documentation on detection rules.
  autodetect: {
    filename: 'package.json',
    exists: true
  }
};
That’s a lot of content for a fresh start. Let’s review the code parts step by step.
The init function initializes the functionality of your plugin for a new job. The init function returns a data object containing various properties (path), configurations (env, environment, prepare, cleanup) and functions (listen, test).
Strider uses the data object to set up the test environment and executes the defined test function during build phase.
- path: a (list of) strings that get added to your PATH variable
- env: use this object to define additional environment varialbes (e.g JAVA_HOME or environment specific tests via NODE_ENV)
- listen: listen or emit global events back to the webapp
- test phases: Strider’s integrations have 4 phases. Each phase needs a
stringcommand or afunction(context, done(err, didrun))function. You can skip any phase by setting it to undefined (= just remove the respective line fromworker.js)- environment: set up your build environment
- prepare: prepare your test run and install required dependencies or modules
- test: run your tests
- cleanup: clean your room, bro!
We’ve reviewed the init method within default worker.js file.
The second part is an autodetect object. This object is used by Strider to automatically detect the plugin configuration. Strider uses the strider-detection-rules plugin on top of gumshoe to do the job.
The autodetection process only starts, if there is no plugin configuration and Strider didn’t know how to handle any job using the plugin.
We walked through the important details of Strider plugins. Remember that every Strider plugin is a also a Node.js app. You can (and should) write tests for your plugin as well. While starting the Strider server, the extension loader searches recursively the node_modules folder for any plugin and registers the plugin functionality to the platform. The extension loader distincts Strider and normal plugins based on defined strider.json or strider: {} definition within the package.json.
This post is kind of dry and creating new Strider plugins require some research within existing ones. Use the Strider organization on GitHub and dig into various plugins. Have a look at their files to get an impression how they structure files and use configuration options and methods.
What Comes Next
This article guides you through the details of plugins and shows you how to create your own plugin from either Strider’s command line tool or template repository. Additionally, we show you injection points to add your plugin functionality.
While starting the Strider server, it detects and hooks your plugin into the system and offers the functionality to any project.
The next post will round up our extensive series on Strider. We’ll recap the previously released articles in this series.
Please leave any questions in the comments below, shoot us a tweet @futurestud_io or get in touch via email. We love to help you writing your own plugin and enrich Strider’s ecosystem.