This series about Strider guides you through the setup process of various use cases to connect Strider and other software platforms like GitHub, GitLab, BitBucket, Slack, Heroku, HipChat, etc.
Besides the defined data flow between Strider and those apps, you can use webhooks to make a request to a specific URL once the build process finished. Additionally, you can define the data and format of your request’s payload.
Strider Series Overview
- Integrate and Notify With Slack
- Integrate and Notify with HipChat
- Report Build Status to GitHub
- Configure and Use Webhooks
Install Strider-Webhooks Plugin
Strider provides the strider-webhooks plugin within its ecosystem index. You can install the plugin straight from the admin panel’s plugin overview.
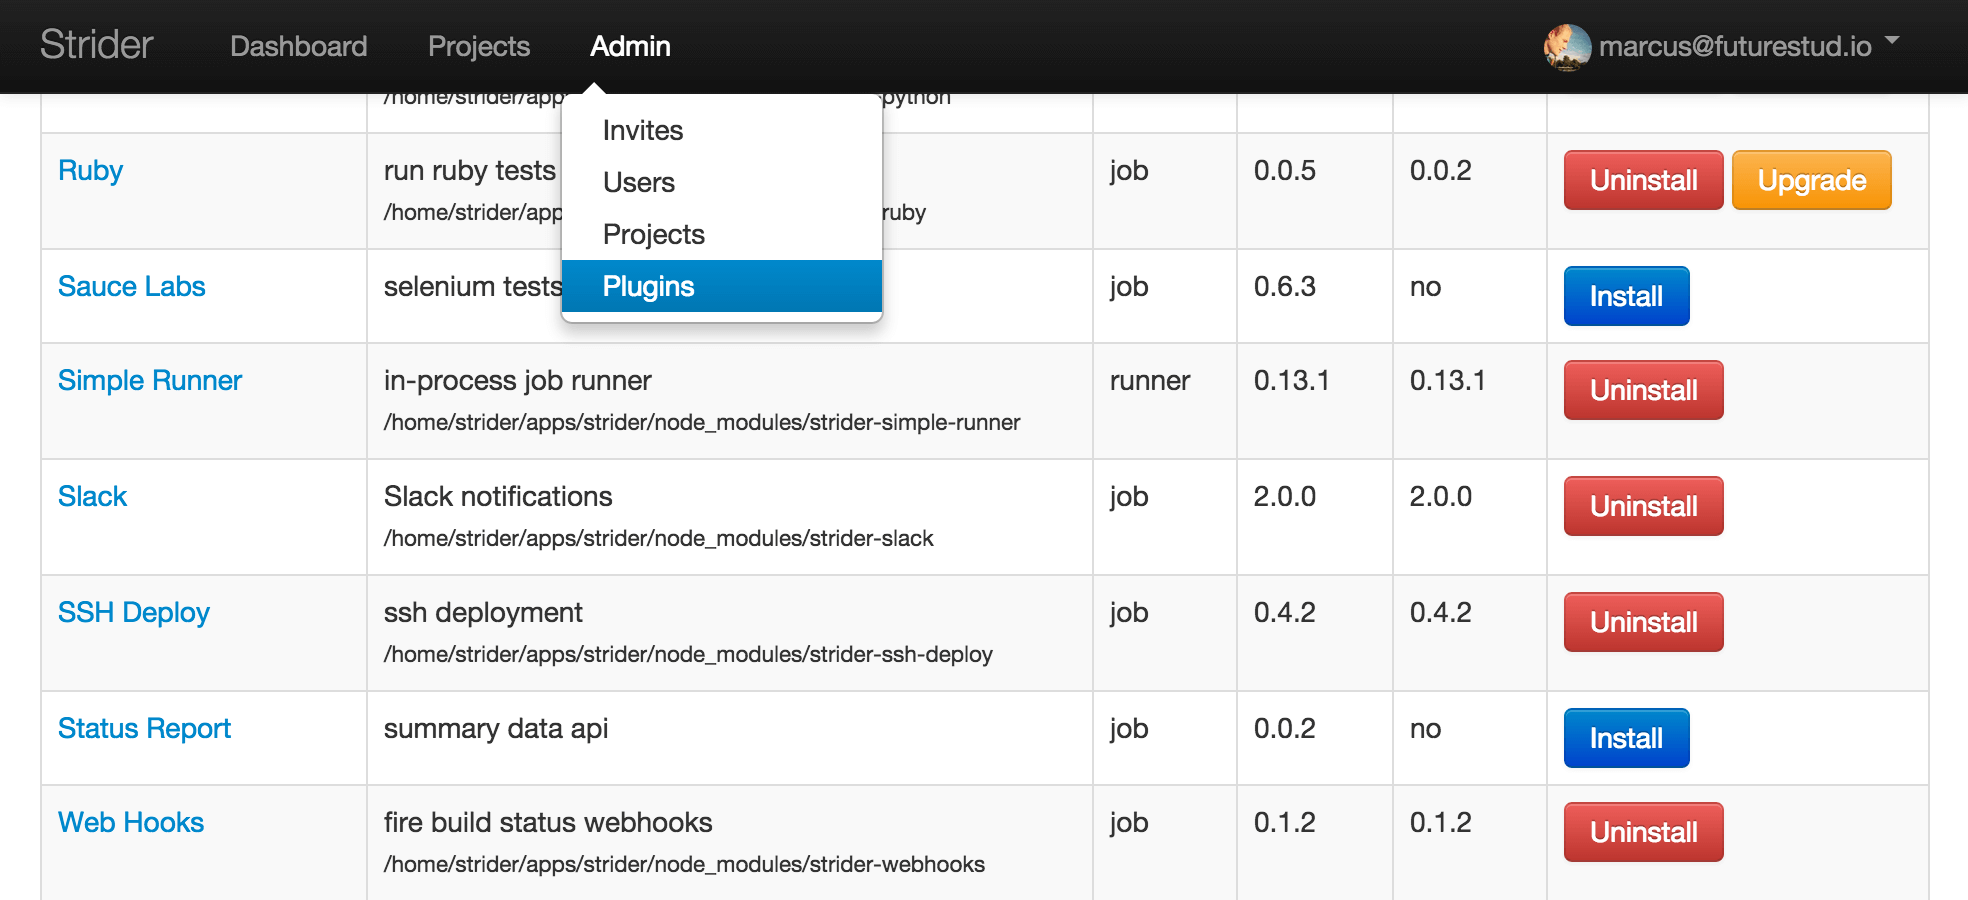
Search for Web Hooks and make sure the plugin is installed. If not, click the Install button.
Configure Strider-Webhooks for Strider Project
Head over to the project’s settings page. Click the plugin link in the left sidebar. Now drag & drop the Webhooks card from Available Plugins to Active Plugins. A new link called Webhooks will appear within the left sidebar once you dropped the card into the available plugins list.
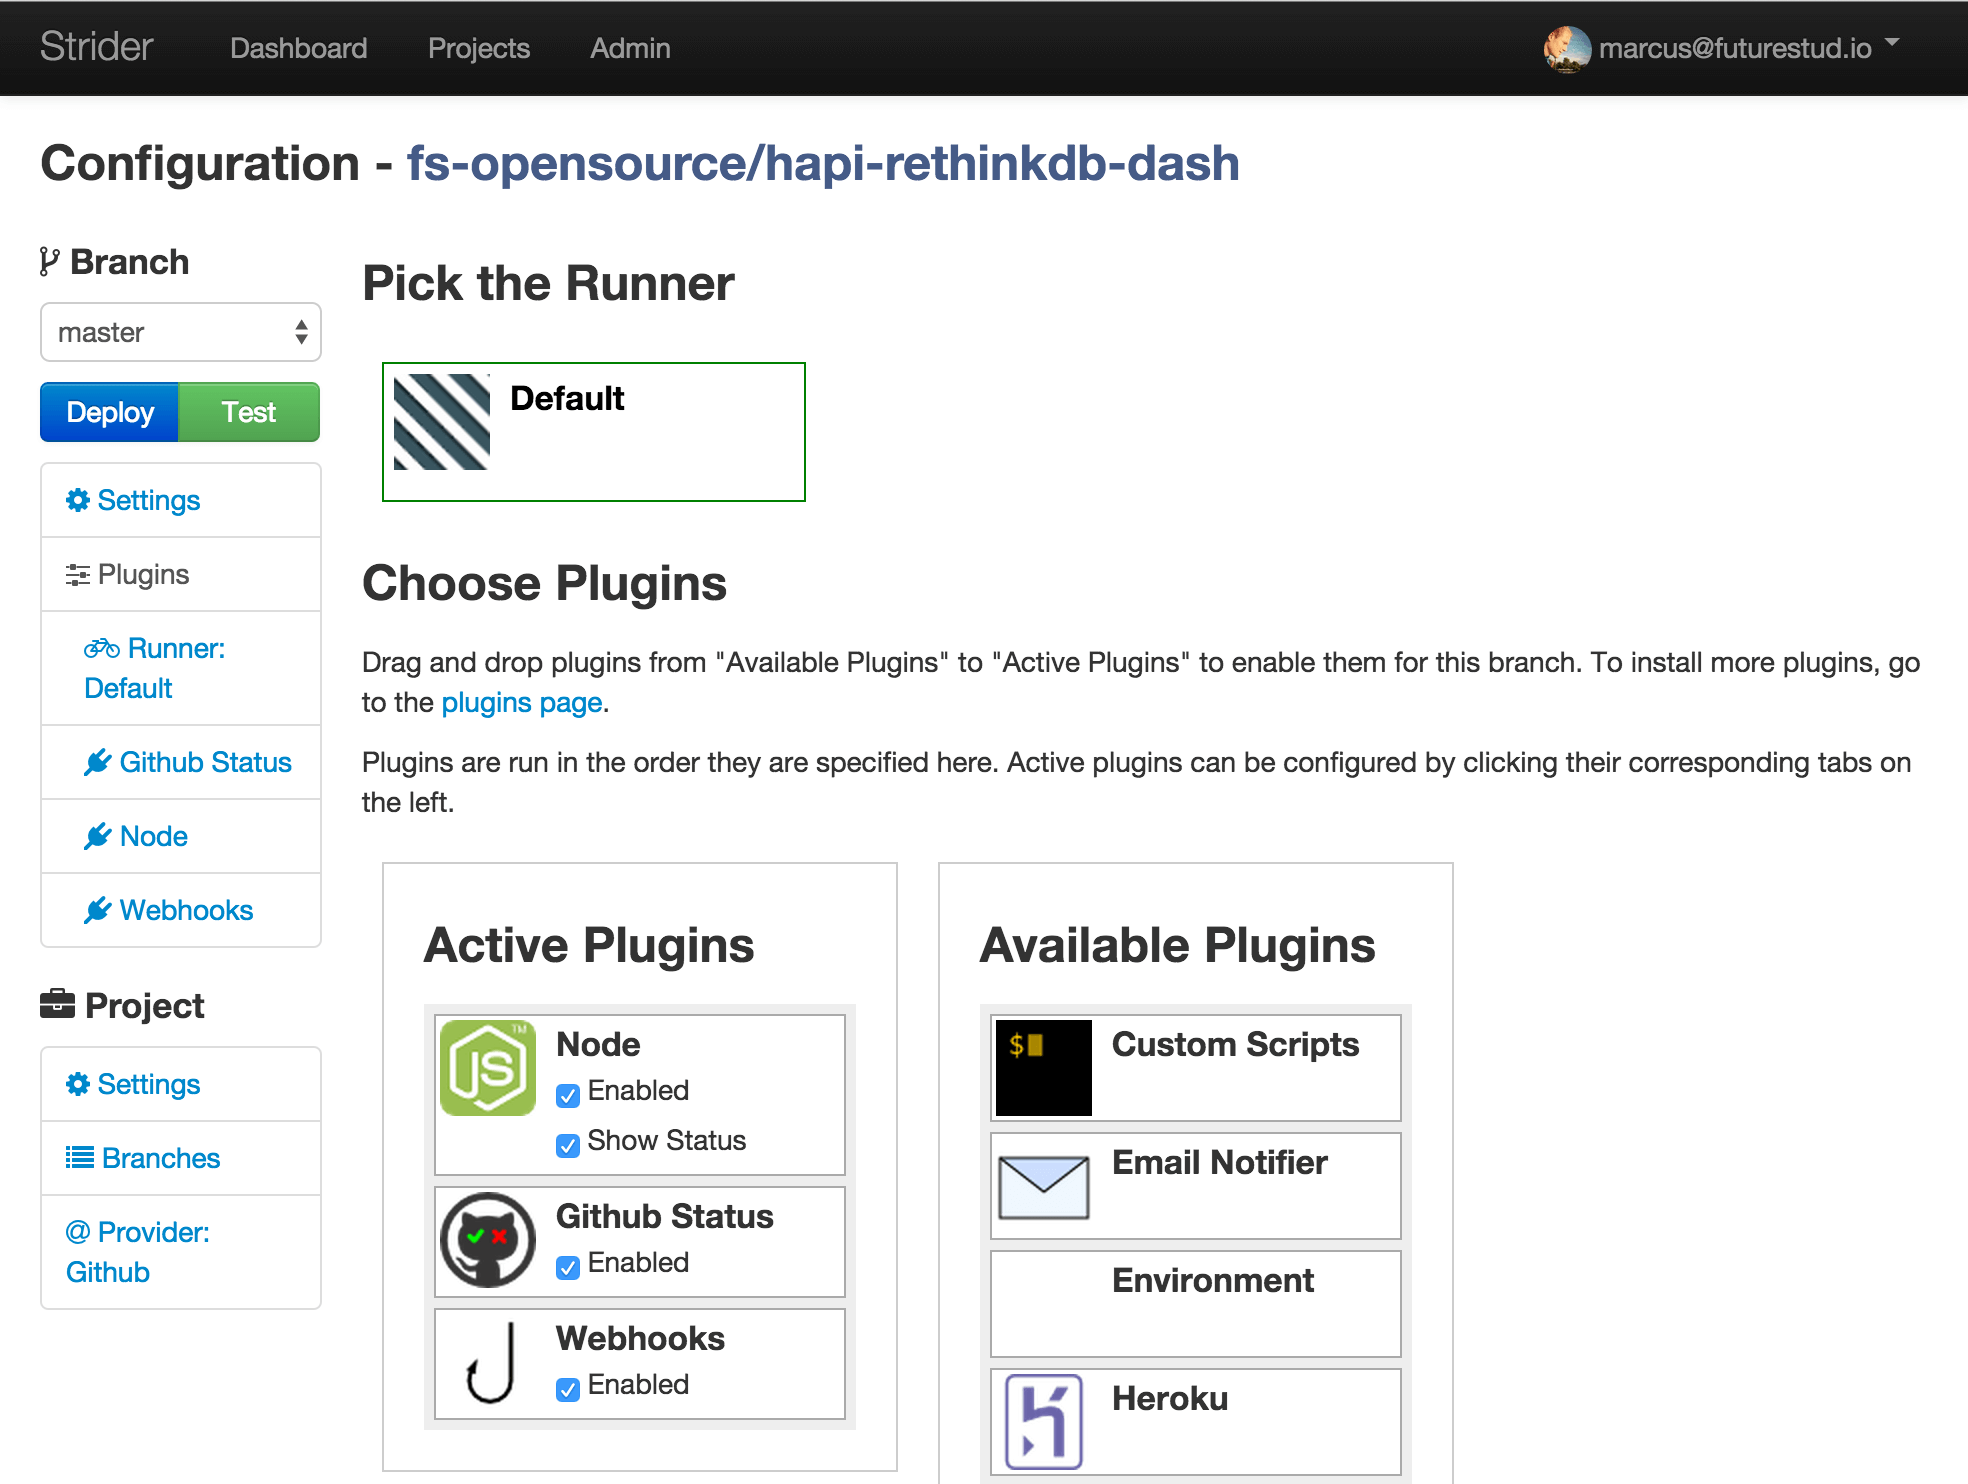
Click the newly created Webhooks link in the sidebar to open the detailed settings page for webhooks on this project.
You need to fill at least the value for TargetURL for HTTP Post to make the plugin work. It will send a HTTP POST request to your defined url and by default add a request body in a given format.
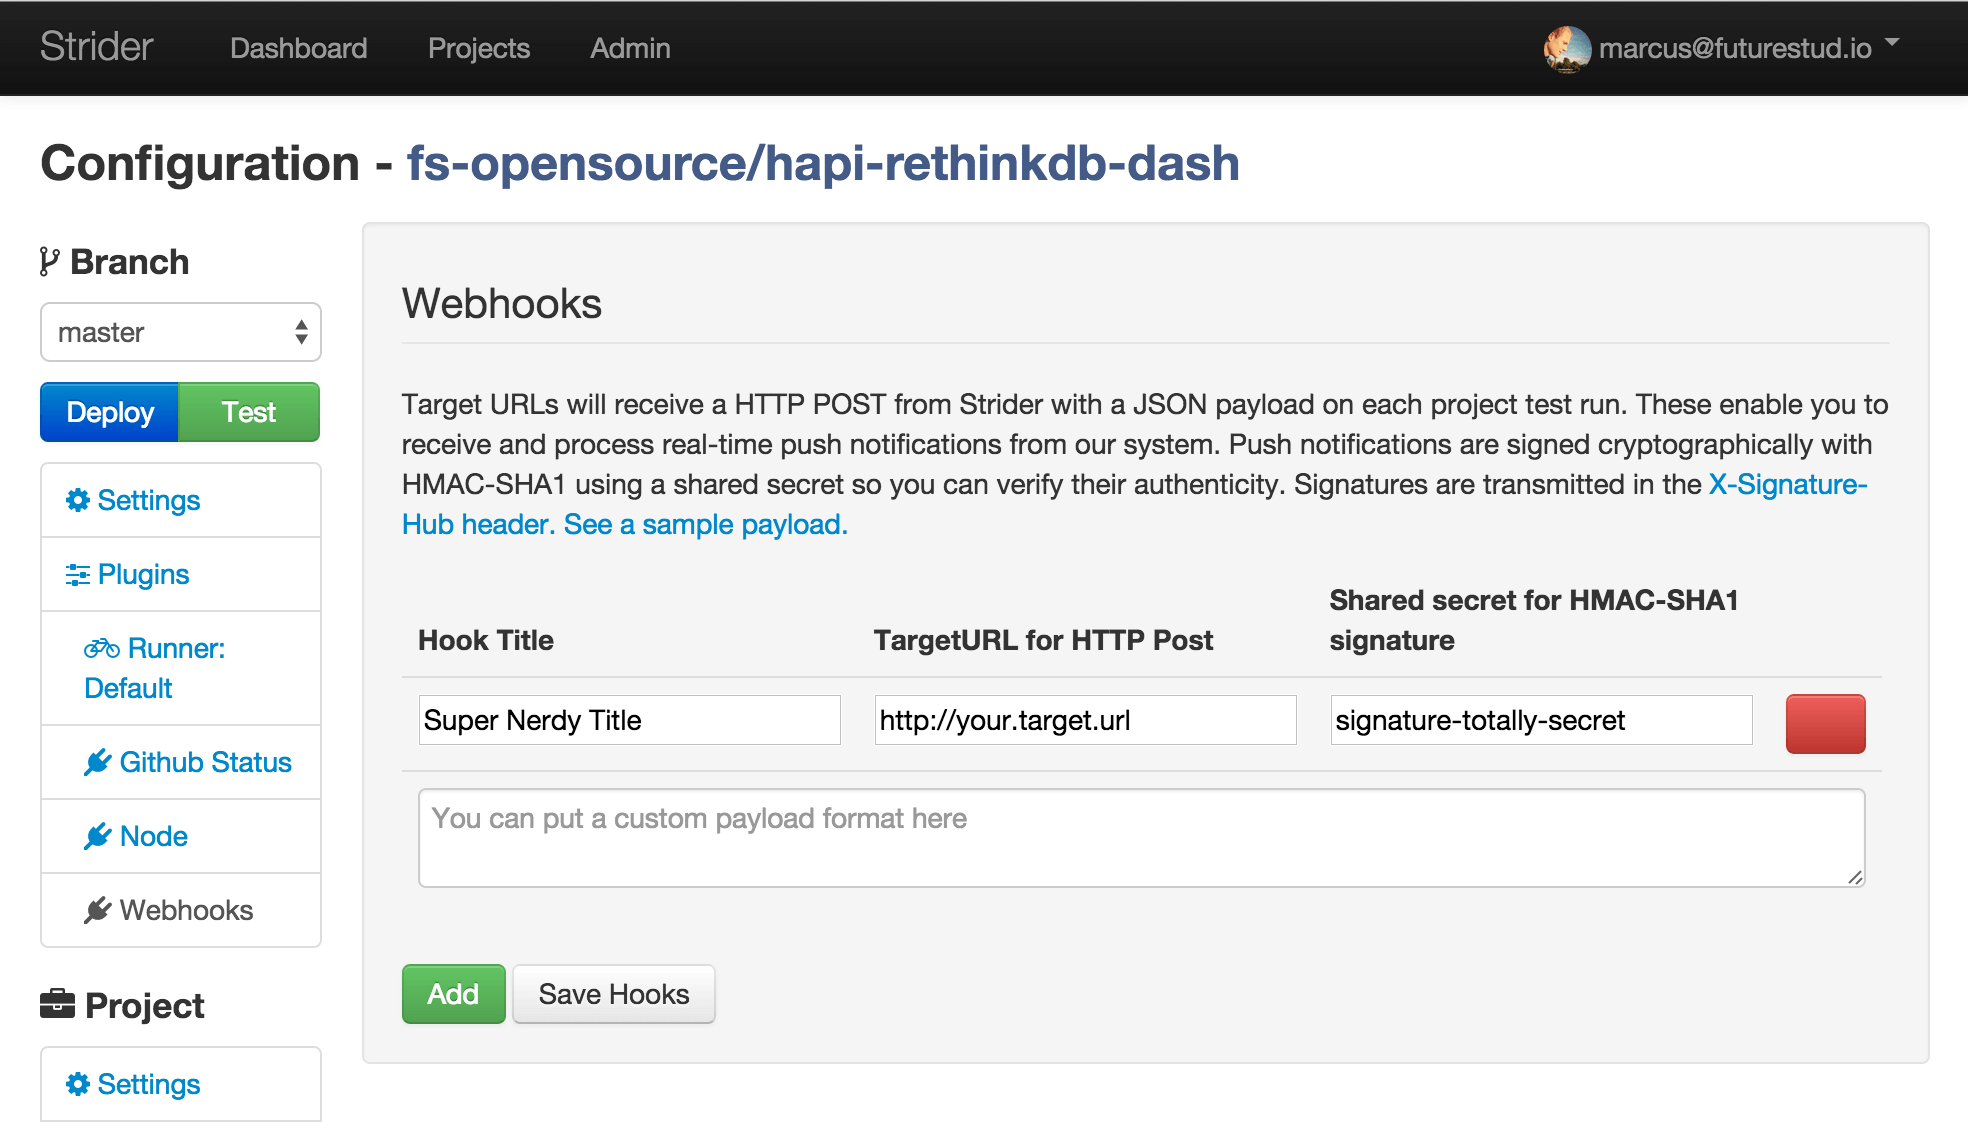
Plugin Configuration options:
- Hook Title: identifier to distinct different web hooks
- TargetURL for HTTP Post: destination url for the POST request
- Shared secret for HMAC-SHA1 signature: You don’t need to add the
sha1=prefix. The plugin handles it for you. Just provide your shared secret. - Custom payload format: this doesn’t work in plugin version 0.1.2. This issue will be fixed in later version (for sure), but currently you cannot specify your preferred format for the request payload.
Once you provided your values, click Save Hooks to persist the branch specific information in the database.
Payload Data
The payload data is based on a Strider job. You can find the job format within its Mongoose model definition. Additionally, have a look at the project model, it integrates with the job model, too.
The default format looks like this:
{
  // job data
  project: 'job.project.name',
  commit_id: 'job.ref.id',
  branch: 'job.ref.branch',
  repo_url: 'job.project.provider.config.url',
  // results
  test_exitcode: 'data.exitCode',
  finish_time: 'data.time'
}
While inspecting the values, you may think they look like object accessors. And you’re right. The values are parsed and used to access the provided job data. This way, you can access the provided information of any Strider job.
Additionally, a data object provides an exitCode and time property. These are the only values within the data object.
Default Request Payload
The Strider Webhooks plugins adds a request payload by default. The payload data could look like this (based on the above shown default format):
{
   payload: {
    "project":"fs-opensource/hapi-rethinkdb-dash",
    "branch":"master",
    "repo_url":"git://github.com/fs-opensource/hapi-rethinkdb-dash.git",
    "test_exitcode":0,
    "finish_time":"2015-05-18T08:06:04.824Z"
  }
}
The absence of commit_id is because we triggered the integration run manually.
The payload data is sent as query parameters with the POST request. You may need to parse it for further operations.
Custom Payload Format
You can define a different format of your payload data and use it instead of the default one. You can use any job object property for your webhook data. Define the accessor as a value for your format property key. Have a look at the Payload Data paragraph for more information about the format configuration options.
Remember: the current version 0.1.2 doesn’t support the definition of any custom payload format. This will be fixed in future versions.
Test Webhooks Integration
That’s it. The configuration is done and we can use the webhook right away. Hit the Retest button and start the build run. Once the integration finishes, the webhook gets fired.
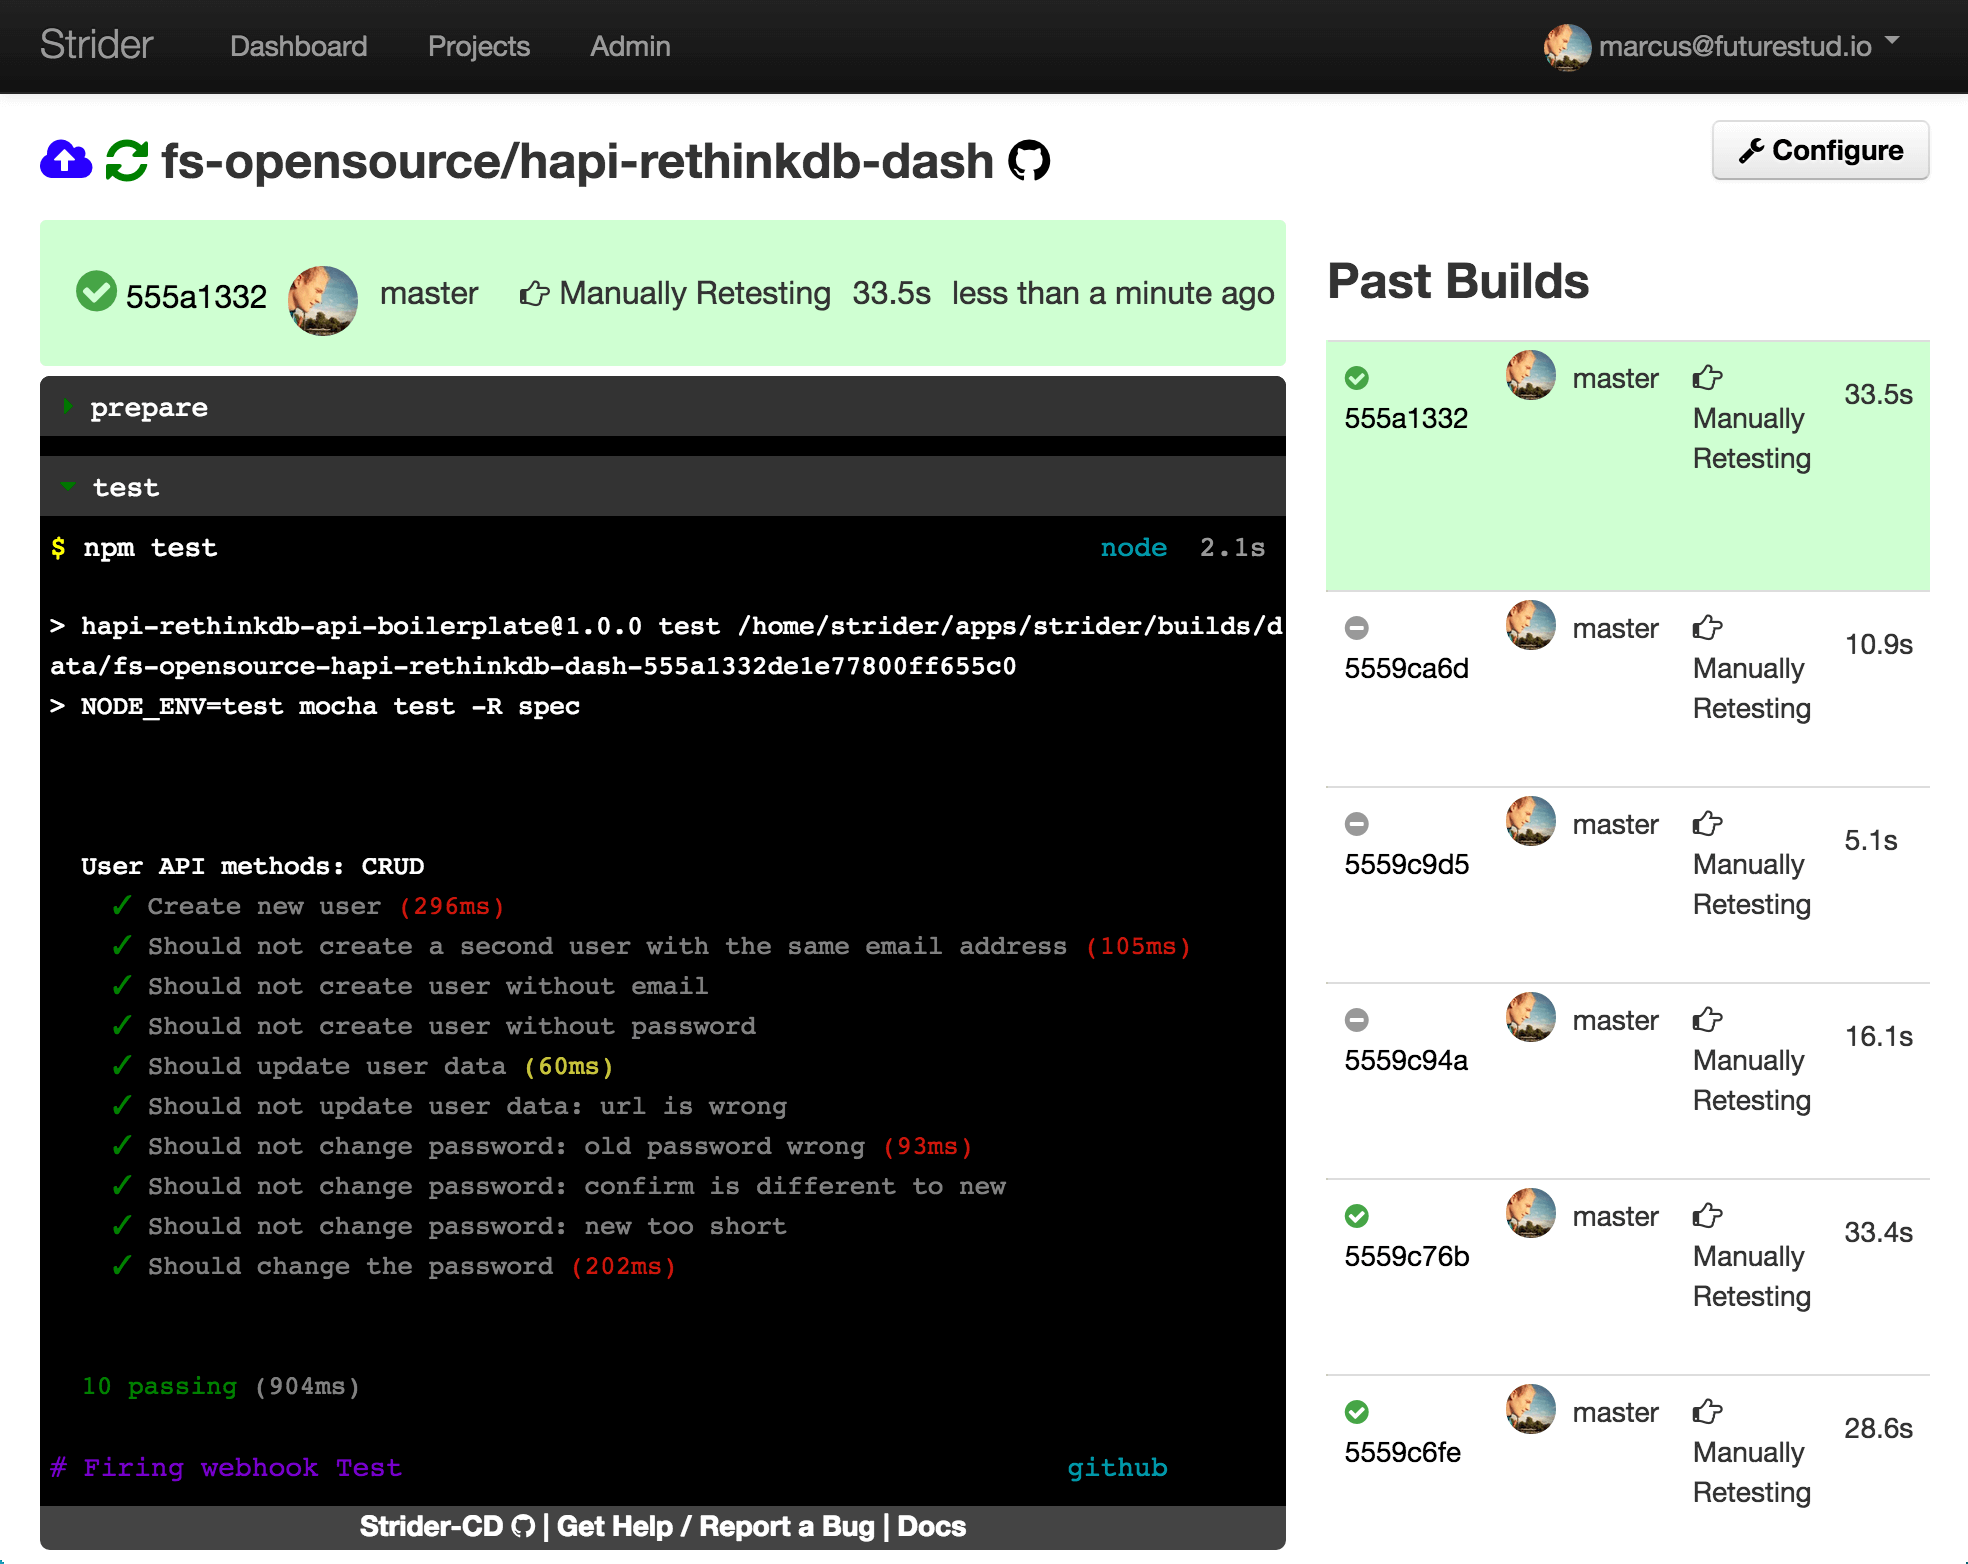
The webhook plugin prints a line (colored purple) at the bottom of the test phase. It uses the provided hook title as an identifier.
# Firing webhook <hook-title>
What Comes Next
We’re heading towards the finish line for this Strider series. Within this post, we show you how to configure webhooks for Strider which are executed after the integration runs finished (success or fail).
The next post illustrates how to create your own plugin for Strider.
Having problems creating your own webhook? Please don’t hesitate to use the comments below or reach out @futurestud_io.