The previous article in this series of Strider posts guided you through the integration of Strider with GitHub. This week we walk through on how to connect Strider with GitLab. Doesn’t matter if you’re connecting to a self-hosted GitLab instance or official GitLab repositories.
Let’s review already published articles in this series.
Strider Series Overview
- How to Connect With GitHub and Run Tests Automatically
- How to Connect with GitLab and Run Tests Automatically
- How to Connect with BitBucket and Run Tests Automatically
- How to Manually Add Git or Gogs Repository and Run Tests Automatically
Introduction
Strider integrates with multiple services and one of them is GitLab. Since version 6.2, the GitLab API offers functionality to integrate seamless with other services. To connect both platforms, we need to install Strider’s GitLab plugin, configure your user account with your GitLab API key and then add repositories.
Connecting Strider with GitLab requires the following minimum app versions:
- Strider 1.4
- GitLab 6.2
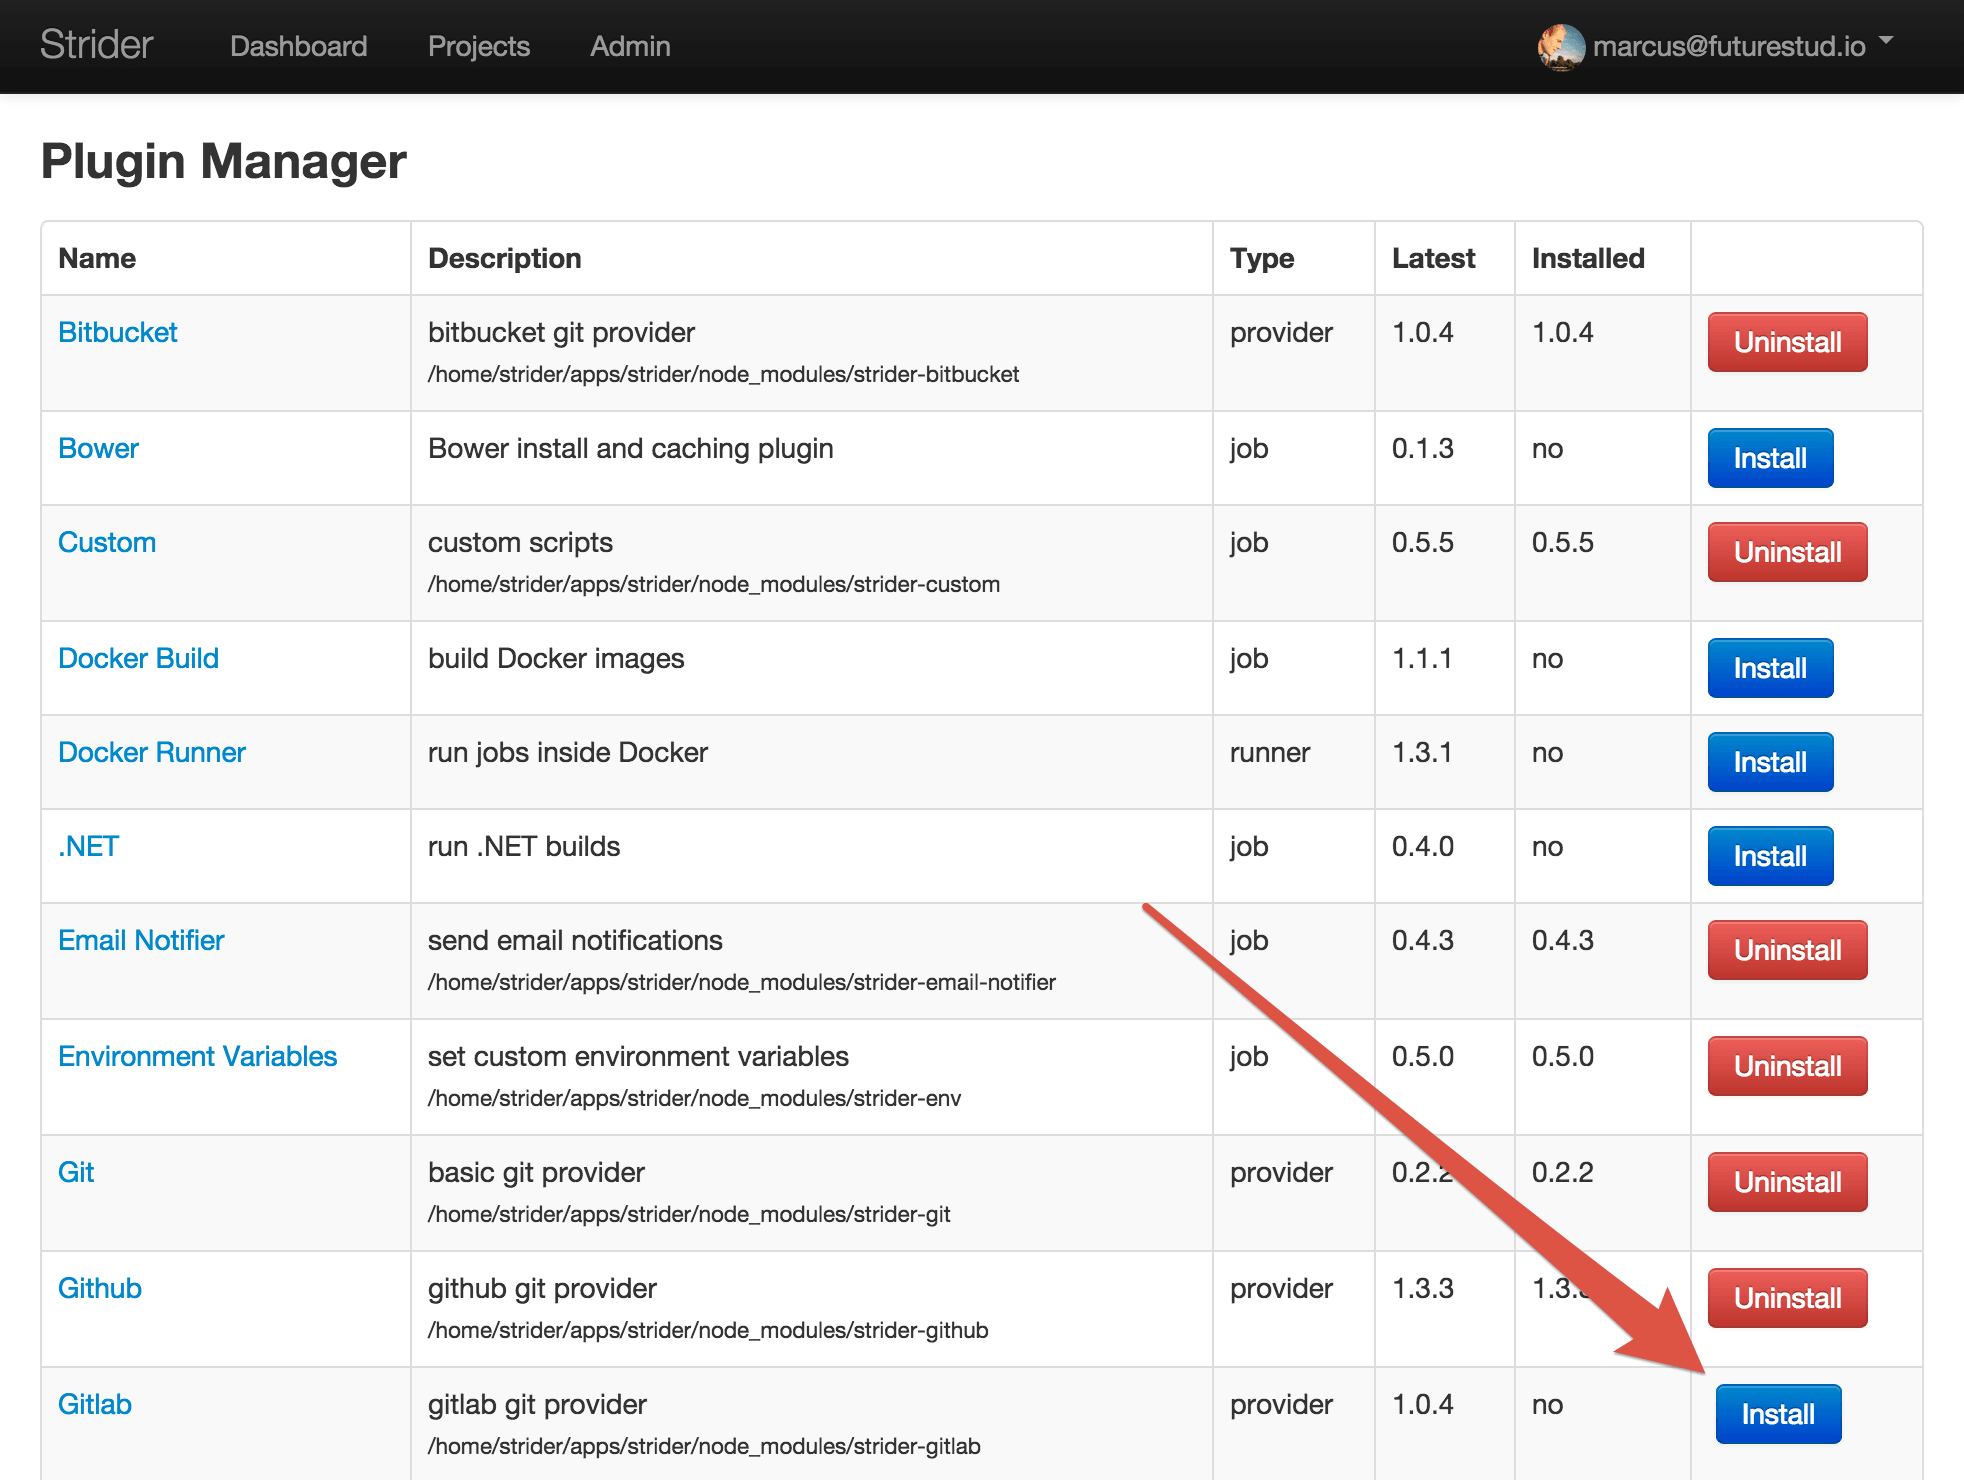
Install Strider-GitLab Plugin
First things first, we need to install Strider’s GitLab plugin. Head over to the plugin section in Strider’s admin panel and click the Install button if the plugin isn’t already installed.
Configure GitLab in Your Strider Account
Strider doesn’t offer GitLab as source for repositories in the projects overview by default. You have to configure GitLab access first in your Strider profile to enable this feature.
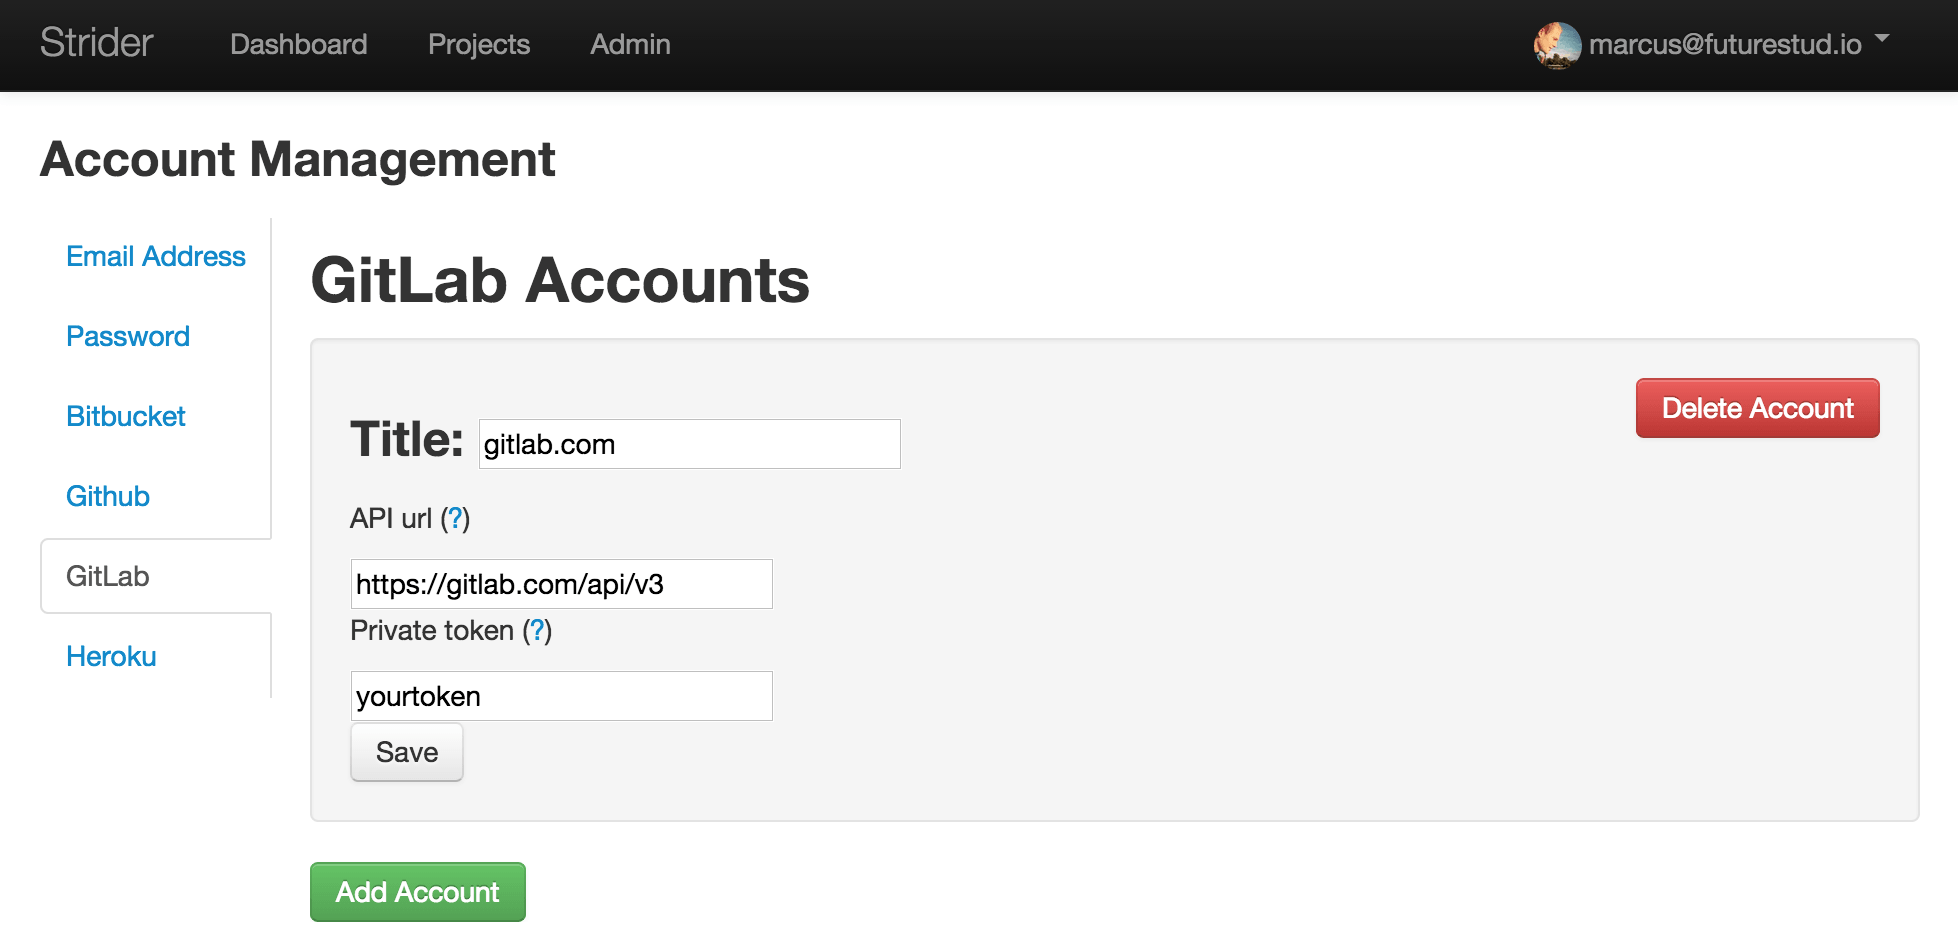
Navigate to your GitLab account settings (top right corner), select GitLab in the sidebar. Click the Add Account button within the view to show all configuration options. Provide a title and pass your GitLab API url. GitLabs API url is composed of your default url to access GitLab via browser and /api/v3. Hosting your repositories on gitlab.com results in the following API url
https://gitlab.com/api/v3
Your own GitLab deployment will look like
https://gitlab.my.url/api/v3
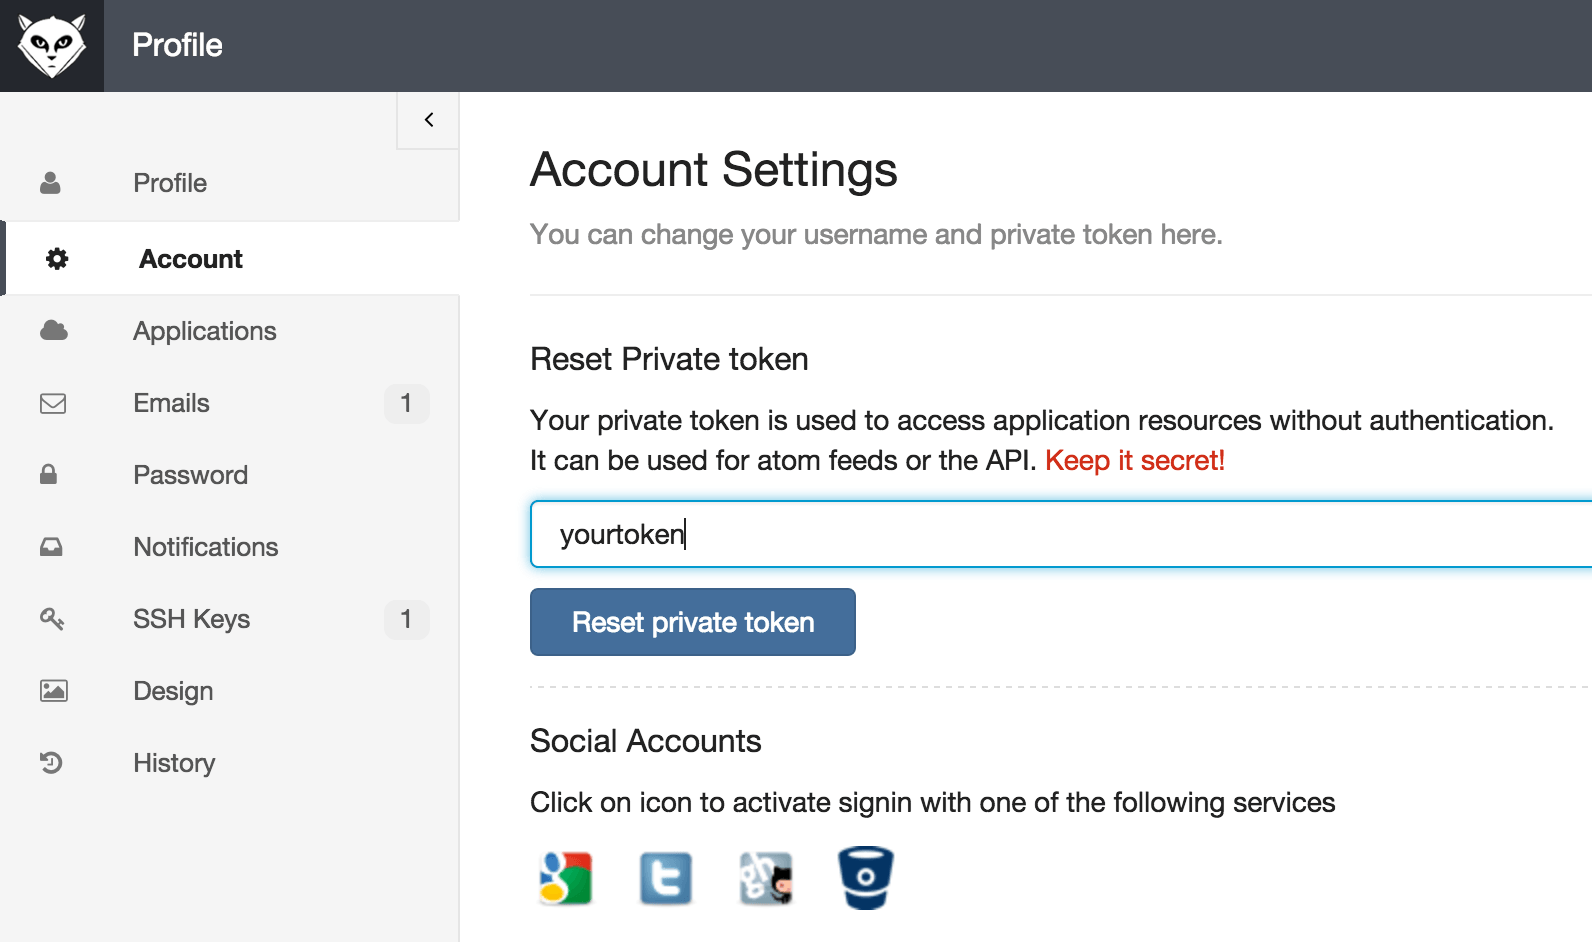
The private token is located in your GitLab profile. Go to Account in your GitLab server and copy your private token.
Now go back to your Strider profile. Paste Gitlab’s private API token into the respective field and press save to add this account.
Attention: providing wrong credentials will result in disfunction of Strider. The projects overview won’t work anymore. You can fix this issue by uninstall and afterwards install Strider’s GitLab plugin via admin panel. If you can’t access the admin panel anymore, uninstall and install the strider-gitlab plugin via command line (with the help of npm).
Add GitLab Repositories to Strider
If you finished the previously describes steps, your GitLab repositories will show in the projects overview.
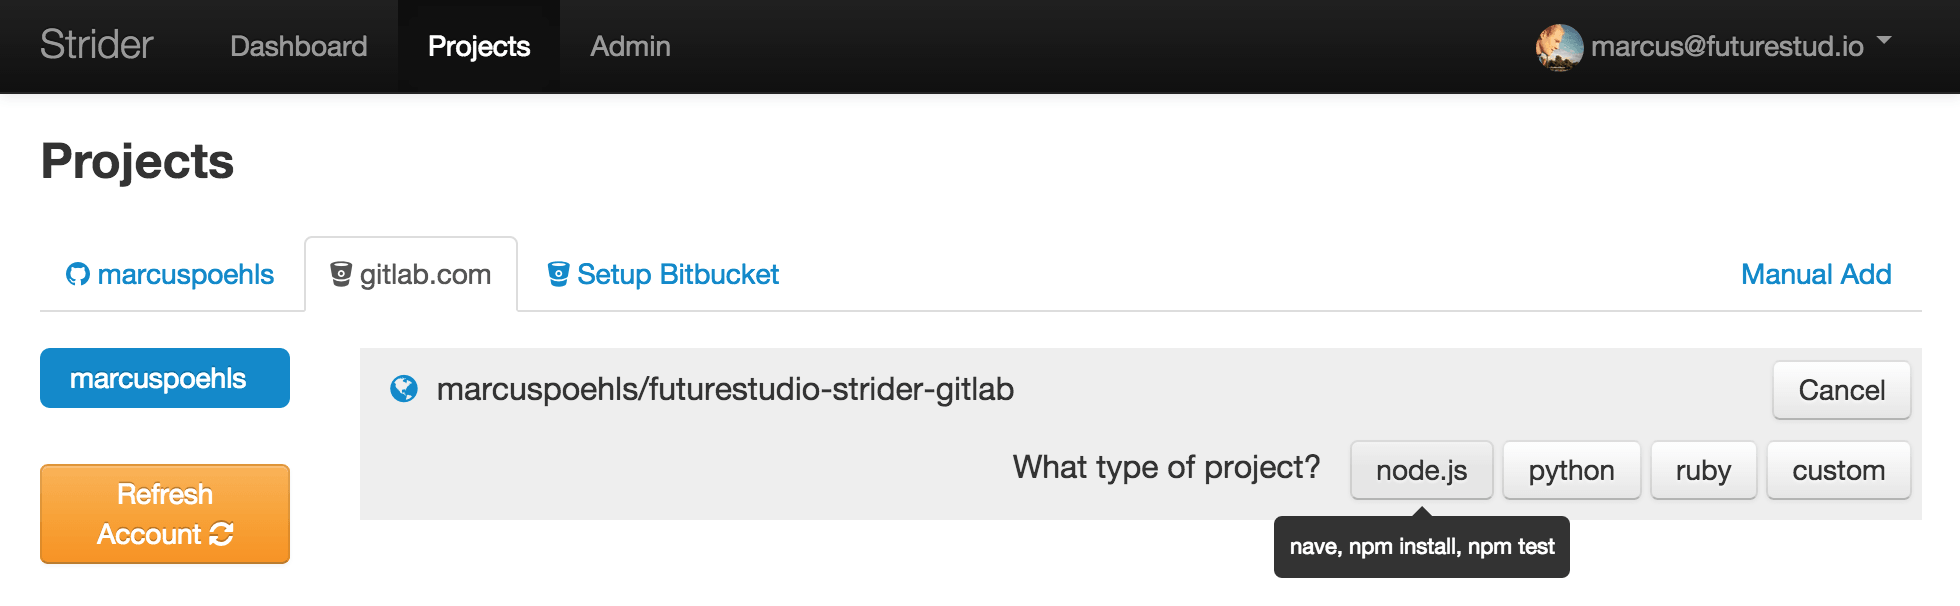
Select a project, click Add and specify the project type. Strider offers the options to directly test the project or configure it. You can test your code right away or make configuration changes.
Run Tests Automatically
Adding a GitLab repository to Strider doesn’t automatically creates any web hook to trigger notifications regarding repository changes. To add the web hook navigate to Strider and open the project detail view of the just added repository. Copy the url which looks like
https://my.strider.url/username/project-name
Now open another tab in your browser and navigate to your GitLab server. Go to the project settings of the repository you just added to Strider. Open Web Hooks and paste the Strider project url into the URL input field. Additionally, add /api/gitlab/webhook to the url to request the correct Strider web hook url for the specified project.
Your final web hook url looks like
https://my.strider.url/username/project-name/api/gitlab/webhook
Check your desired Trigger types and click Add Web Hook.
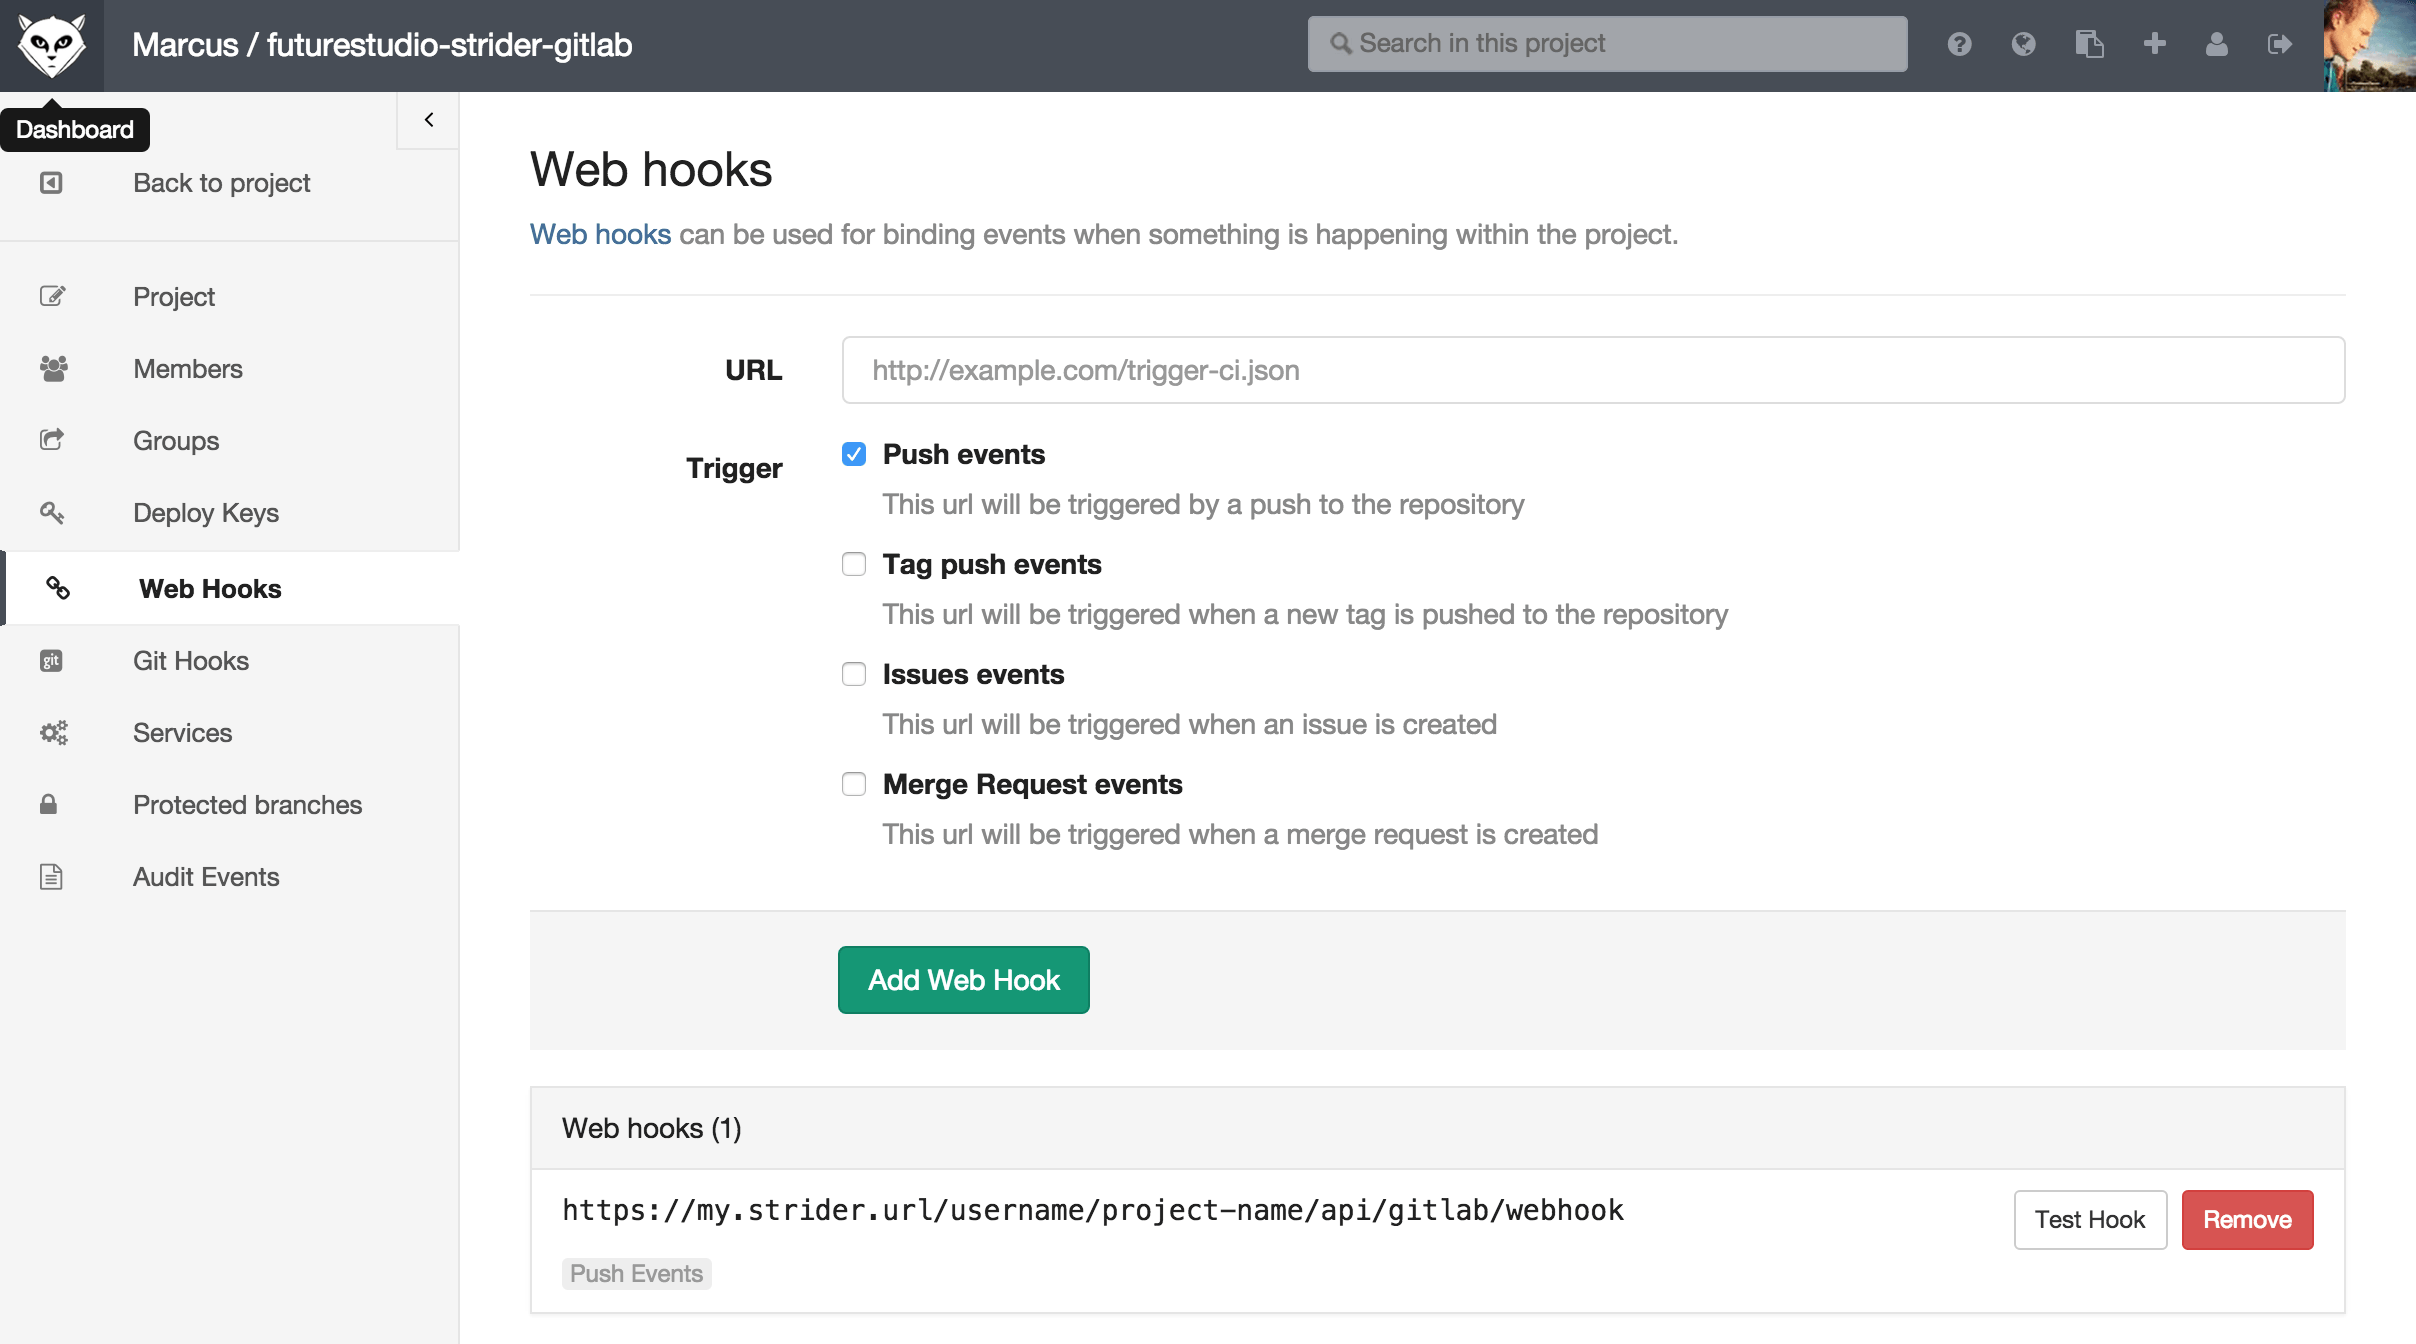
GitLab adds a box with provided web hook urls below the add web hook panel. You can test the hook right away by clicking Test Hook.
What Comes Next
That’s it. Your Strider deployment is connected with your GitLab profile. You can add GitLab repositories and test them automatically.
Next week we connect Strider with Bitbucket and configure both platforms that any pushes to the repositories automatically trigger a build process.
Having trouble? Please don’t hesitate to contact us via comments or @futurestud_io!