We already walked you through the processes of connecting Strider with GitHub, GitLab and Bitbucket to access your repositories for testing. In case you don’t host your git repositories on either of the mentioned services, don’t become panicky. This guide is exactly for you!
Before moving on to add a Gogs or git repository, let me point you to the list of posts within this Strider series.
Strider Series Overview
- How to Connect With GitHub and Run Tests Automatically
- How to Connect with GitLab and Run Tests Automatically
- How to Connect with BitBucket and Run Tests Automatically
- How to Manually Add Git or Gogs Repository and Run Tests Automatically
Gogs or Git Repository
At first, this article was supposed to be split in two separate posts. Problem: the Gogs API functionality is very limited and we cannot connect seamlessly from Strider to access the hosted repositories. That’s the reason why we treat Gogs repositories as normal git repositories.
Install Strider-Git Plugin
First things first: install the required strider-git plugin to manually add git repositories to Strider. Visit the plugin section in admin panel and search for ”Git“.
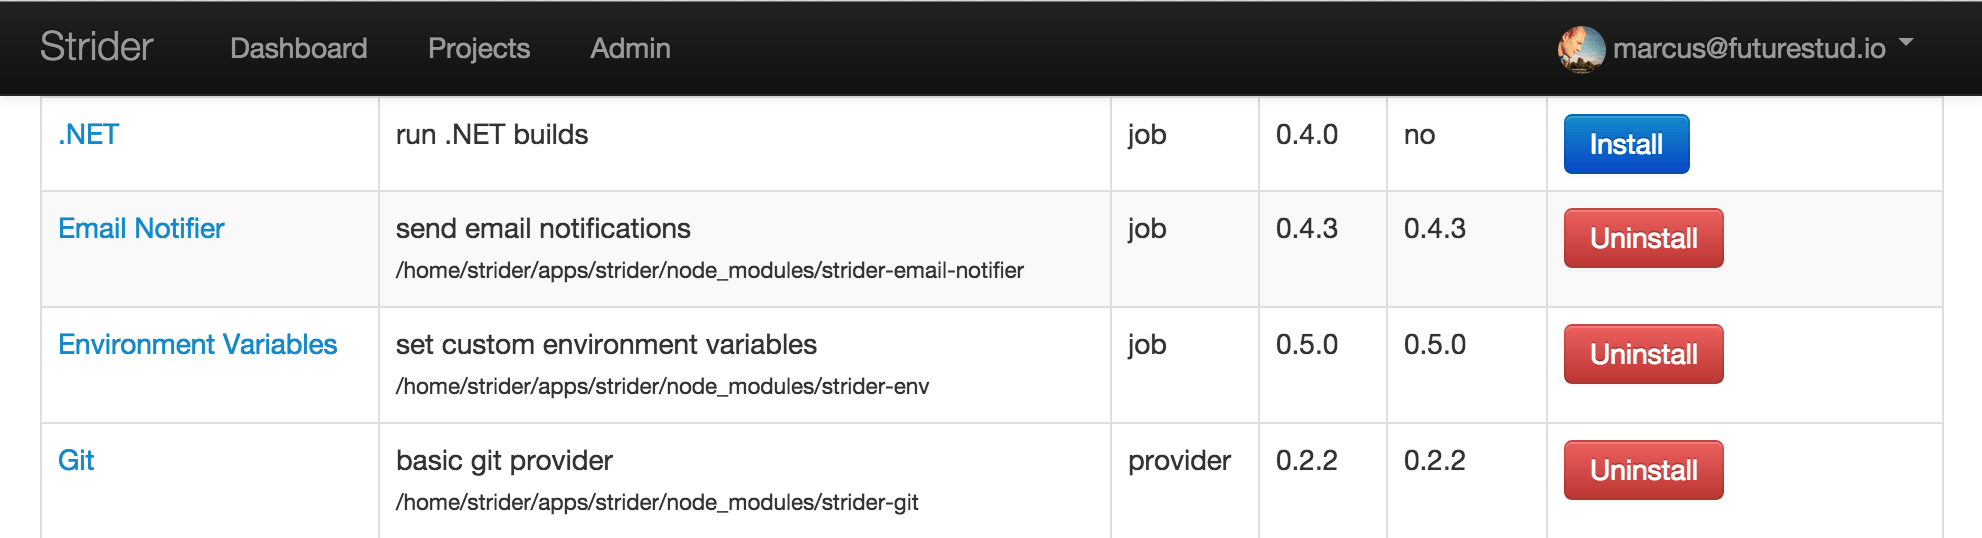
Click the Install button if the plugin isn’t already installed.
Add Git Repository to Strider
Strider offers the ability to manually add git repositories besides integrations with git hosting services. Go to Strider’s project overview and click the Manual Add tab on the right.
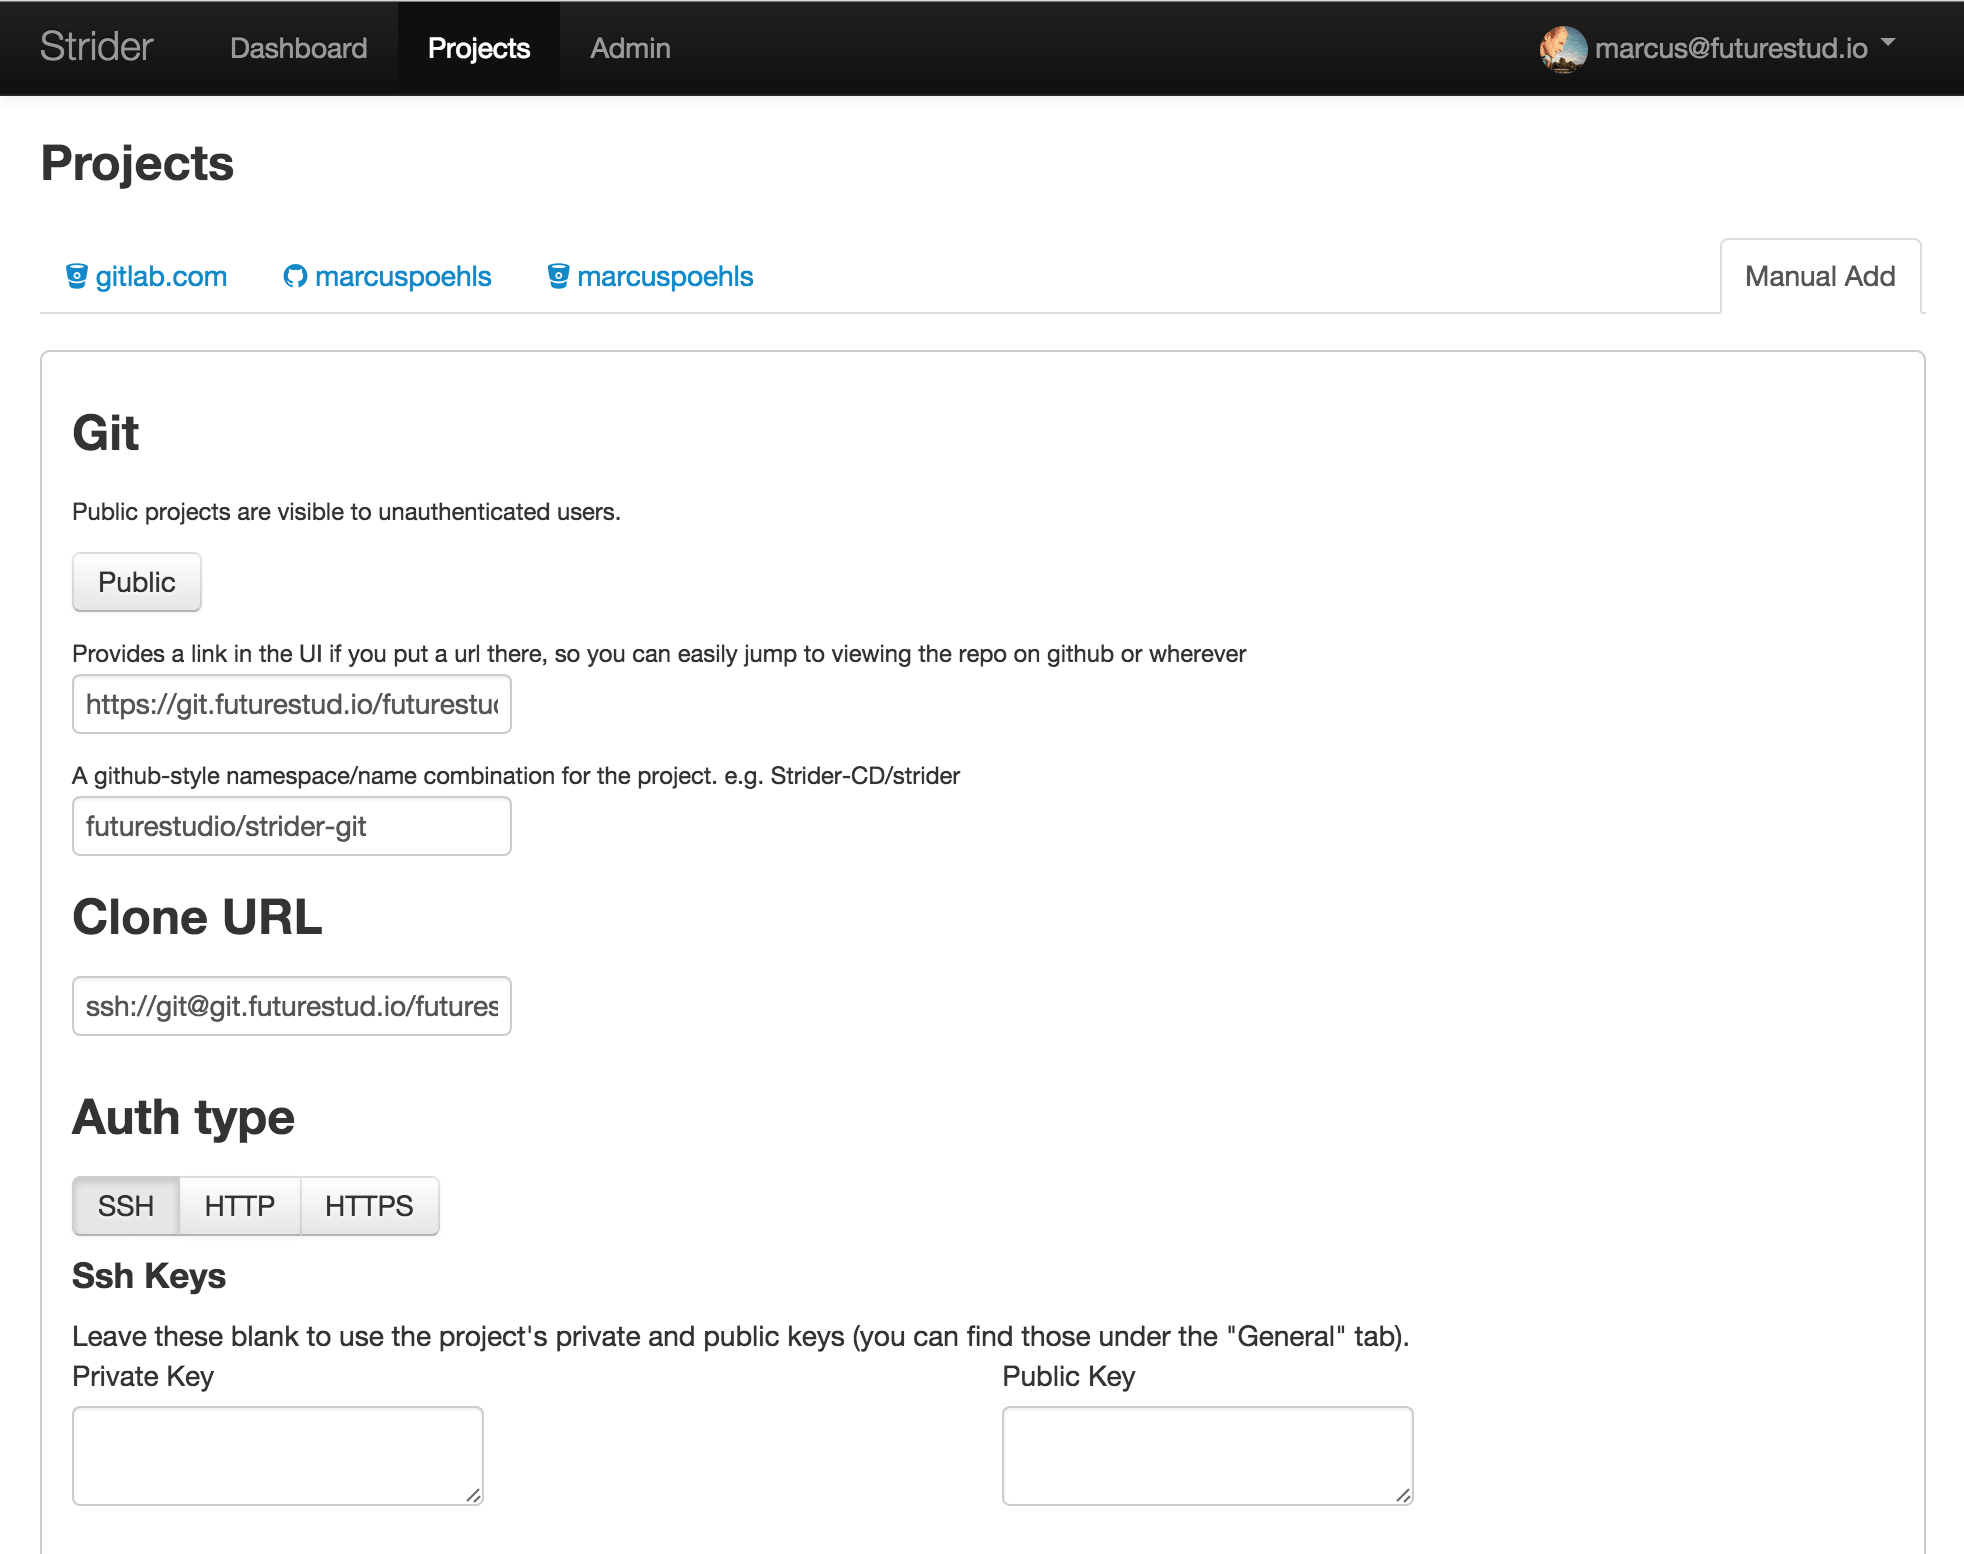
The manual add view offers multiple options and fields to define for your personal git repository.
First, decide whether the integration tests should be visible in public. If you decide yes, click the Public button to activate.
Second, paste a link to your repository. Strider will link your project on the dashboard and uses the provided value. If you don’t have any link, just leave the field empty.
Third, fill a GitHub-style name like namespace/repository-name. You’re free to use any name as long as it is in the correct format. This field is required.
Fourth, fill the clone url of your repository. Make sure you add either a HTTP(S) or SSH url for your repository. In case you add a SSH url, keep in mind to add Strider’s SSH keys to your git repository access list. This field is required.
Fifth, select the authentication type which Strider should use to access the repository. This type depends on the clone url provided in the field above. For HTTP(S) addresses, you need to specify a username and password. For SSH, you can optionally specify your keys. Strider will generate keys for the project when leaving the fields blank.
Attention: we had problems with Strider access the repository using passwords which include a question or exclamation mark. In case you run into auth issues during test runs, double check the respective Strider output.
Finally, click Create New to add the repository to Strider.
Run Your First Test
Make sure Strider can access your repository. Go to Strider’s dashboard and click the Retest button. Afterwards, check the test details.
Tests finished successfully? Awesome! Just go ahead to the next section (Run Tests Automatically).
Things went south? Check the output of the test run and correct your provided settings. In case you’ve access problems (error code 500), you can verify and correct the provided values in the project settings.
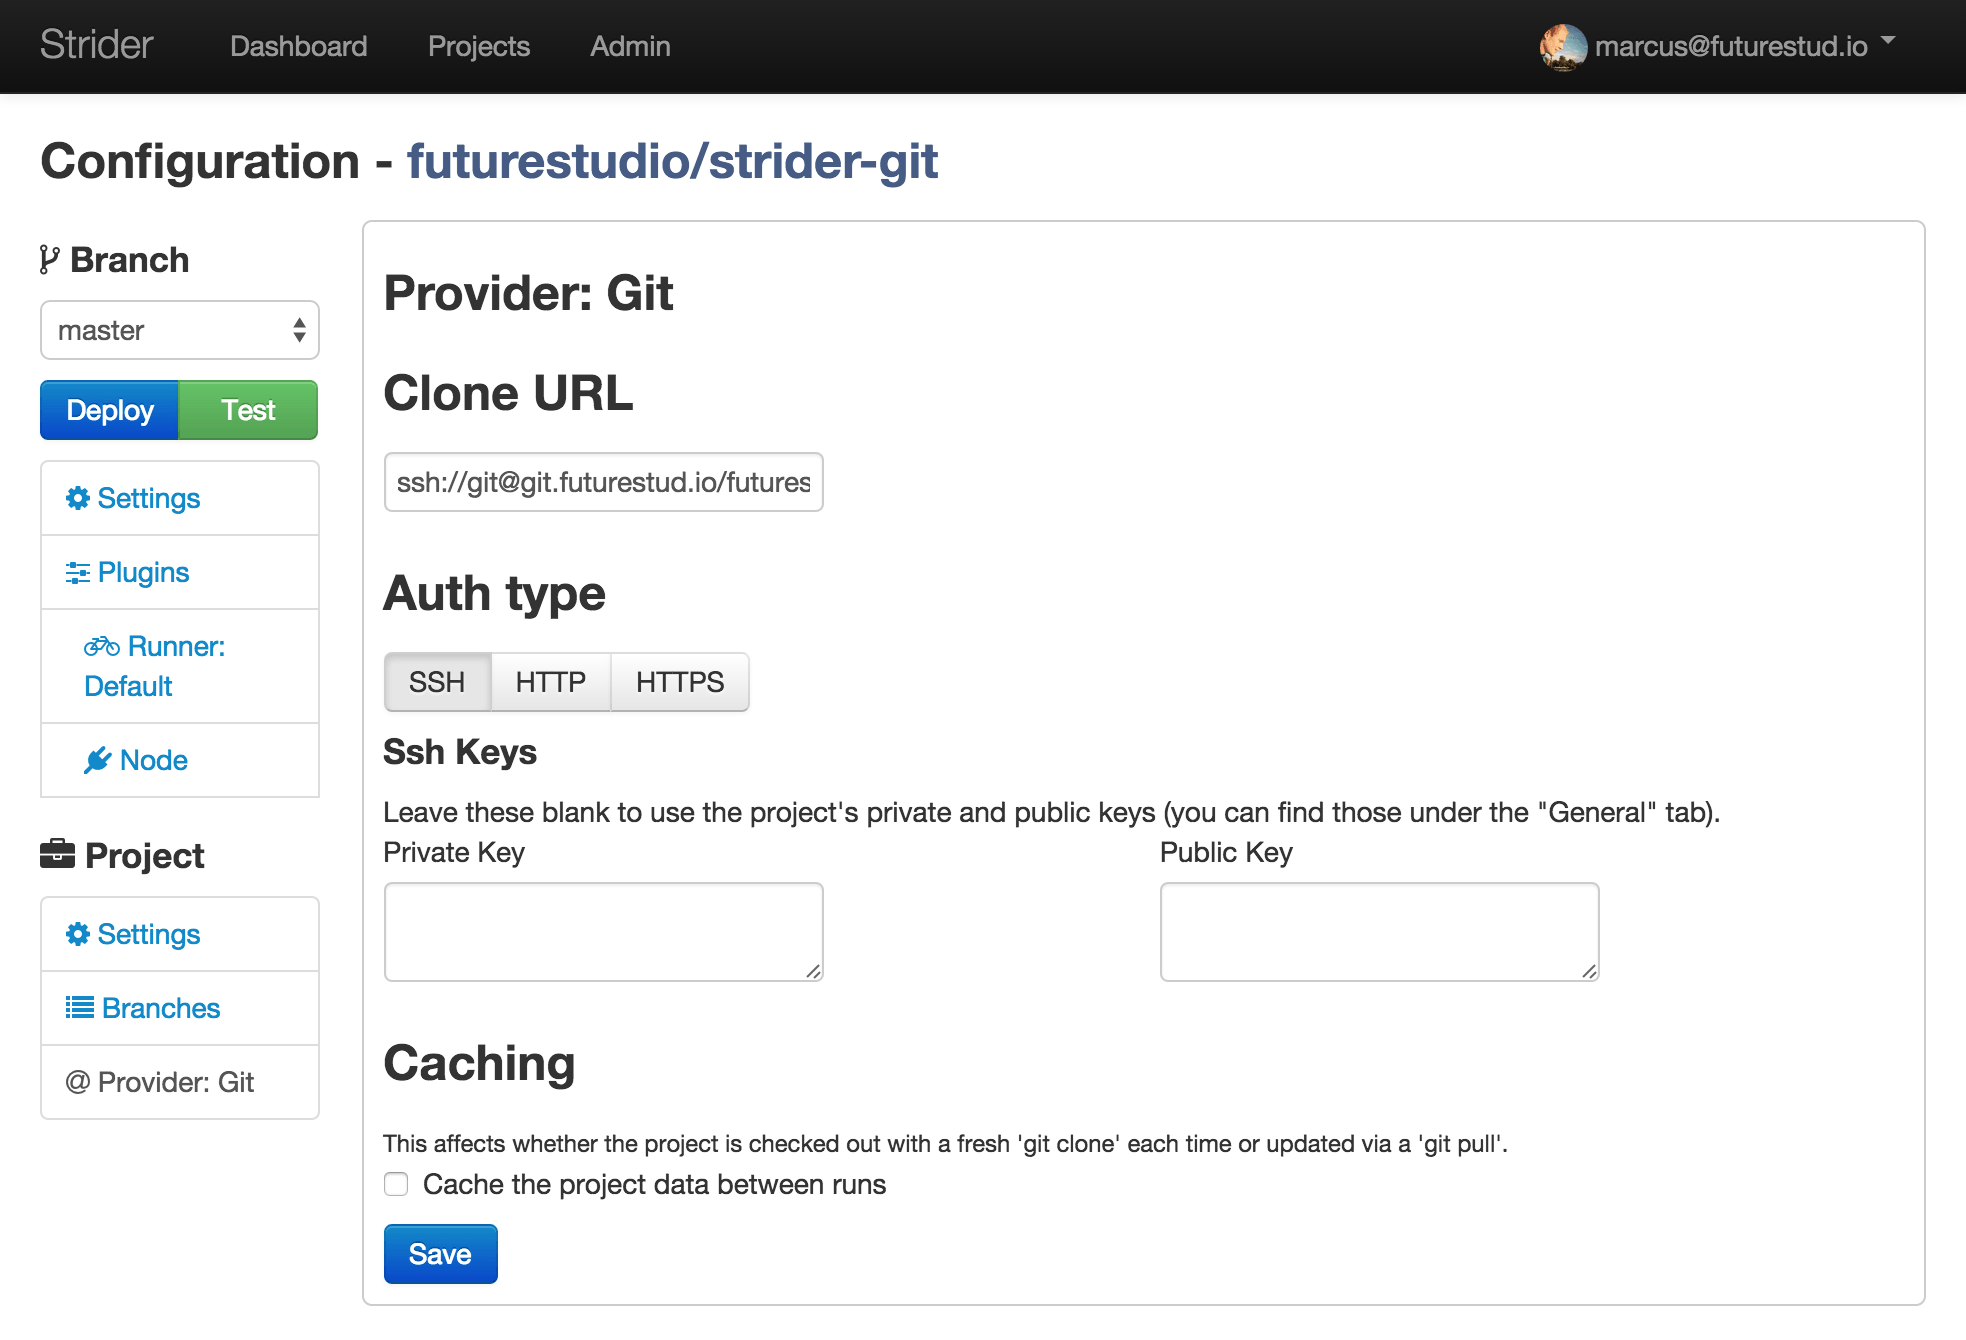
Double check your values for clone url and authentication. If you chose SSH as authentication method, make sure you either provide your desired keys in the provider settings or add Strider’s generated keys to your user’s authorized_keys file on the server hosting your repository. For Gogs, you can add the provided SSH keys from Strider to a user account who has access to the repository.
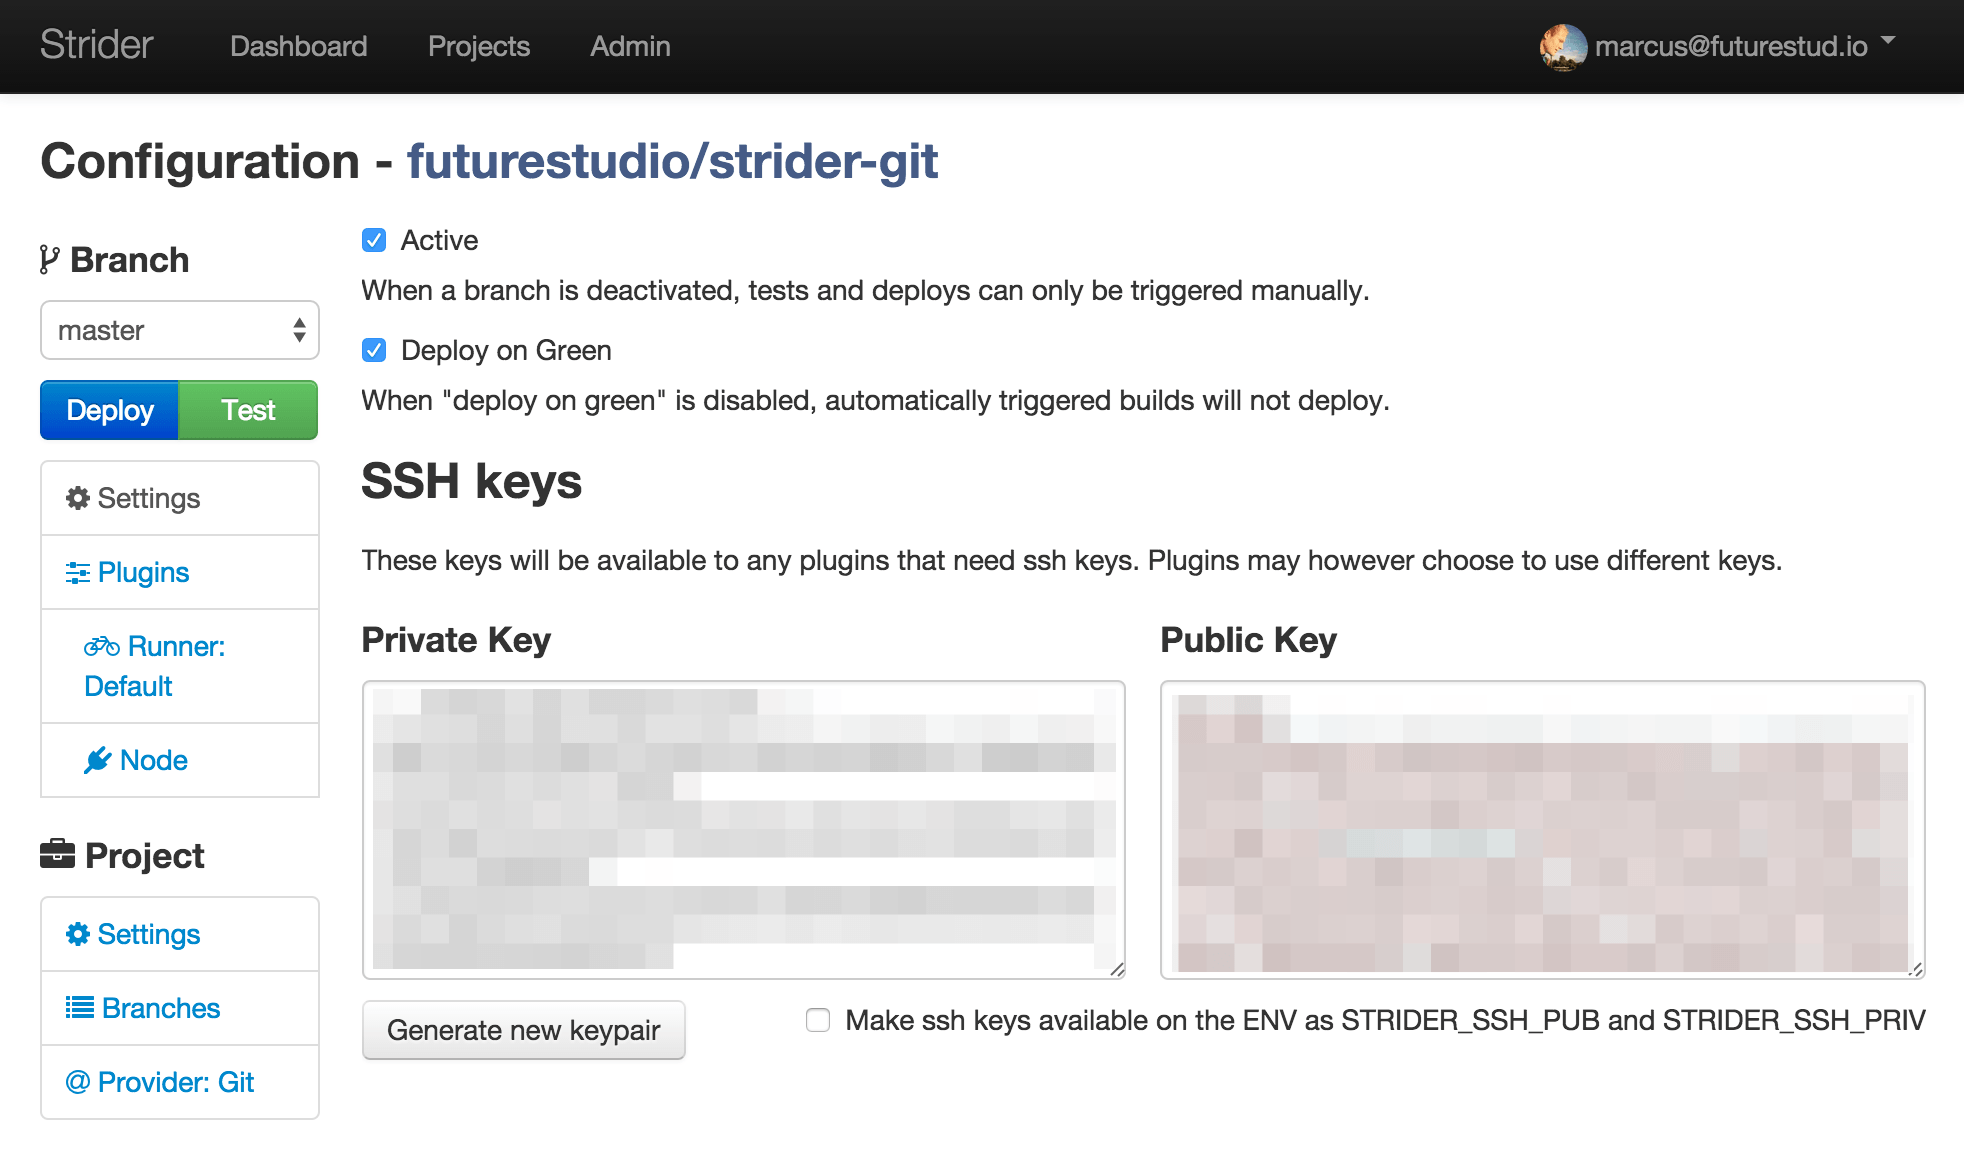
Strider’s SSH keys are accessible in the project settings.
Run Tests Automatically
At this point, you added your repository to Strider and manually tested your repository. The next step is to find a method for automatically run code integrations with every push to the repository.
We use git hooks to notify Strider and start test runs via a web hook url. The Strider web hook url requires authentication and the branch you want to test.
Let’s get our hands dirty. SSH into your server which is hosting the git repository you recently added to Strider. cd into the repository’s .git folder.
cd /path/to/git-or-gogs-repositories/namespace/repo.git/
We need to edit the update git hook. Use the editor of your choice and open the update file in git’s hook folder. We use nano for editing.
nano hooks/update
The content of the update file may look like this (this is the default gogs update hook):
#!/usr/bin/env bash
„/home/system/git/gogs/gogs“ update $1 $2 $3
Copy the following lines and paste them into the update file you’re currently editing.
branch=$(git rev-parse —symbolic —abbrev-ref $1)
if [ „$branch“ == „master“ ] || [ „$branch“ == „staging“ ]; then
  echo „Queuing Strider build for ${branch}.“
  curl \
    -k \
    -H „Content-Type: application/json“ \
    -d „{\“branch\“:\“$branch\“, \“type\“:\“TEST_AND_DEPLOY\“}“ \
    -u „YourStriderEmail@Domain.com:YourStriderPassword“ \
    -X POST \
    https://YourStriderHost.com/some/repository/start
else
  echo „Skipping Strider build for ${branch}.“
fi
At first, this snippet parses the branch to which we pushed our code. Second, if the branch matches master or staging, we perform the Strider notification with the help of curl. Please install curl on your server if not already done.
To perform the start of test runs for this repository, we send a POST request to Strider. You have to adjust the user data field „YourStriderEmail@Domain.com:YourStriderPassword“ and the Strider url https://YourStriderHost.com/some/repository/start to your hosting settings.
Save the update file. Push code changes to your local repository into any of the branches which are „allowed“ to trigger the Strider build (master and staging in this example). You will see an additional output in your command line. The reason for this: the curl command we added to contact Strider and its response.
Check Strider if the build started successfully.

The snippet above also sets the Strider test type to TEST_AND_DEPLOY. Since we didn’t configure any deployment process yet, nothing happens. You can remove the type value or change it to TEST_ONLY to skip the deployment process.
What Comes Next
This guide shows you how to connect Strider with a Gogs or git repository. Since Gogs doesn’t provide a proper API to access the hosted repos, we treat them as ”normal“ git repositories.
The next post guides you through the integration of Strider with Heroku and explains how to deploy successfully tested code to your Heroku application.
Need help or having trouble to get Strider work with manually added git repositories? Use the comments or reach out @futurestud_io.