While developing your application, you might want to secure resources with authentication. Creating your own sign up and log in flow is boilerplate code you want to avoid.
At this point, you can benefit from authentication mechanisms like OAuth. With OAuth you can integrate with another platform and users allow access to their profile data (except password, of course) for an application.
This guide walks you through the integration of your hapi app with GitHub and shows you how to let users authenticate for your platform using their GitHub account.
hapi Series Overview
- What You’ll Build
- Prepare Your Project: Stack & Structure
- Environment Variables and Storing Secrets
- Set Up MongoDB and Connect With Mongoose
- Sending Emails in Node.js
- Load the User’s Profile Picture From Gravatar Using Virtuals in Mongoose
- Implement a User Profile Editing Screen
- Generate a Username in Mongoose Middleware
- Displaying Seasons and Episodes for TV Shows with Mongoose Relationship Population
- Implementing Pagination for Movies
- Implement a Watchlist
- Create a Full Text Search with MongoDB
- Create a REST API with JSON Endpoints
- Update Mongoose Models for JSON Responses
- API Pagination for TV Shows
- Customize API Endpoints with Query Parameters
- Always Throw and Handle API Validation Errors
- Advanced API Validation With Custom Errors
- Create an API Documentation with Swagger
- Customize Your Swagger API Documentation URL
- Describe Endpoint Details in Your Swagger API Documentation
- 10 Tips on API Testing With Postman
- JWT Authentication in Swagger API Documentation
- API Versioning with Request Headers
- API Login With Username and Password to Generate a JWT
- JWT Authentication and Private API Endpoints
- Refresh Tokens With JWT Authentication
- Create a JWT Utility
- JWT Refresh Token for Multiple Devices
- Check Refresh Token in Authentication Strategy
- Rate Limit Your Refresh Token API Endpoint
- How to Revoke a JWT
- Invalidate JWTs With Blacklists
- JWT Logout (Part 1/2)
- JWT “Immediate” Logout (Part 2/2)
- A Better Place to Invalidate Tokens
- How to Switch the JWT Signing Algorithm
- Roll Your Own Refresh Token Authentication Scheme
- JWT Claims 101
- Use JWT With Asymmetric Signatures (RS256 & Co.)
- Encrypt the JWT Payload (The Simple Way)
- Increase JWT Security Beyond the Signature
- Unsigned JSON Web Tokens (Unsecured JWS)
- JWK and JWKS Overview
- Provide a JWKS API Endpoint
- Create a JWK from a Shared Secret
- JWT Verification via JWKS API Endpoint
- What is JOSE in JWT
- Encrypt a JWT (the JWE Way)
- Authenticate Encrypted JWTs (JWE)
- Encrypted and Signed JWT (Nested JWT)
- Bringing Back JWT Decoding and Authentication
- Bringing Back JWT Claims in the JWT Payload
- Basic Authentication With Username and Password
- Authentication and Remember Me Using Cookies
- How to Set a Default Authentication Strategy
- Define Multiple Authentication Strategies for a Route
- Restrict User Access With Scopes
- Show „Insufficient Scope“ View for Routes With Restricted Access
- Access Restriction With Dynamic and Advanced Scopes
- hapi - How to Fix „unknown authentication strategy“
- Authenticate with GitHub And Remember the Login
- Authenticate with GitLab And Remember the User
- How to Combine Bell With Another Authentication Strategy
- Custom OAuth Bell Strategy to Connect With any Server
- Redirect to Previous Page After Login
- How to Implement a Complete Sign Up Flow With Email and Password
- How to Implement a Complete Login Flow
- Implement a Password-Reset Flow
- Views in hapi 9 (and above)
- How to Render and Reply Views
- How to Reply and Render Pug Views (Using Pug 2.0)
- How to Create a Dynamic Handlebars Layout Template
- Create and Use Handlebars Partial Views
- Create and Use Custom Handlebars Helpers
- Specify a Different Handlebars Layout for a Specific View
- How to Create Jade-Like Layout Blocks in Handlebars
- Use Vue.js Mustache Tags in Handlebars Templates
- How to Use Multiple Handlebars Layouts
- How to Access and Handle Request Payload
- Access Request Headers
- How to Manage Cookies and HTTP States Across Requests
- Detect and Get the Client IP Address
- How to Upload Files
- Quick Access to Logged In User in Route Handlers
- How to Fix “handler method did not return a value, a promise, or throw an error”
- How to Fix “X must return an error, a takeover response, or a continue signal”
- Query Parameter Validation With Joi
- Path Parameter Validation With Joi
- Request Payload Validation With Joi
- Validate Query and Path Parameters, Payload and Headers All at Once on Your Routes
- Validate Request Headers With Joi
- Reply Custom View for Failed Validations
- Handle Failed Validations and Show Errors Details at Inputs
- How to Fix AssertionError, Cannot validate HEAD or GET requests
Prepare Your Project
At first, you need to install two dependencies: bell to simply integrate OAuth within your application for a given provider (e.g., GitHub, Twitter & Co.) and hapi-auth-cookie to remember the user’s successful login.
npm i -S bell hapi-auth-cookie
Once you’ve the two packages successfully installed, move on to the next step and create an OAuth application on GitHub.
Register new OAuth Application on GitHub
Integrating GitHub with your hapi app to authenticate users requires a dedicated OAuth application on GitHub. This step is required, because you want users to explicitly authenticate for your application, not anyone else’s.
To create your OAuth application on GitHub, move over to your GitHub settings and visit the „OAuth applications“ link.
You can also create an OAuth app for your organization. Therefore, visit the selected organization settings and then „OAuth applications“ in the menu.
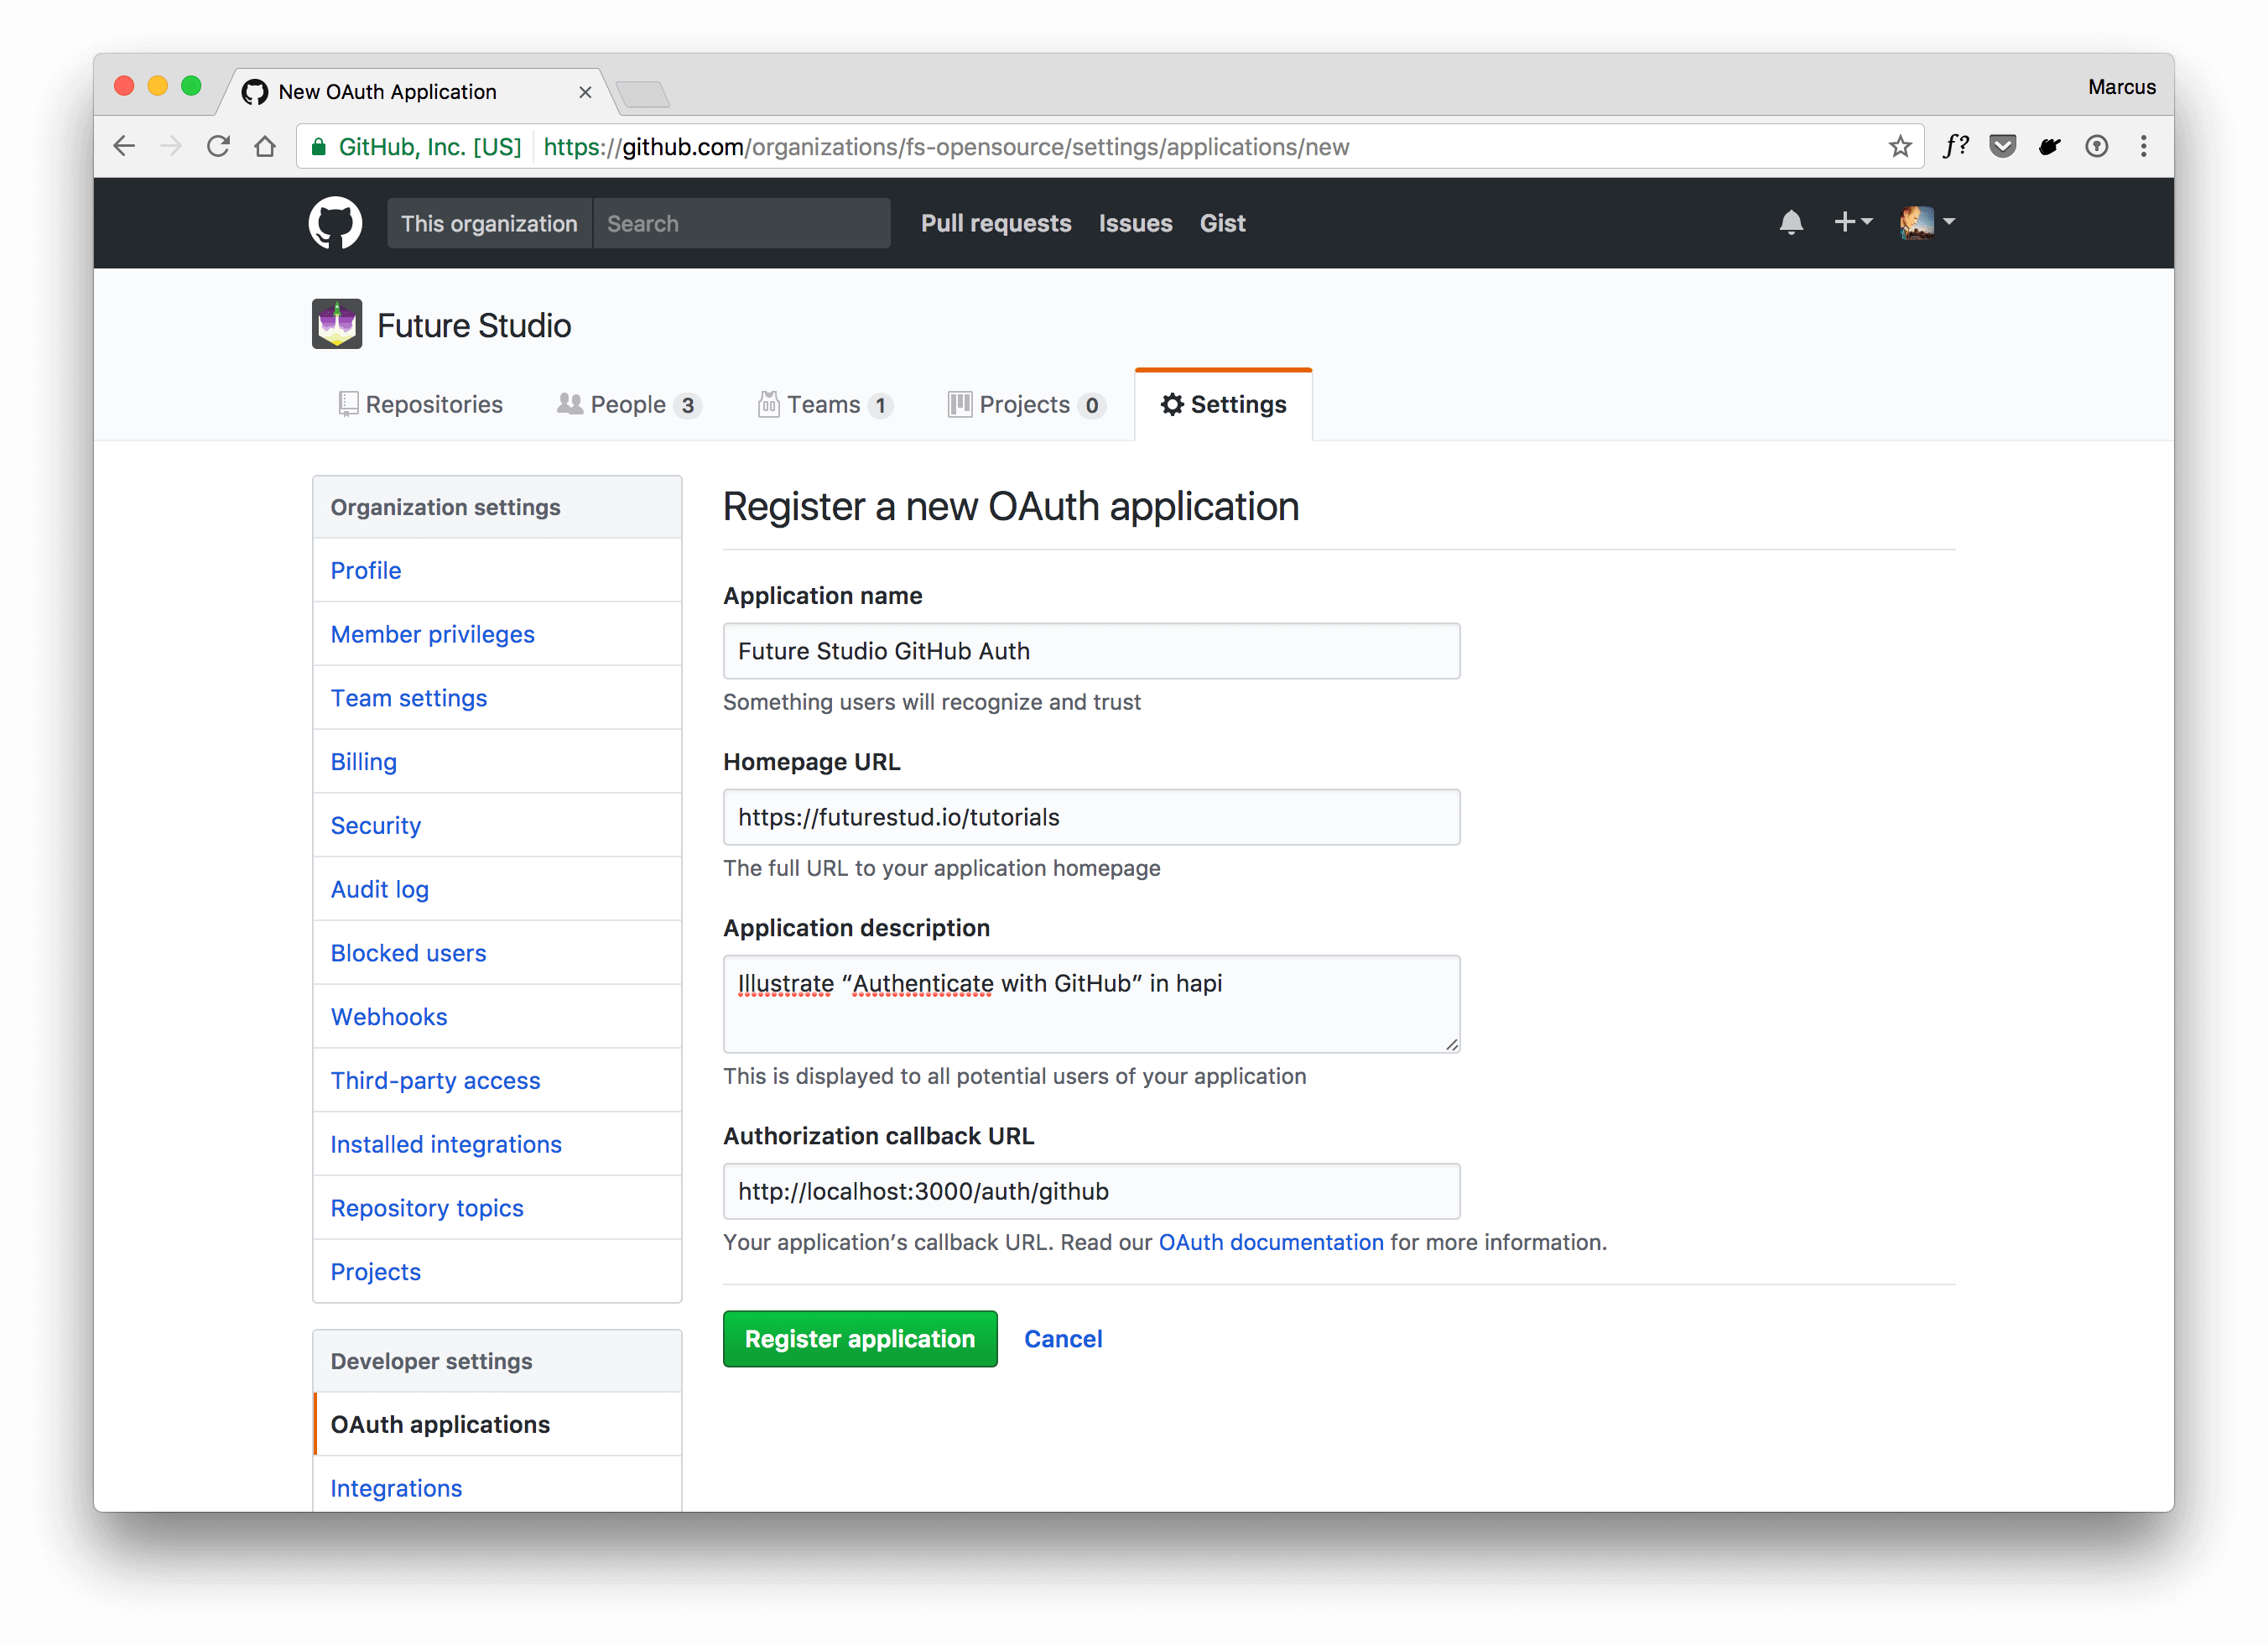
Fill in the form and please keep an eye on the Authorization callback URL, because the request returns to this url after successful authentication. And you want GitHub to call a URL that belongs to your application :)
For development, you can use a localhost address. The picture above depicts http://localhost:3000/auth/github as the callback URL and we need to listen on that route within our server to handle the call properly.
Click Register application to create it.
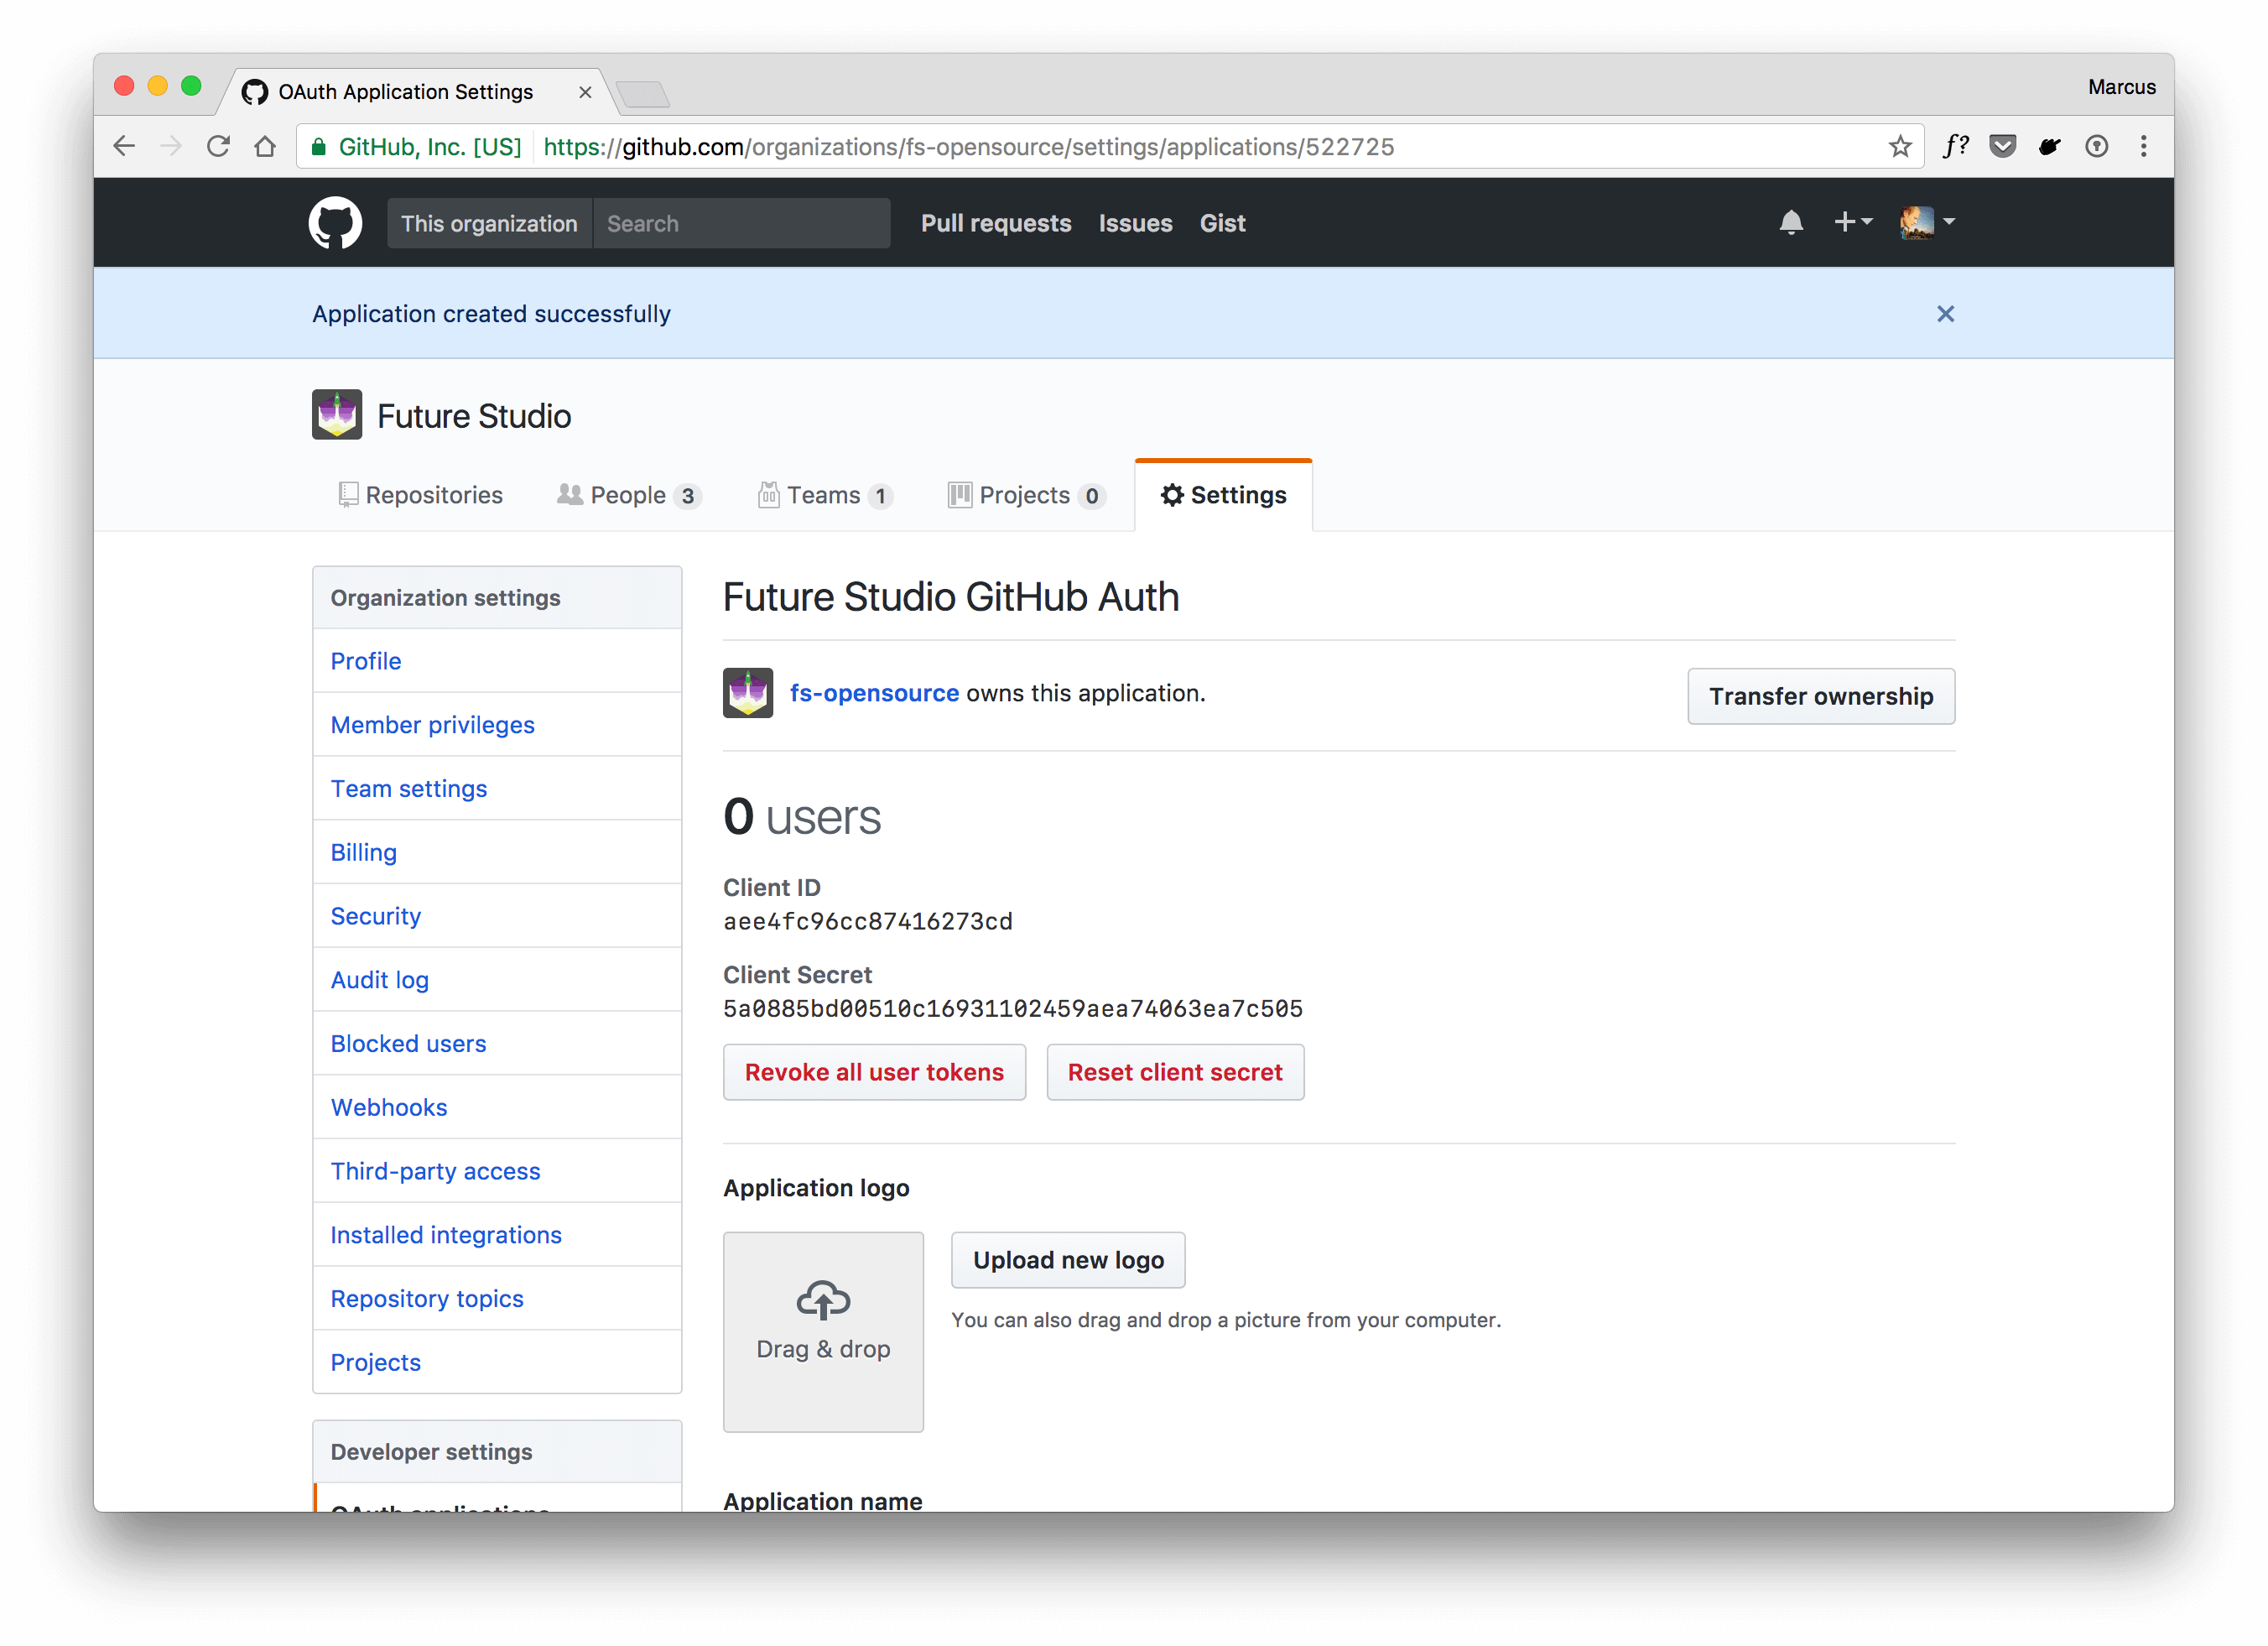
Alright, there you go. Keep this tab open, because you need the values for Client ID and Client Secret in a minute.
Actually, don’t copy the values from the screenshot. Use your own client id and secret. At the time you’re reading this tutorial, the app is already gone and not available anymore. Your authentication will always fail.
Create a github Authentication Strategy
In the first step, you’ve installed bell and now you’ll create a new authentication strategy based on the bell scheme. Name the new strategy as you wish. We’ll go with github so that it’s easily referable from within the application and you immediately know what’s behind this strategy.
We suggest to create a dedicated authentication plugin and add your strategy this way:
async function register (server, options) {
  // declare and install dependency to bell
  await server.register({
    plugin: require('bell')
  })


  /**
   * Register 'github' authentication strategy
   */
  server.auth.strategy('github', 'bell', {
    provider: 'github',
    password: 'ThisIsASecretCookiePasswordForGitHub',
    clientId: 'your-client-id',
    clientSecret: 'your-client-secret',
    isSecure: process.env.NODE_ENV === 'production'
  })

  server.log('info', 'Plugin registered: bell authentication with strategy »github«')
}

exports.plugin = {
  register,
  name: 'authentication',
  version: '1.0.0',
  once: true
}
With bell, you’ve multiple settings that can be configured while creating the strategy. The settings from above are sufficient to integrate GitHub with your application.
The github provider is a predefined provider in bell itself and it sets the required OAuth urls to complete the OAuth flow. You can point bell to a GitHub Enterprise instance as well. Therefore, please check the provider configuration details.
clientId and clientSecret are the values from your GitHub OAuth application. Remember the values from above? Both values are required to identify your application and the callback with the user’s data as response payload.
The password is used for a cookie that will be set and isSecure defines whether the cookie is used on encrypted (HTTPS) routes.
Add Route That Requires github Authentication Strategy
The authentication strategy is prepared, now go ahead and add a route that requires the github strategy. Remember the callback url from the GitHub OAuth application, the route’s path needs to match the defined url path.
Above, you’ve seen that we used http://localhost:3000/auth/github for the GitHub’s callback URL in your OAuth app. Now you need to add a route on path /auth/github.
server.route({
  method: 'GET',
  path: '/auth/github',
  options: {
    auth: 'github',
    handler: (request, h) => {
      if (request.auth.isAuthenticated) {
        const user = request.auth.credentials.profile
        const data = {
          name: user.displayName,
          username: user.username,
          avatar: user.raw.avatar_url
        }

        return h.view('authenticated', data)
      }

      return h.view('index', {
        error: 'Could not authenticate with GitHub.'
      }).code(400)
    }
  }
})
With github as the required authentication strategy, bell makes sure you’re redirected to GitHub first and request access for the OAuth app if you didn’t allow it yet. Once you allow your app to use your GitHub data, bell continues and finishes the OAuth flow and ultimately your route handler is called.
Within your route, the GitHub data is available within request.auth.credentials, including an API access token if you need to call the GitHub API separately.
The GitHub profile data is stored within a nested object request.auth.credentials.profile. Pick the data you need and finally show the resource that is secured with GitHub authentication.
Test Your Code
You’ve put everything together and can test your integration. We’ve created a sample project and published over at GitHub. It adds basic view support and has two views: one that requires you to authenticate with GitHub and another one shown once the auth flow completed successfully.
If you’ve completed the GitHub integration within your application, start your server and visit the route that requires GitHub authentication. The following screen uses the mentioned sample project from above.
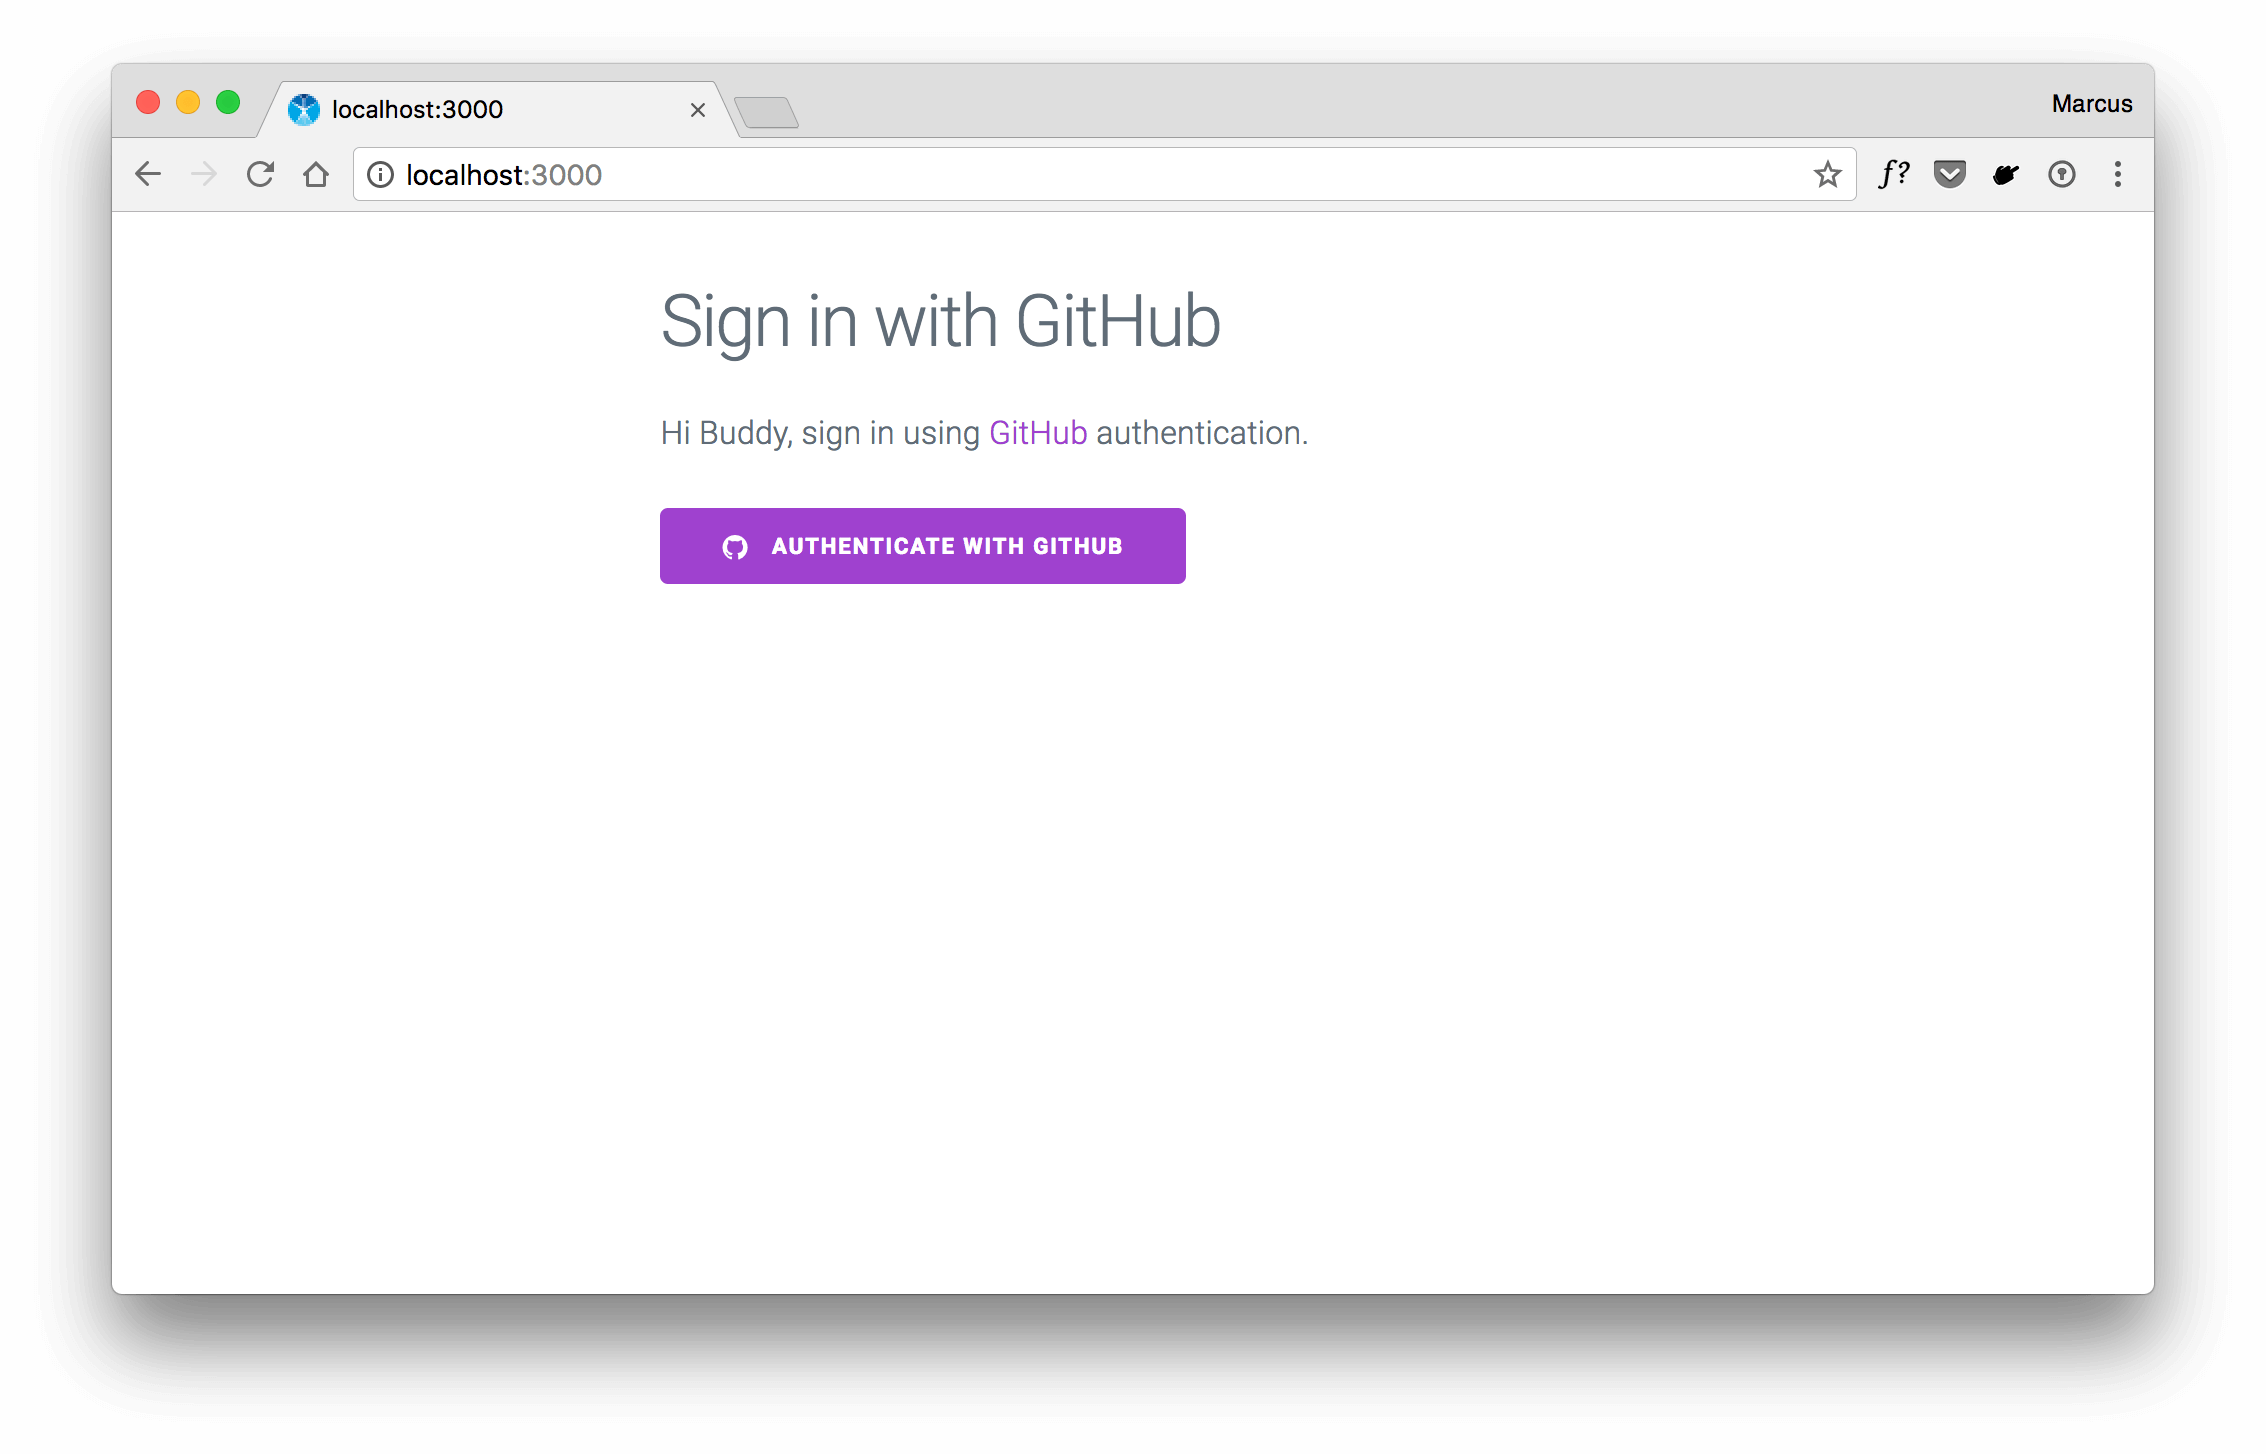
Click the link to „Authenticate with GitHub“ which results in the OAuth web flow that redirects you to GitHub and asks for permission to access your personal user data.
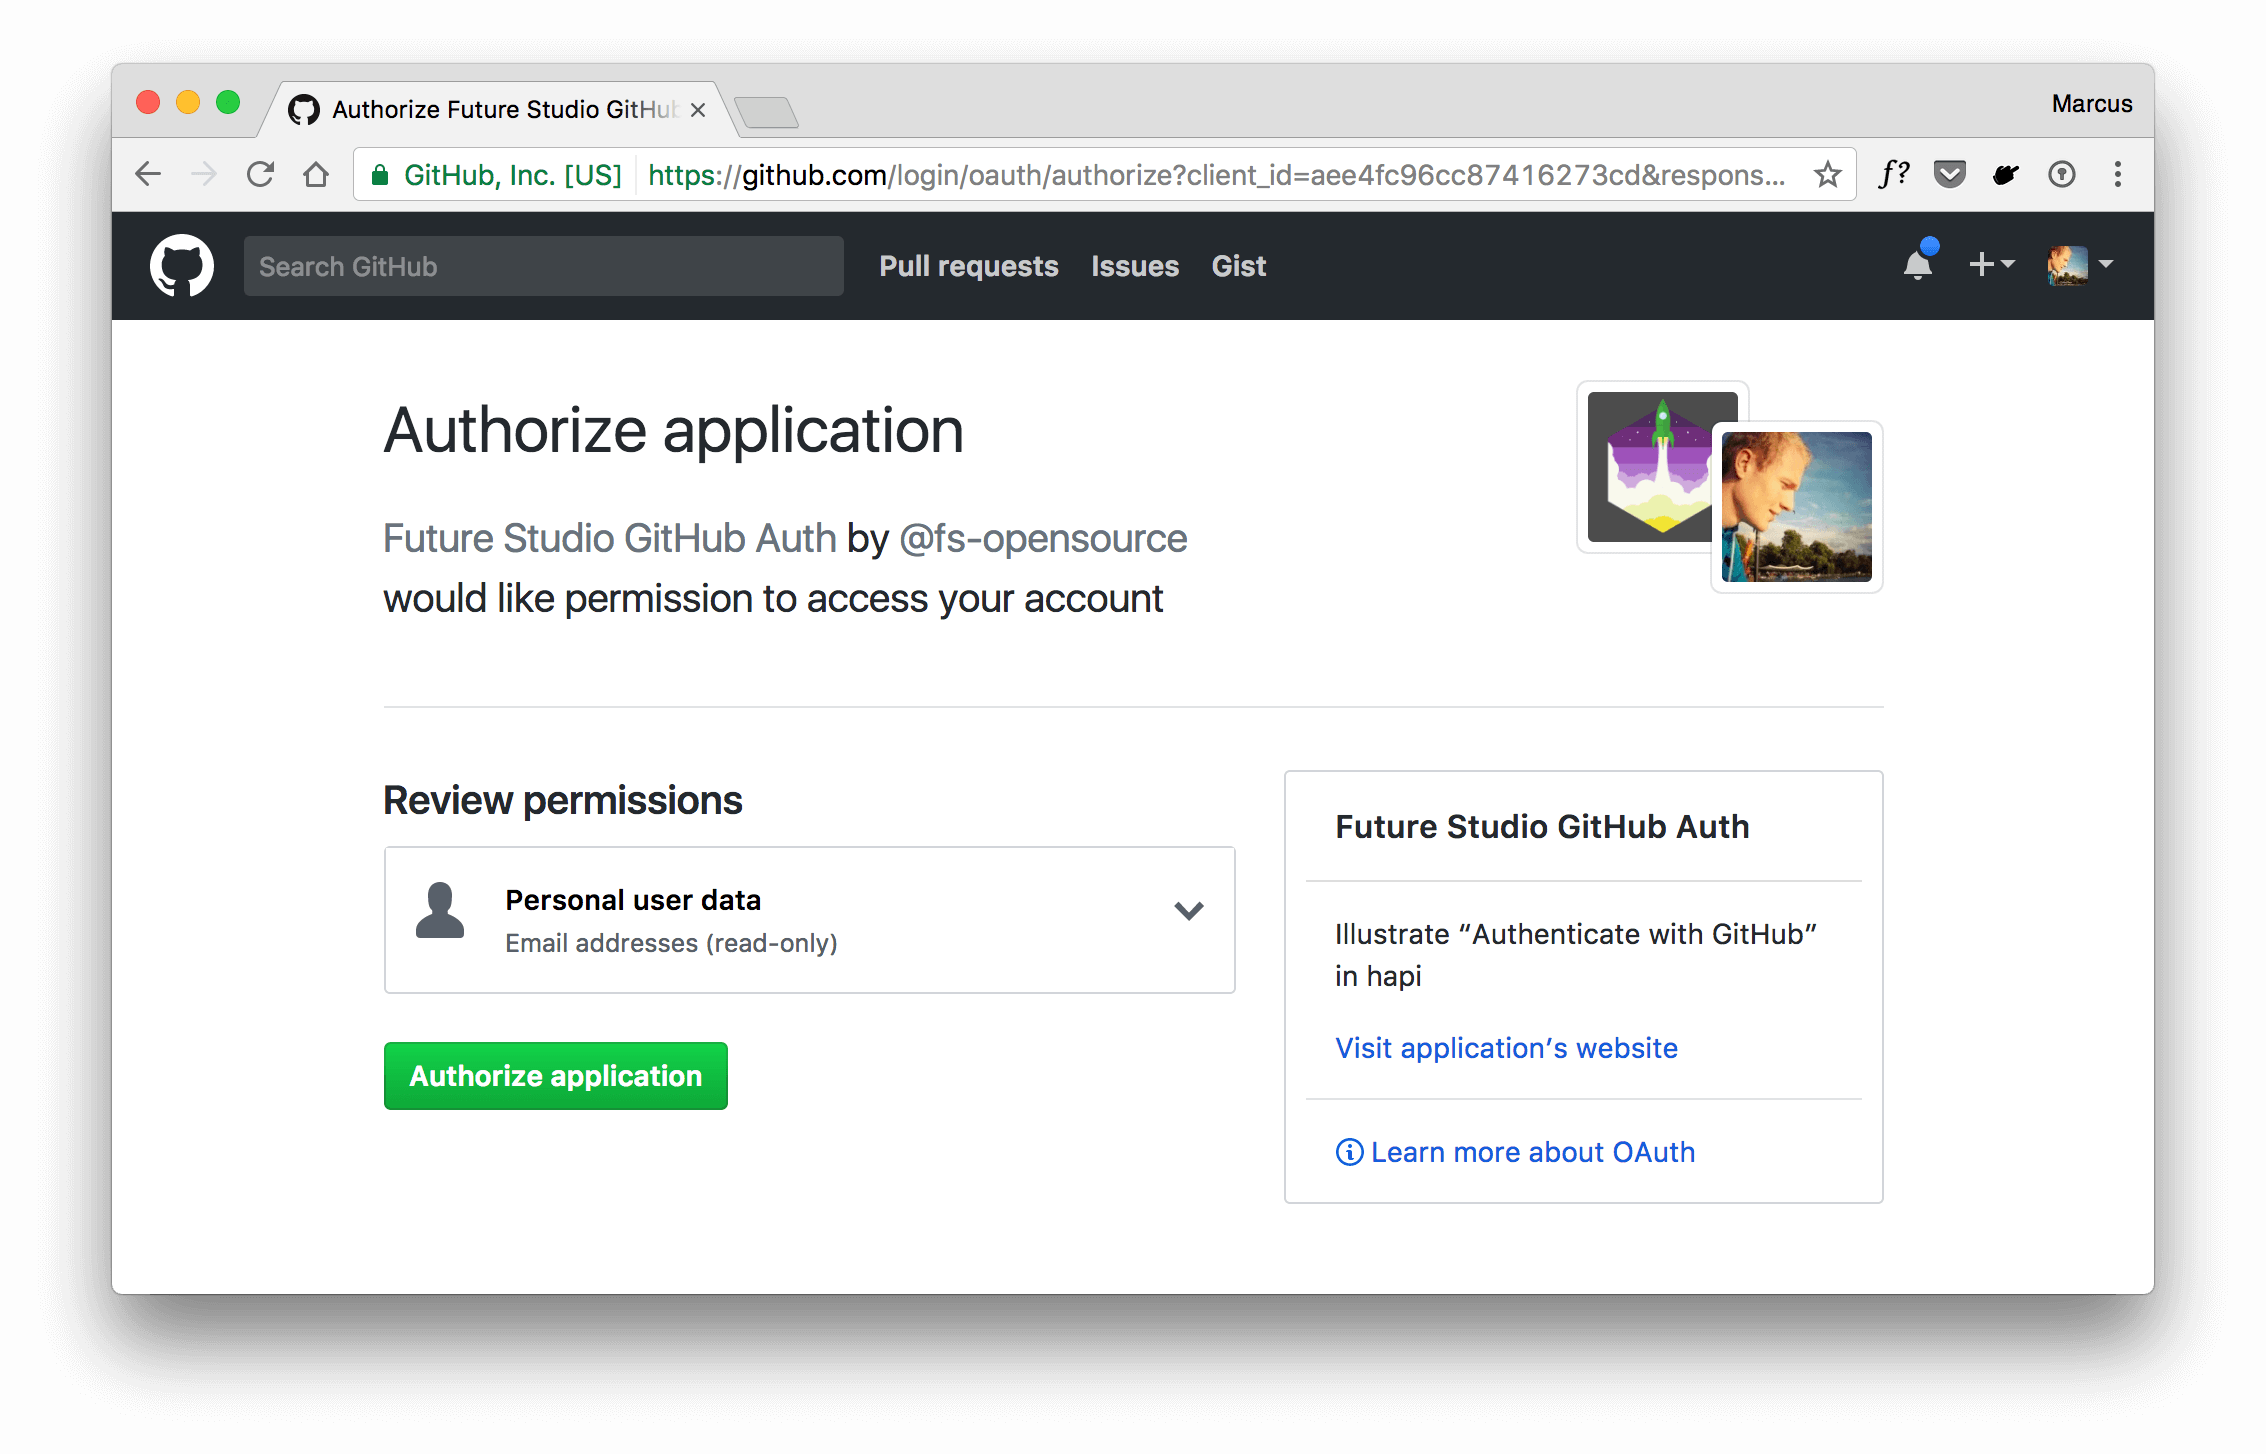
Once you click „Authorize application“, you’ll be redirected to your callback url and with that to your application. Within your route handler, do the required processing and use the user credentials for good.
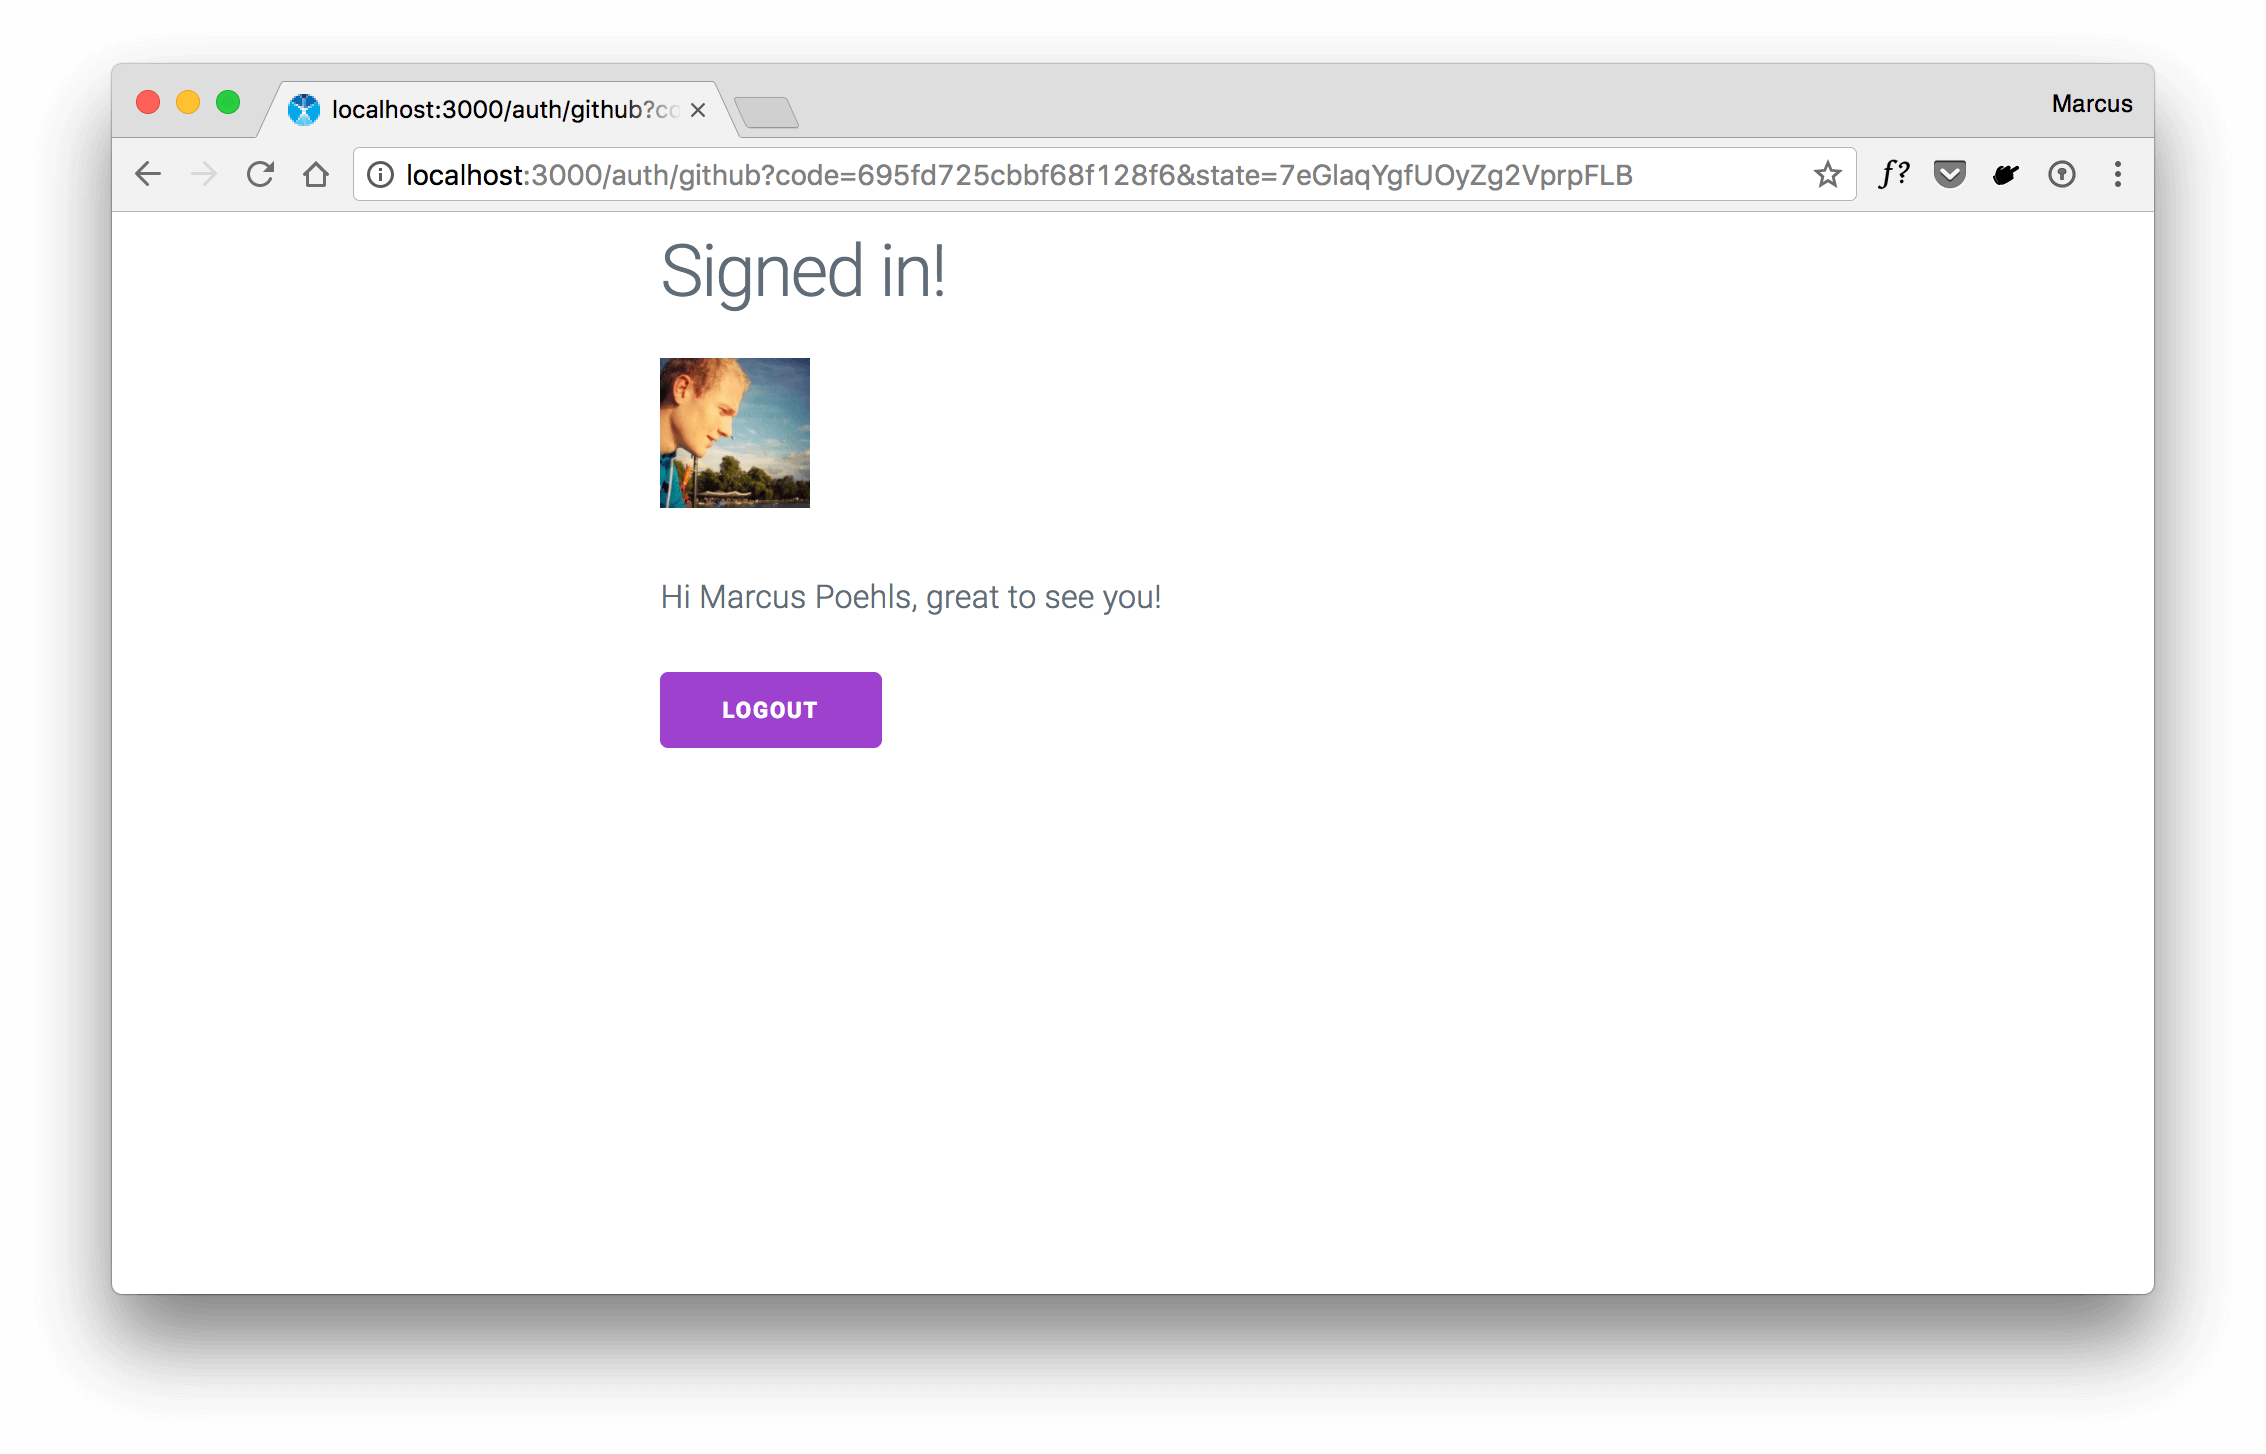
The sample application shows a simple greeting and your GitHub avatar. We’ve also added an extra functionality to save a cookie and remember the user’s login.
The following paragraph shows you how to leverage hapi-auth-cookie to remember the user.
Remember the User with hapi-auth-cookie
The downside of the previous implementation is that all requests to your routes that require the github authentication strategy will do the roundtrip to GitHub and get back to your route handler once the OAuth flow finished.
Add a second authentication strategy that uses a session cookie for authentication. Combine 3rd party authentication with bell and hapi-auth-cookie by using a cookie that gets set once your GitHub authentication is successful.
Therefore, extend the authentication plugin from above with a new session strategy:
async function register (server, options) {
  // declare and install dependency to bell
  await server.register([
    {
      plugin: require('bell')
    },
    {
      plugin: require('hapi-auth-cookie')
    }
  ])

  /**
   * Register 'github' authentication strategy
   */
  server.auth.strategy('github', 'bell', {
    provider: 'github',
    password: 'ThisIsASecretCookiePasswordForGitHub',
    clientId: 'your-client-id',
    clientSecret: 'your-client-secret',
    isSecure: process.env.NODE_ENV === 'production'
  })


  /**
   * Register session based auth strategy to store
   * credentials received from GitHub and keep
   * the user logged in
   */
  server.auth.strategy('session', 'cookie', {
    password: 'ThisIsASecretPasswordForTheAuthCookie',
    redirectTo: '/',
    isSecure: process.env.NODE_ENV === 'production'
  })

  server.log('info', 'Plugin registered: bell authentication with strategy »github«')
}

exports.plugin = {
  register,
  name: 'authentication',
  version: '1.0.0',
  once: true
}
With the session strategy in place, you can add a single line of code to your route handler on path /auth/github to store the desired data and remember the user.
server.route({
  method: 'GET',
  path: '/auth/github',
  config: {
    auth: 'github',
    handler: (request, h) => {
      if (request.auth.isAuthenticated) {
        const user = request.auth.credentials.profile
        const data = {
          name: user.displayName,
          username: user.username,
          avatar: user.raw.avatar_url
        }

        request.cookieAuth.set(data)     // <-- new line to set the session cookie

        return h.view('authenticated', data)
      }

      return h.view('index', {
        error: 'Could not authenticate with GitHub.'
      }).code(400)
    }
  }
})
Now you can use the session strategy for all routes that require authentication. Check for an existing cookie and use the stored data.
The snippet above saves the name, username, and avatar properties into the session cookie. You can add other fields as well.
Sample Code and Project
We’ve published a sample project for this tutorial on GitHub containing the code that is used to integrate a hapi project with GitHub. If you feel stuck with the integration in your own application, sneak at our code snippets to get a grasp on how to do the connection. We hope that helps :)
Outlook
This extensive tutorial guided you on how to integrate your hapi application with a third party service using OAuth. You don’t have to implement your own sign-up and log in flow, benefit from integrations with other apps.
In the next tutorial, we’ll show you how to extend existing user profiles of your platform with data from OAuth applications. Precisely, you’ll learn how to connect a user of your platform with its GitHub account to get an API token that can be used for subsequent requests.
With hapi you can benefit from the integrated “scope” feature that lets you restrict access. That’s what the next tutorial is all about: restrict user access with scopes.
We’re happy to hear your thoughts and comments. Please don’t hesitate to use the comments below or find us on Twitter @futurestud_io. Let us know what you think!
Enjoy coding & make it rock!