Sending emails from your application is a beneficial feature. In situations where a user signs up for your platform or wants to reset the password, use their attention. Welcome emails should have a single, targeted call to action.
The foundations of all the tactics to use the user’s attention is the actual email sending process. This is what you’ll implement in Futureflix. With the existing signup functionality, you’ll use the opportunity to send a welcoming email to your platform.
hapi Series Overview
- What You’ll Build
- Prepare Your Project: Stack & Structure
- Environment Variables and Storing Secrets
- Set Up MongoDB and Connect With Mongoose
- Sending Emails in Node.js
- Load the User’s Profile Picture From Gravatar Using Virtuals in Mongoose
- Implement a User Profile Editing Screen
- Generate a Username in Mongoose Middleware
- Displaying Seasons and Episodes for TV Shows with Mongoose Relationship Population
- Implementing Pagination for Movies
- Implement a Watchlist
- Create a Full Text Search with MongoDB
- Create a REST API with JSON Endpoints
- Update Mongoose Models for JSON Responses
- API Pagination for TV Shows
- Customize API Endpoints with Query Parameters
- Always Throw and Handle API Validation Errors
- Advanced API Validation With Custom Errors
- Create an API Documentation with Swagger
- Customize Your Swagger API Documentation URL
- Describe Endpoint Details in Your Swagger API Documentation
- 10 Tips on API Testing With Postman
- JWT Authentication in Swagger API Documentation
- API Versioning with Request Headers
- API Login With Username and Password to Generate a JWT
- JWT Authentication and Private API Endpoints
- Refresh Tokens With JWT Authentication
- Create a JWT Utility
- JWT Refresh Token for Multiple Devices
- Check Refresh Token in Authentication Strategy
- Rate Limit Your Refresh Token API Endpoint
- How to Revoke a JWT
- Invalidate JWTs With Blacklists
- JWT Logout (Part 1/2)
- JWT “Immediate” Logout (Part 2/2)
- A Better Place to Invalidate Tokens
- How to Switch the JWT Signing Algorithm
- Roll Your Own Refresh Token Authentication Scheme
- JWT Claims 101
- Use JWT With Asymmetric Signatures (RS256 & Co.)
- Encrypt the JWT Payload (The Simple Way)
- Increase JWT Security Beyond the Signature
- Unsigned JSON Web Tokens (Unsecured JWS)
- JWK and JWKS Overview
- Provide a JWKS API Endpoint
- Create a JWK from a Shared Secret
- JWT Verification via JWKS API Endpoint
- What is JOSE in JWT
- Encrypt a JWT (the JWE Way)
- Authenticate Encrypted JWTs (JWE)
- Encrypted and Signed JWT (Nested JWT)
- Bringing Back JWT Decoding and Authentication
- Bringing Back JWT Claims in the JWT Payload
- Basic Authentication With Username and Password
- Authentication and Remember Me Using Cookies
- How to Set a Default Authentication Strategy
- Define Multiple Authentication Strategies for a Route
- Restrict User Access With Scopes
- Show „Insufficient Scope“ View for Routes With Restricted Access
- Access Restriction With Dynamic and Advanced Scopes
- hapi - How to Fix „unknown authentication strategy“
- Authenticate with GitHub And Remember the Login
- Authenticate with GitLab And Remember the User
- How to Combine Bell With Another Authentication Strategy
- Custom OAuth Bell Strategy to Connect With any Server
- Redirect to Previous Page After Login
- How to Implement a Complete Sign Up Flow With Email and Password
- How to Implement a Complete Login Flow
- Implement a Password-Reset Flow
- Views in hapi 9 (and above)
- How to Render and Reply Views
- How to Reply and Render Pug Views (Using Pug 2.0)
- How to Create a Dynamic Handlebars Layout Template
- Create and Use Handlebars Partial Views
- Create and Use Custom Handlebars Helpers
- Specify a Different Handlebars Layout for a Specific View
- How to Create Jade-Like Layout Blocks in Handlebars
- Use Vue.js Mustache Tags in Handlebars Templates
- How to Use Multiple Handlebars Layouts
- How to Access and Handle Request Payload
- Access Request Headers
- How to Manage Cookies and HTTP States Across Requests
- Detect and Get the Client IP Address
- How to Upload Files
- Quick Access to Logged In User in Route Handlers
- How to Fix “handler method did not return a value, a promise, or throw an error”
- How to Fix “X must return an error, a takeover response, or a continue signal”
- Query Parameter Validation With Joi
- Path Parameter Validation With Joi
- Request Payload Validation With Joi
- Validate Query and Path Parameters, Payload and Headers All at Once on Your Routes
- Validate Request Headers With Joi
- Reply Custom View for Failed Validations
- Handle Failed Validations and Show Errors Details at Inputs
- How to Fix AssertionError, Cannot validate HEAD or GET requests
Overview
Sending emails for your application doesn’t require a complete in- and outbound email handling. You don’t want to implement a Gmail clone. Make use of an email delivery service like Postmark, Mailgun, Sparkpost, SendGrid or any other.
Depending on the number of emails you’re going to send, a specific platform might have cost benefits over another.
Compare the platforms and ultimately decide on your favorite one. The next step is to sign up for an email delivery service.
Sign Up for an Email Delivery Service
There’s one thing you should know: you can use your personal email account to send emails from your Futureflix app. To go this way, use the SMTP credentials of your email account.
Using your private email account isn’t the best choice because you’re restricted in the number of emails to send within a given timeframe. The mail providers don’t want you to send transactional emails to another platform. In case you do, they may disable your account.
At the time of writing this tutorial, Postmark and Mailgun have either a free plan or credits included. We’re using Mailgun at Future Studio to send welcome emails to new Future Students.
Sign up for the service you prefer. The number of emails included in both services, Postmark and Mailgun, will hopefully last for some time. At least to get a grasp on email sending.
Creating a Server at Postmark
For Futureflix, I’ve decided to check out Postmark and give it a spin 😁
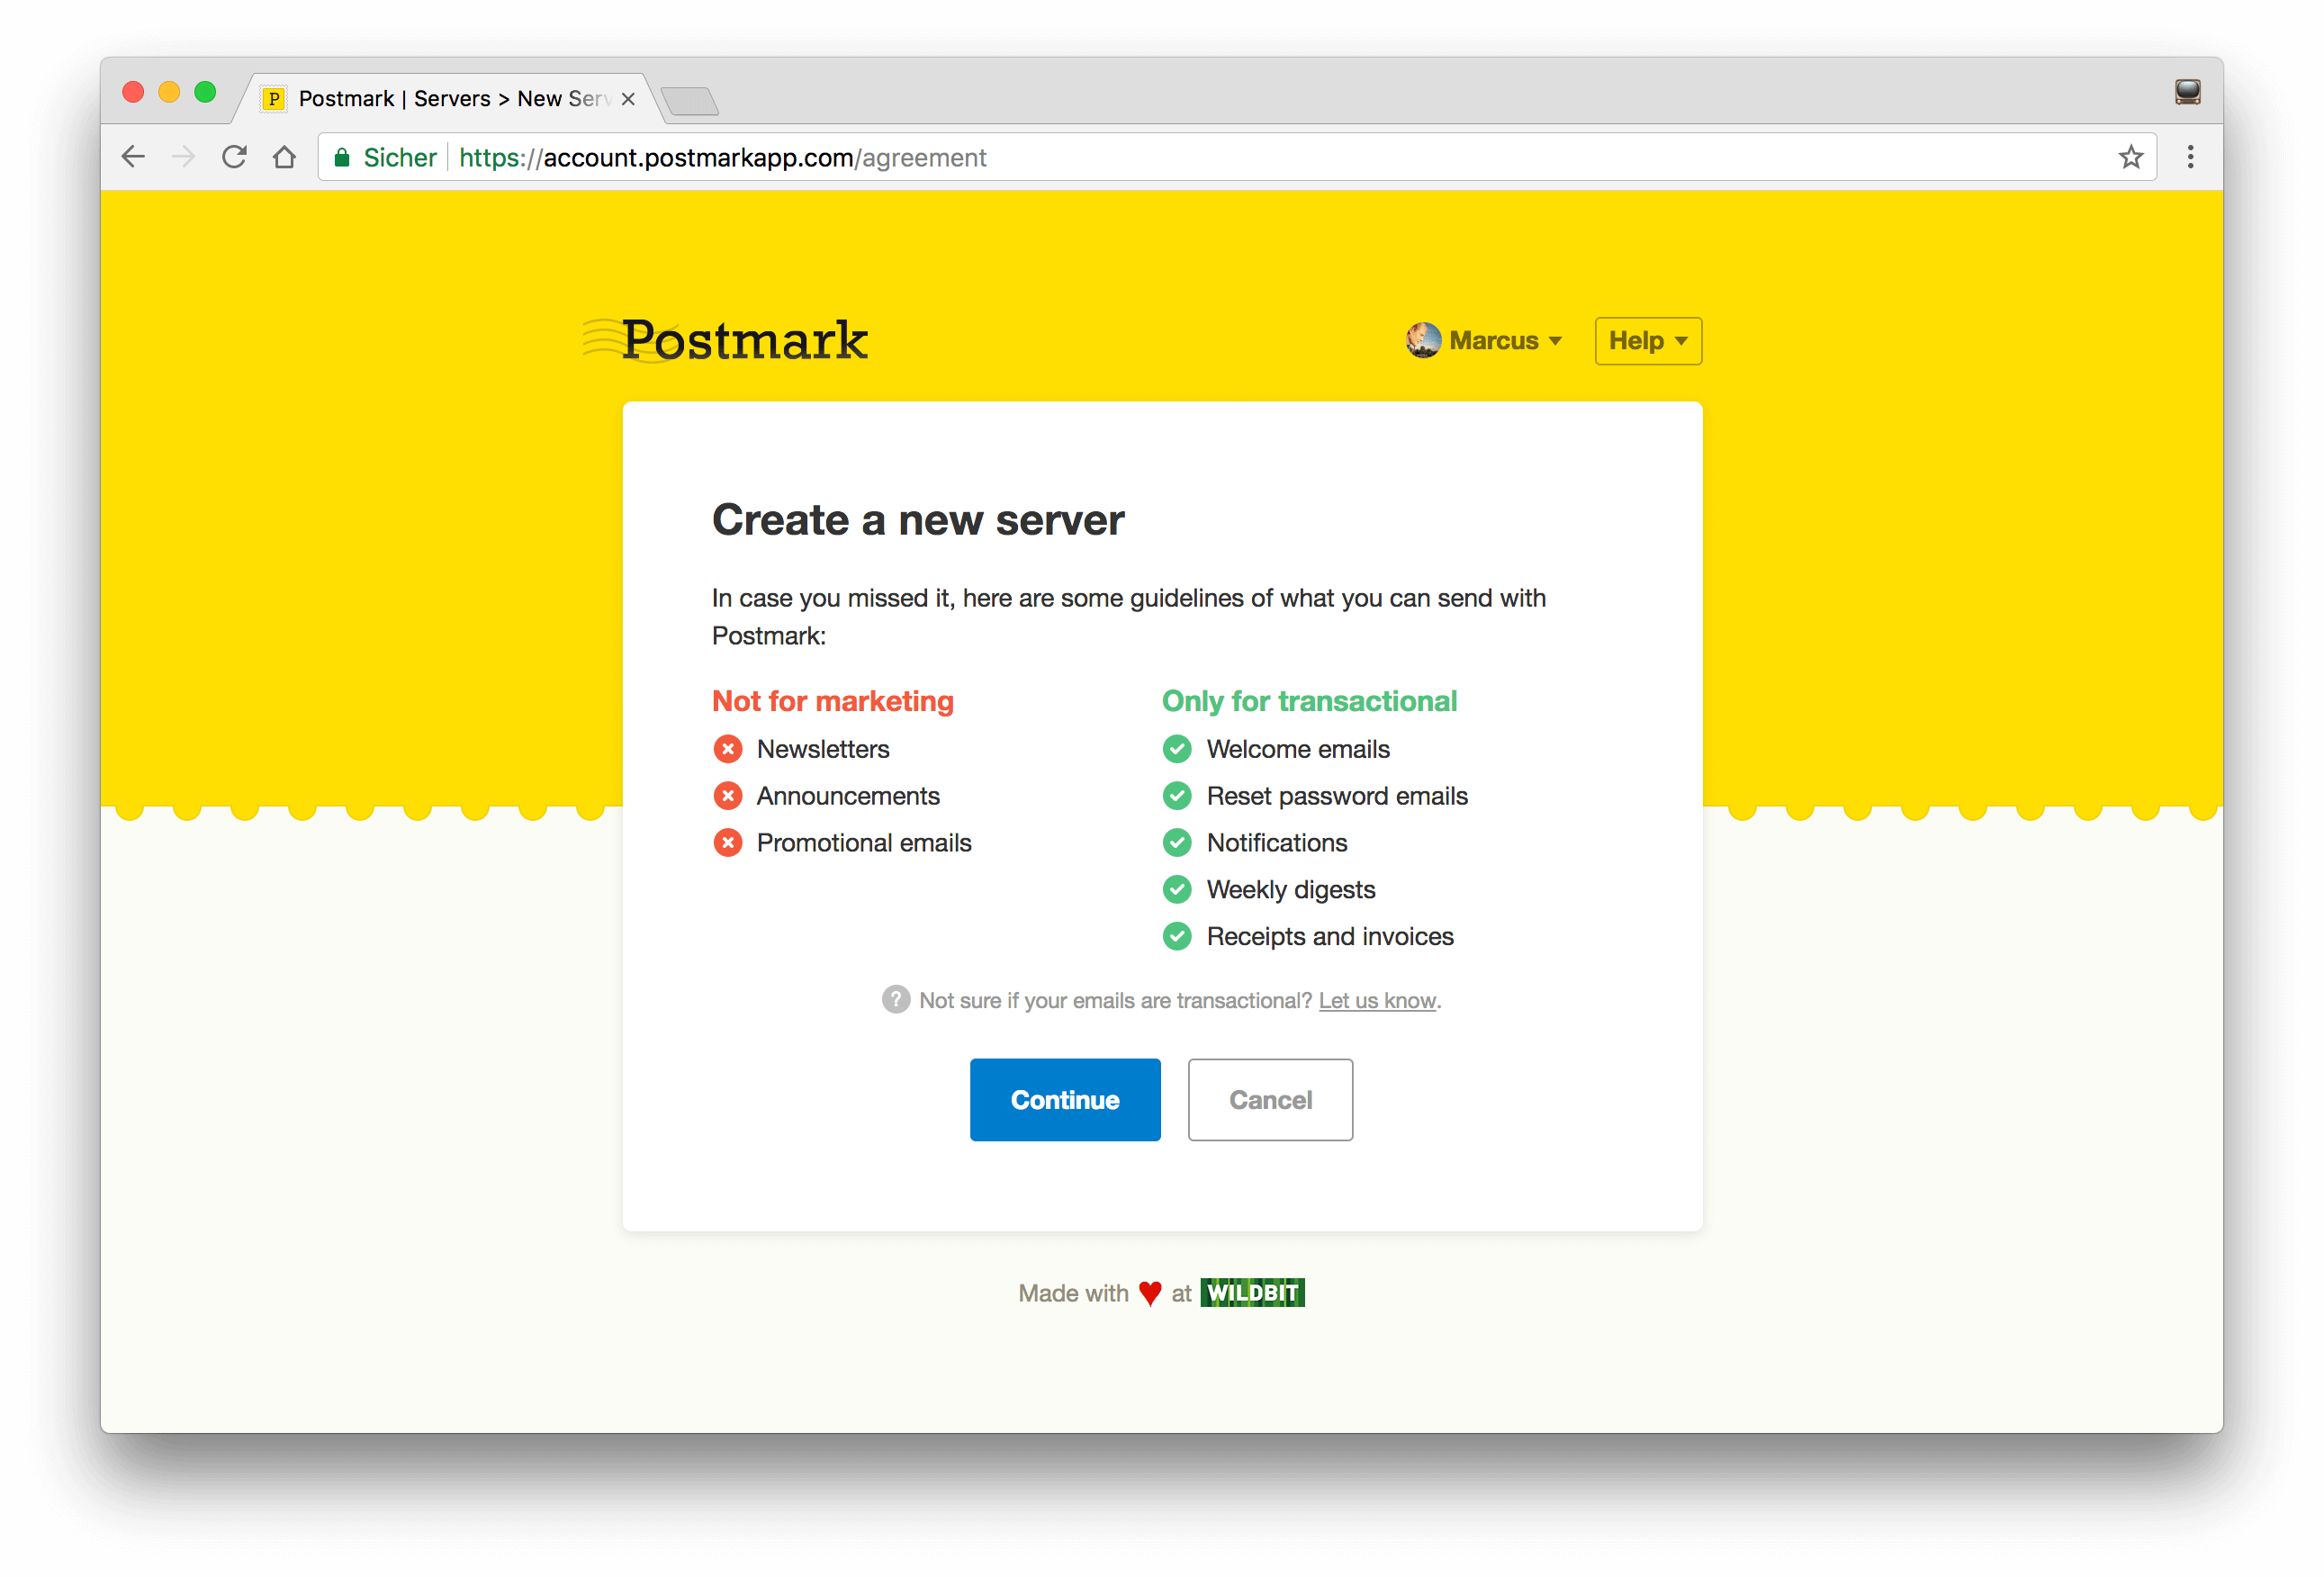
With Postmark, you’re going through an onboarding process that requires a coworker on their side to approve you. If you don’t want to wait for this approval process, choose Mailgun.
At Postmark, you receive a credit volume of 25,000 emails. This will last for a while. Create a server at Postmark after the successful approval. This server is a representation of credentials that you’ll use to send emails.
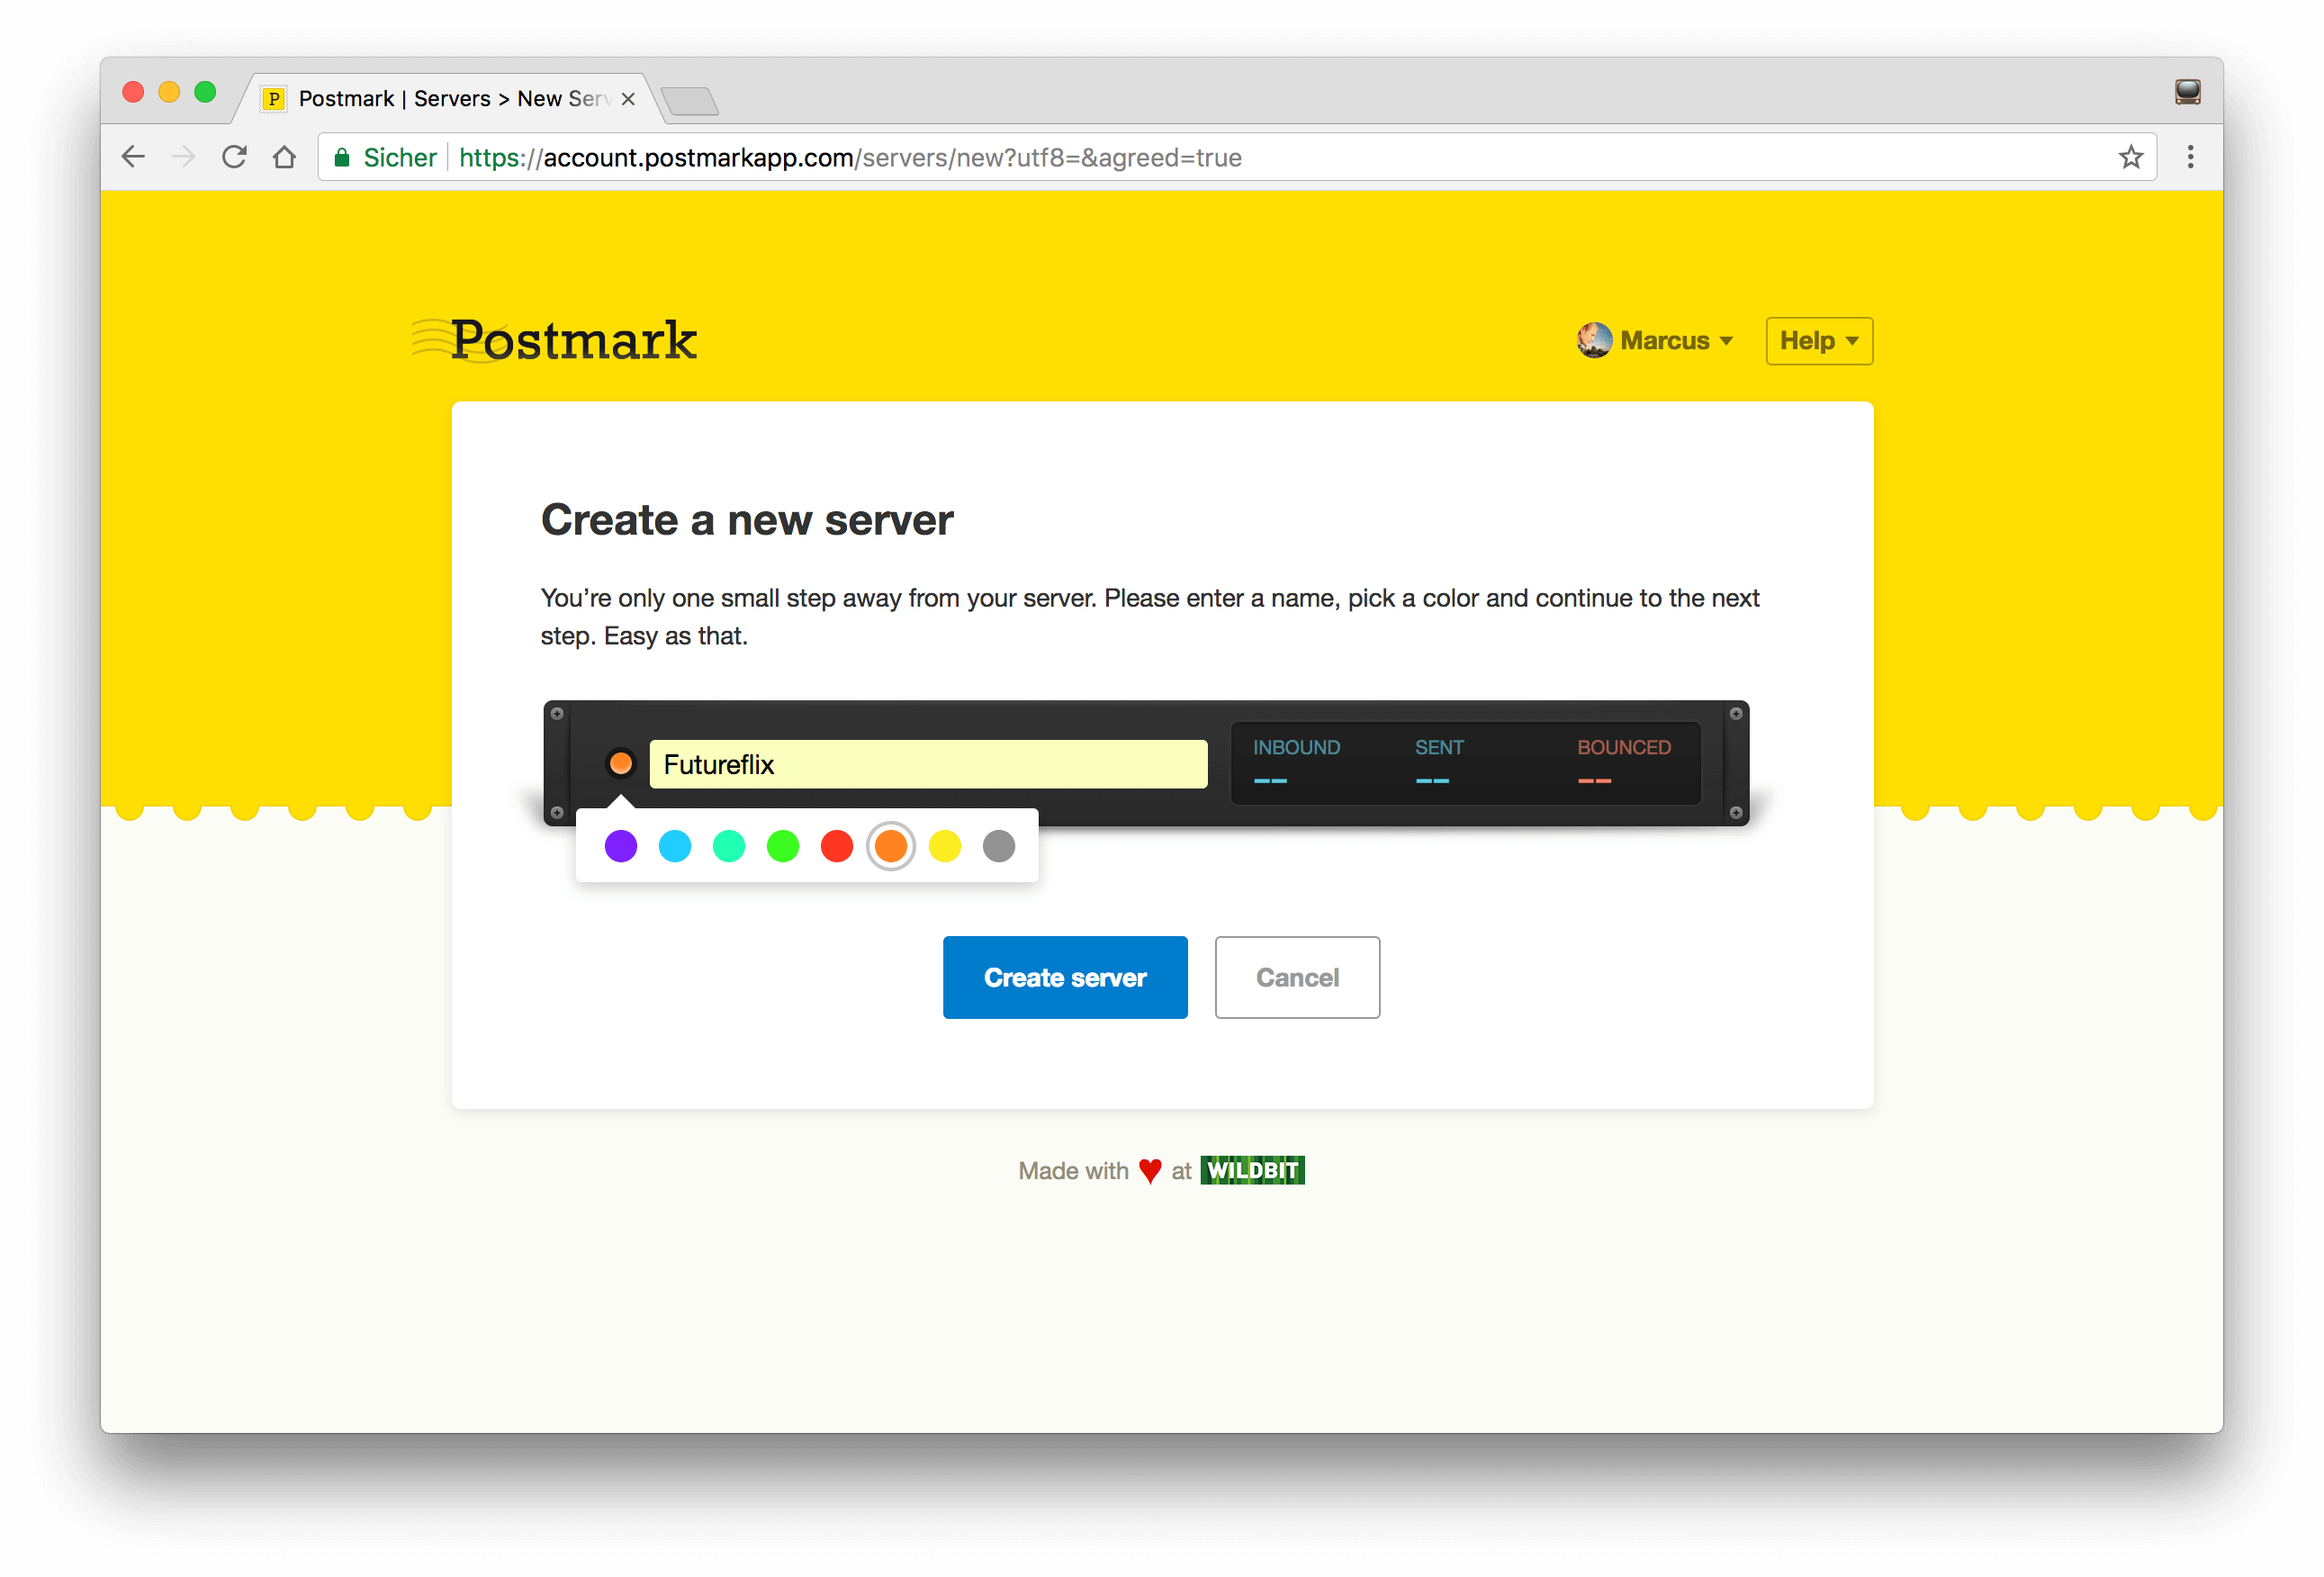
I’m calling my Postmark server “Futureflix” and assign the orange color.
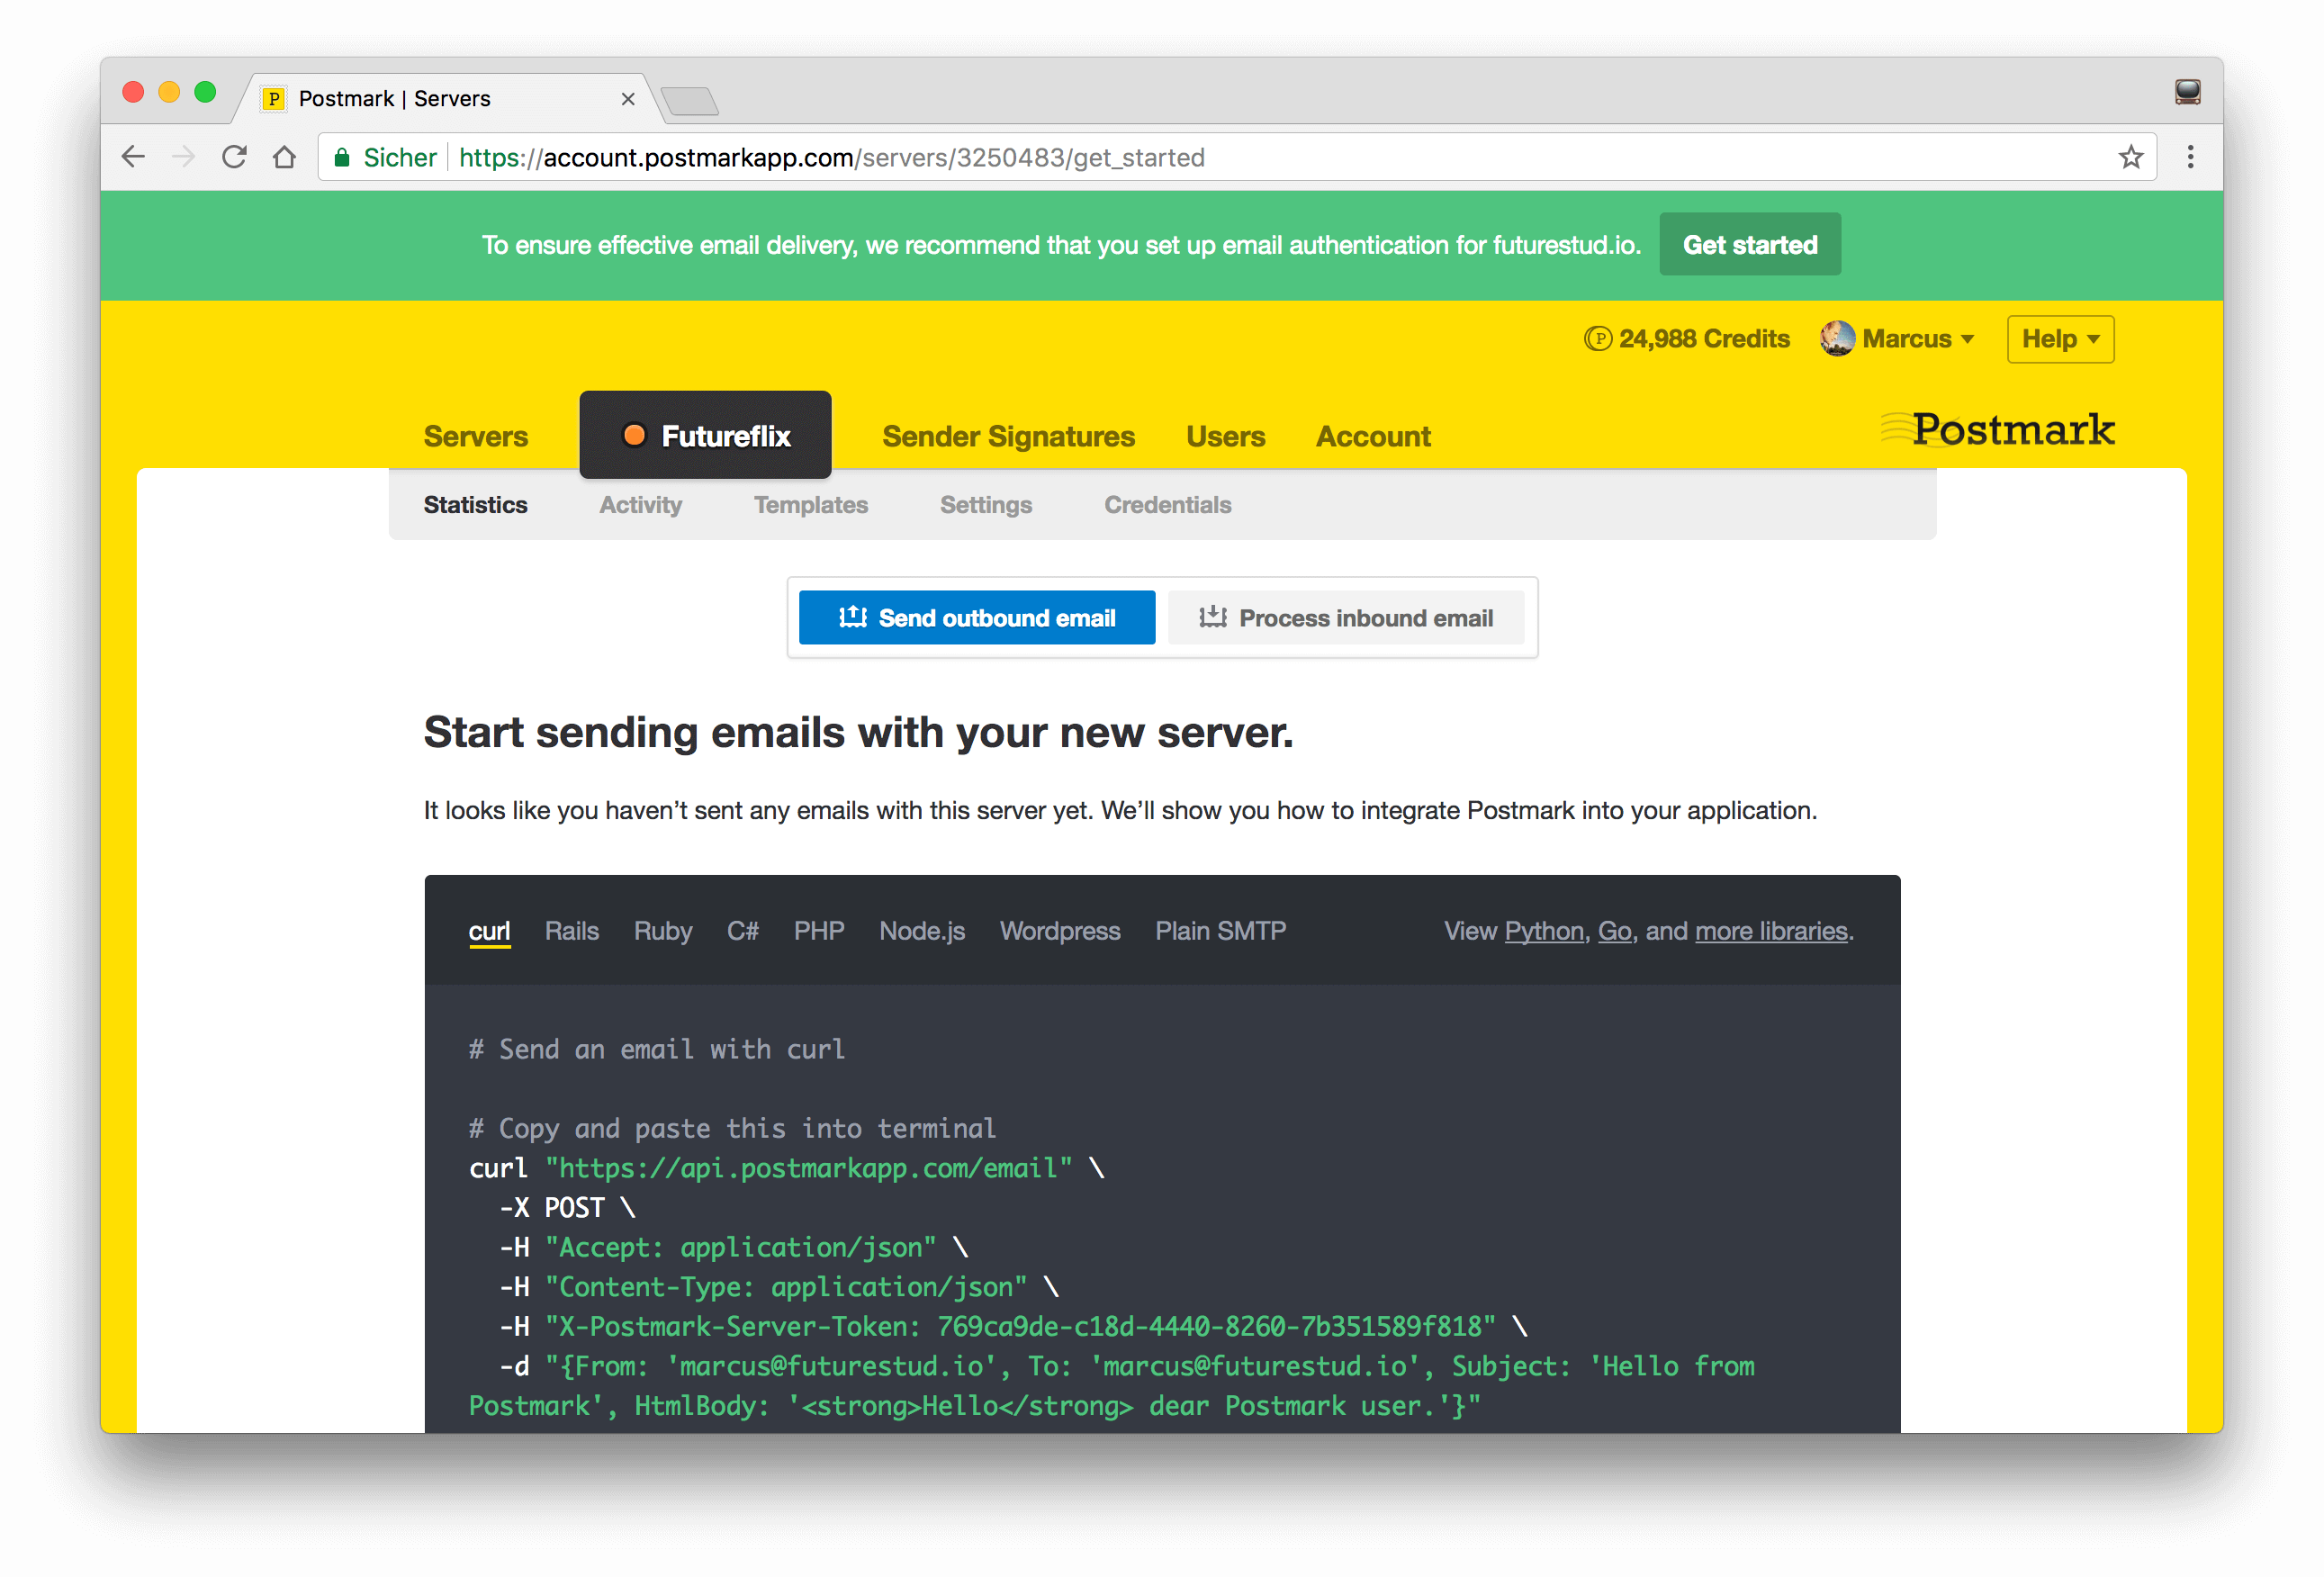
Click the „Create Server“ button to finish the process. You’ll see the created server and a code block on how to send your first email with Postmark. If you want to try the mail sending process, go ahead and use the cURL statement. It’s working!

For Futureflix, you’re interested in the Postmark API token. You can see it already within the cURL statement. Navigate to the “Credentials” link in the sub-navigation and check the “Server API” section.
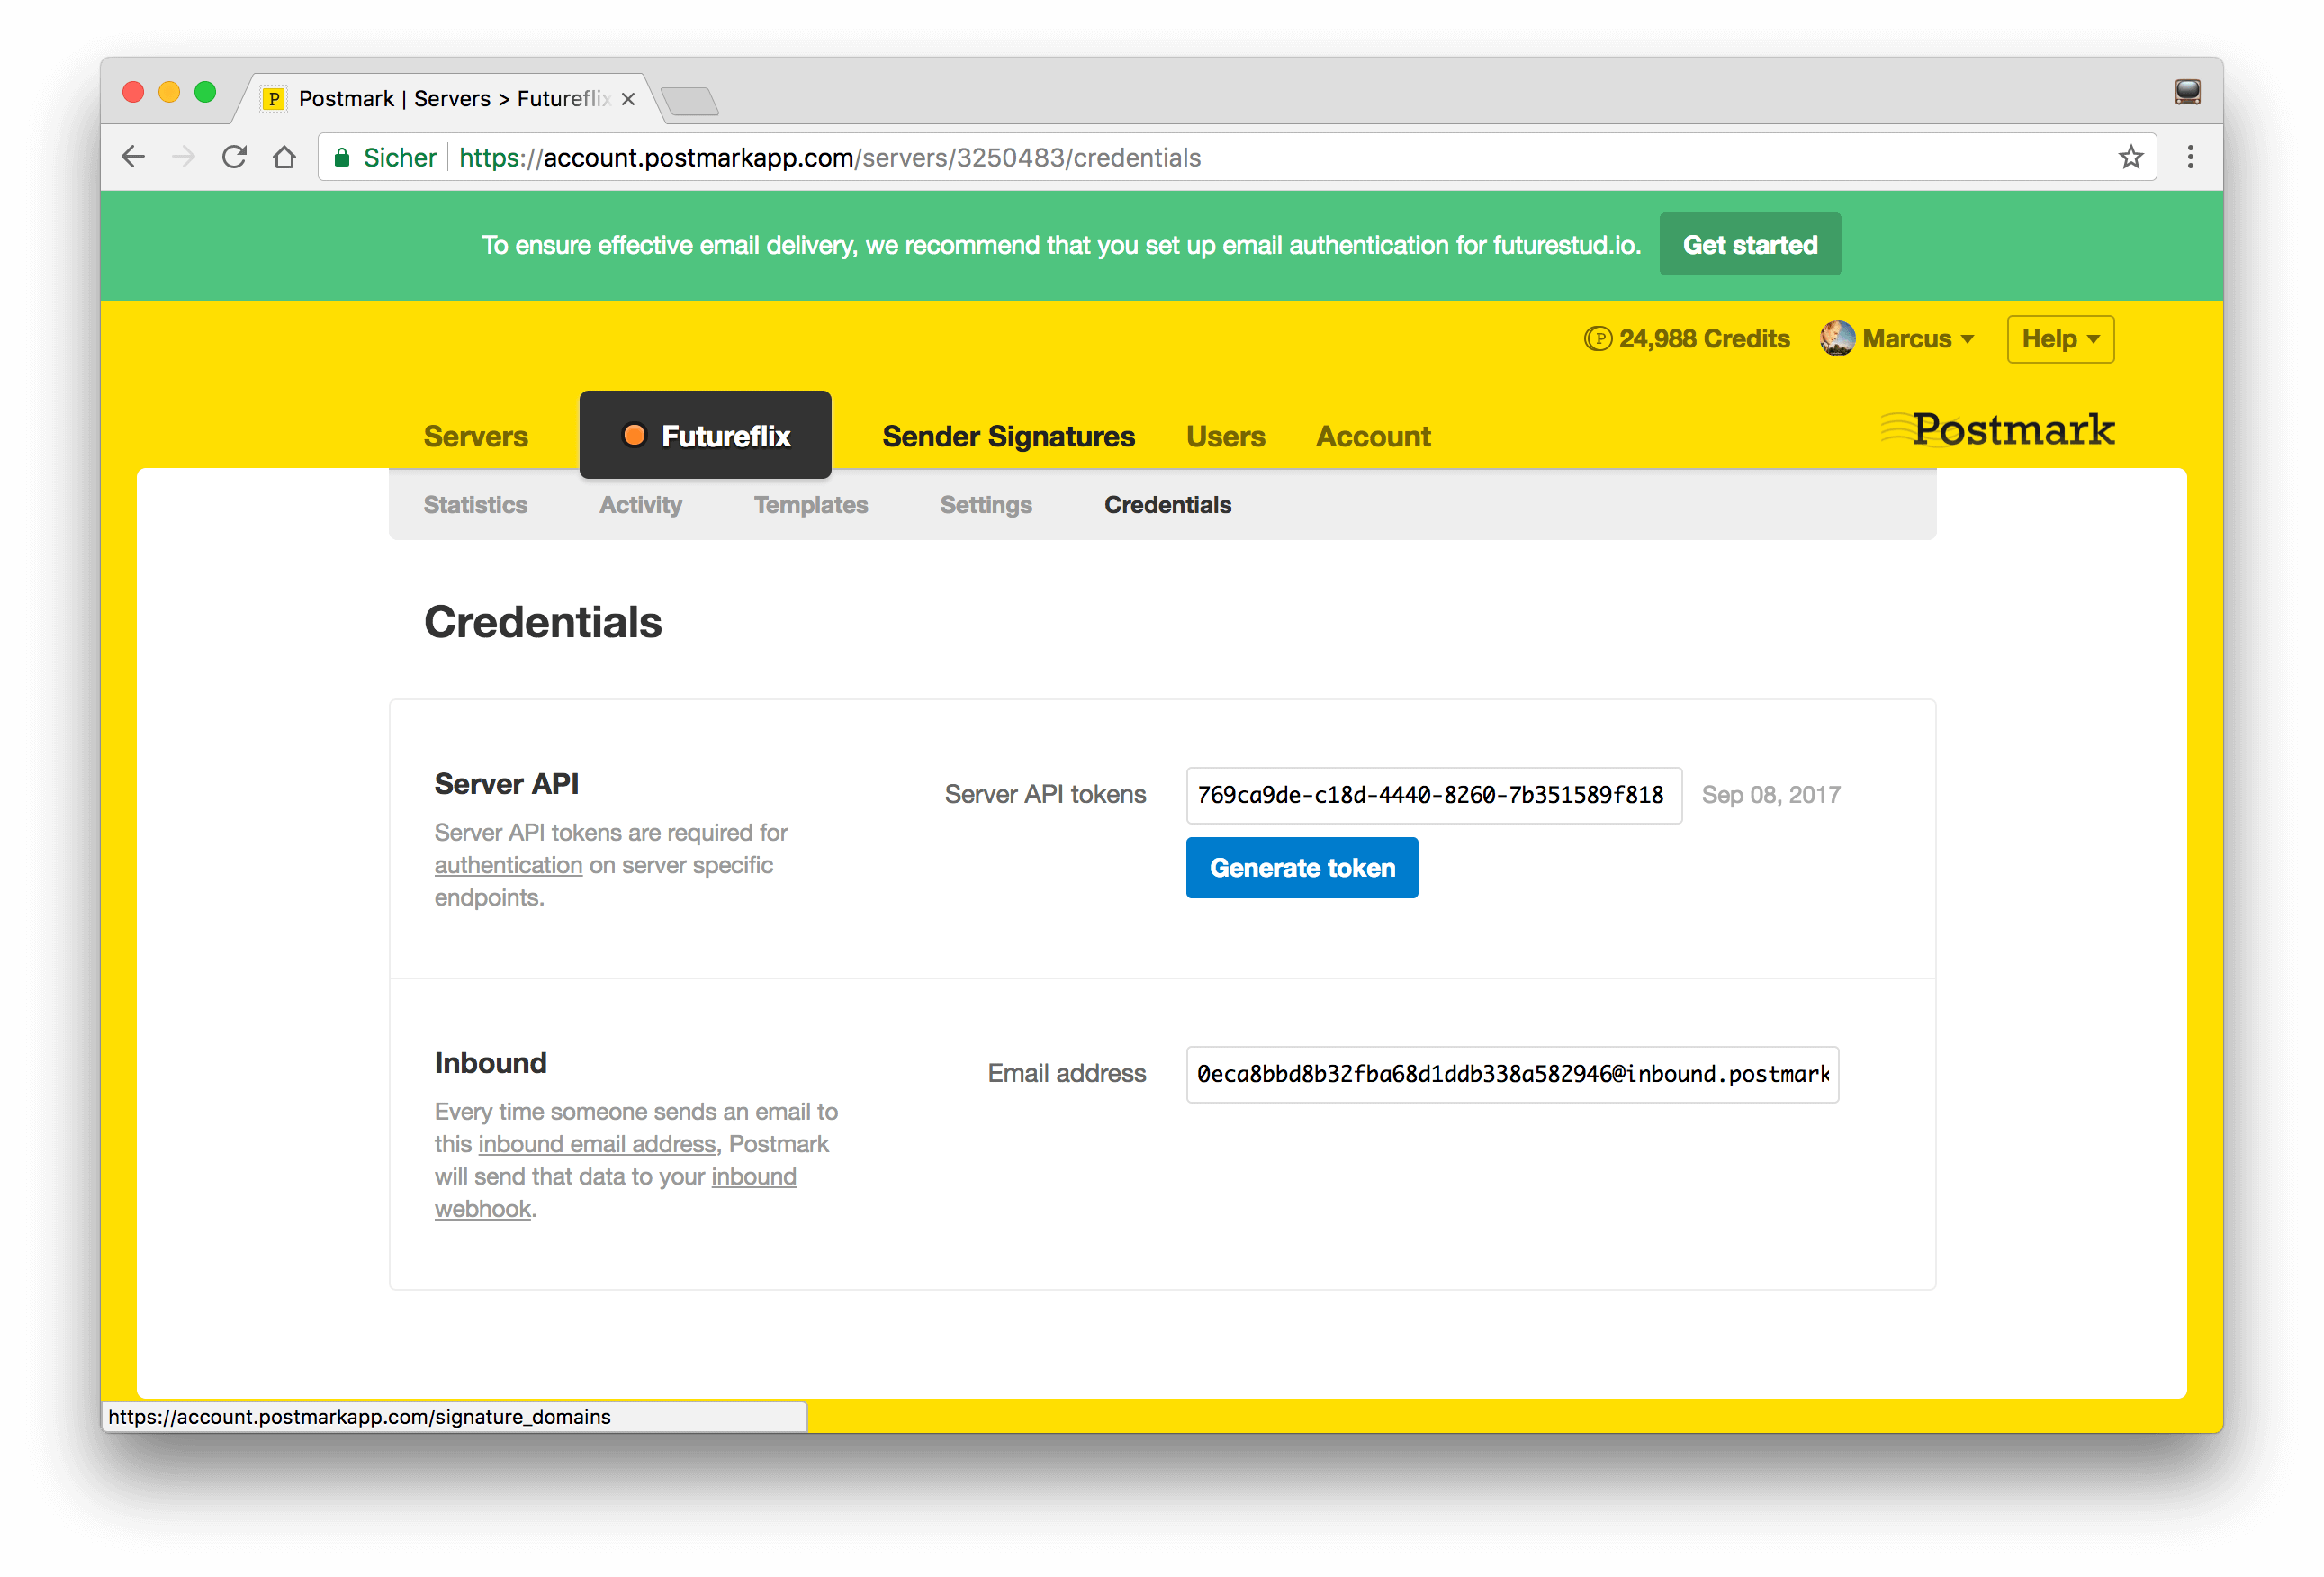
There’s the API token that you’ll need in the next section. Alright, go ahead and create your mailer in Node.js and connect it with your Postmark account.
The Mailer Utility
The Futureflix starter kit comes with a set of utilities. One of them is the mailer which helps you sending emails to users directly from the project. This said, you don’t need to implement the mailer yourself, but you should know what it does.
You’ll use the Nodemailer package to send emails in Node.js. This library gives you a simple interface to send emails from your application. The single Nodemailer requirement is Node.js v6 or later.
Nodemailer builds on the concept of transports to send emails. The main transporter is SMTP. Besides that, there are dozens of transporters for services like Postmark, Mailgun, Sendgrid, Amazon’s Simple Email Service (Amazon SES). At this point, NPM hosts 60 nodemailer transport packages.
If you decided to go with another email service than Postmark, replace the nodemailer-postmark-transporter with the email service of your choice.
npm i -S nodemailer nodemailer-postmark-transport
Nodemailer is written ES2015 (ES6), dependency-free, ships with Unicode support for emojis 👌, and does a great job of giving you a helping hand by hiding all technical depth.
Connect Nodemailer With Postmark
In the previous section, you’ve installed the nodemailer and nodemailer-postmark-transport packages. Here, connect both packages within the mailer utility. Speaking of connecting, the mailer uses the POSTMARK_API_KEY environment variable. Create it in your secrets.env file with your Postmark API key (from the screenshot above).
Again, if you’re with another email service than Postmark, adapt this solution. For SMTP, you need to define other environment variables, like MAIL_HOST, MAIL_PORT, MAIL_USER and MAIL_PASS.
secrets.env
# MongoDB
# the data store for everything :)
DATABASE=mongodb://localhost/futureflix

# Postmark API Key
# SMTP service to send emails from this project
POSTMARK_API_KEY=your-postmark-key
With this Postmark API key, you’ll build a transporter to ultimately send emails.
The nodemailer-postmark-transport package connects to Postmark with the given API key. For the sending process, you need to provide the email’s recipient, subject, body, and attachments. This is the job of the mailer itself. Check it out in the following paragraph.
The Mailer
It’s time to jump right into the mailer utility. Navigate to the utils directory and open the mailer.js. The mailer isn’t a dedicated hapi plugin, although it could be. Keeping it outside a hapi plugin, you can adapt and even copy it to any other Node.js project 😃
The mailer executes the following steps:
- Read and render the email template
- Prepare the mail configuration: from and to recipients, subject line, mail body
- Send the email
At the file’s top (in the following code block), you’ll see the package imports and Transporter creation. The Postmark transporter requires the API key, taken from the environment variable. You’ve already added the variable to your secrets.env environment file.
The email templates can have placeholders for dynamic content. To render them, you’ll use the Handlebars template engine. This allows you to dynamically add user-specific data and give each mail a personal touch.
Got it, you want to see the mailer’s code 😉
utils/mailer.js
'use strict'

const Fs = require('fs')
const Path = require('path')
const Boom = require('boom')
const Util = require('util')
const Nodemailer = require('nodemailer')
const Handlebars = require('handlebars')
const htmlToText = require('html-to-text')
const ReadFile = Util.promisify(Fs.readFile)
const PostmarkTransport = require('nodemailer-postmark-transport')
const Transporter = Nodemailer.createTransport(PostmarkTransport({
  auth: {
    apiKey: process.env.POSTMARK_API_KEY
  }
}))
const Templates = Path.resolve(__dirname, '..', 'email-templates')

/**
 * filename: email template name, without ".html" file ending. Email templates are located within "server/email-templates"
 * options: data which will be used to replace the placeholders within the template
 **/
async function prepareTemplate (filename, options = {}) {
  try {
    const templatePath = Path.resolve(Templates, `${filename}.html`)
    const content = await ReadFile(templatePath, 'utf8')

    // use handlebars to render the email template
    // handlebars allows more complex templates with conditionals and nested objects, etc.
    // this way we have much more options to customize the templates based on given data
    const template = Handlebars.compile(content)
    const html = template(options)

    // generate a plain-text version of the same email
    const text = HtmlToText.fromString(html)

    return {
      html,
      text
    }
  } catch (error) {
    throw new Boom('Cannot read the email template content.')
  }
}

exports.send = async (template, user, subject, data) => {
  const { html, text } = await prepareTemplate(template, data)
  const mailOptions = {
    from: `Marcus Poehls <marcus@futurestud.io>`,
    to: user.email,
    subject: subject,
    html,
    text
  }

  try {
    await Transporter.sendMail(mailOptions)
  } catch (err) {
    console.log(err)
  })
}
The entry point to the Mailer is a named export called send. Calling Mailer.send(…) from a route handler in hapi will turn on the engines to render specific data into the template. The rendered HTML and text are part of the email configuration which Nodemailer requires to send the mail.
Make sure to update the from field in the mailOptions. In case you forget to update this field and use the current configuration, you might run into this error:
{ status: 422,
  message: 'The \'From\' address you supplied ("Marcus Poehls" <marcus@futurestud.io>) is not a Sender Signature on your account. Please add and confirm this address in order to be able to use it in the \'From\' field of your messages.',
  code: 400 }
Seeing this error? Update the from address to an allowed sender signature from your email service
Within the send method, the created transporter sends an email with the composed mailOptions. If you don’t specify a callback as the second argument for Nodemailer’s sendMail function, it returns a promise. You can see that there’s only a catch block to handle the error situation. For now, it’s ok to leave the control flow as is. You’ll get back to that in a later tutorial.
Before sending any email, you need a template. This is the next step, preparing the welcome email’s template.
Prepare the “Welcome” Email Template
The template is an important piece of your email puzzle. You want it to look nicely designed with good copy text and at the same time not being to marketing like. Also, there’s a wide variety of email clients you want to support so that your email displays on every app and display size.
The great news: you don’t have to create a template from scratch. Postmark supports you with nine templates for different occasions. Mailgun has three action templates, tested in popular email clients. All templates are responsive, well tested, and work fine on mobile and desktop.
We suggest taking the templates with inlined styles because they have better support in email clients.
Create the Email Template
For the welcome email, we take Postmark’s welcome HTML template and customize the content. This welcome.html template is already part of the Futureflix starter kit. Find it in server/email-templates. Because it’s an HTML file, you can open it in the browser to get a grasp on the styling.
Refine the Email Template’s Content
If you want to adjust the template’s content, wording, and styling: please go ahead 😉 Customize the template to your wishes.
Keep in mind that Google might put your email into Gmail’s promotions tab if it contains images. The provided template doesn’t have any image and should go straight to Gmail’s main tab. The promotions tab in Gmail has a negative impact on the open rates. Try your best to not land there.
Render Email Template and Fill with Data
You probably had a look at the welcome.html email template. If you didn’t, please open it now. You can also check it out on GitHub.
You’ll recognize the use of mustache tags, e.g. {{discoverURL}}. The reason for that: the mailer uses the Handlebars templating engine to dynamically render data into the template.
Put placeholders into your email templates and dynamically render data into them. The mailer utility passes your provided data object straight to the view. Handlebars takes care of replacing the related placeholders with the object’s data.
In the welcome.html template, there’s a button with a call to action. The link to this button is dynamic and you need to provide it while rendering. The placeholder in the email looks like this:
<a href="{{discoverURL}}" class="button button--" target="_blank" style="…">
  Discover movies and TV shows
</a>
Provide the {{discoverURL}} in the data object for this email template. You know what, this is the right time to integrate the welcome email dispatch into the signup flow.
Send the “Welcome” Email on Each Sign-Up
Your project is ready to send the welcome email to users to sign up. Navigate to the user-signup-login plugin within the server directory and open the handler.js file.
Import the mailer utility at the top of this handler.js file.
Find the signup object and extend the related handler. Remember the discoverURL for the action button within the welcome email? Depending on your development or production deployment, you might want to send a different URL. Use the host property within the request headers to define the host part of the URL.
Send the welcome email using the Mailer and define the parameters: template name, the user object, subject line and template data.
web/user-signup-login/handler.js
…
const Mailer = require('../utils/mailer')

…

signup: {
  plugins: { 'hapi-auth-cookie': { redirectTo: false } },
  handler: (request, reply) => {
      // skipping to the interesting part
      // …

    try {
      const user = await user.save()
      request.cookieAuth.set({ id: user.id })

      const discoverURL = `http://${request.headers.host}/discover`
      Mailer.send('welcome', user, '📺 Futureflix — Great to see you!', { discoverURL })

      // \o/ wohoo, sign up successful
      return reply.view('signup-success')
    } catch (err) {
      …
    }
  },
  validate: { … }
}
At this point, the mailer integration is in style of “fire and forget”. You don’t integrate the promise of Mailer.send() in the signup promise chain. In case an error occurs while sending the email, the mailer logs the error and the request proceeds.
This design decision proceeds with the actual sign up and doesn’t prioritize the welcome email over the account creation.
A Word of “Email Sending Wisdom” 😌
The implementation in this tutorial doesn’t wait for Postmark to finish its operation. You’re not making sure the email is actually sent to the user. The reason is to favor the successful signup and guide the user on your platform instead of showing an error related to a welcome email that wasn’t delivered.
If you integrate the mail sending process into the signup promise chain and the Postmark servers are unresponsive or unavailable, the signup process would fail and return an error. You don’t want a signup error if the user account is created in MongoDB. The thing that should happen in this situation is a delayed welcome mail, but a user should see their successful signup.
You’ll change this behavior of email sending in a later tutorial. You’ll use a queue and integrate the email delivery as a queued job. Another benefit of handling your emails via queues is the free retries for failed sending attempts. The queuing system handles errors the way you want it to be, like a delayed retry.
Register a User and Receive the Welcome Email
Yeah, it’s time to test the implementation. Start your Futureflix server and navigate to the signup page. Register a user with an email address that you’ve access to. In case you’ve already registered a user with your email address, delete the one from MongoDB with Robo 3T and sign up again.
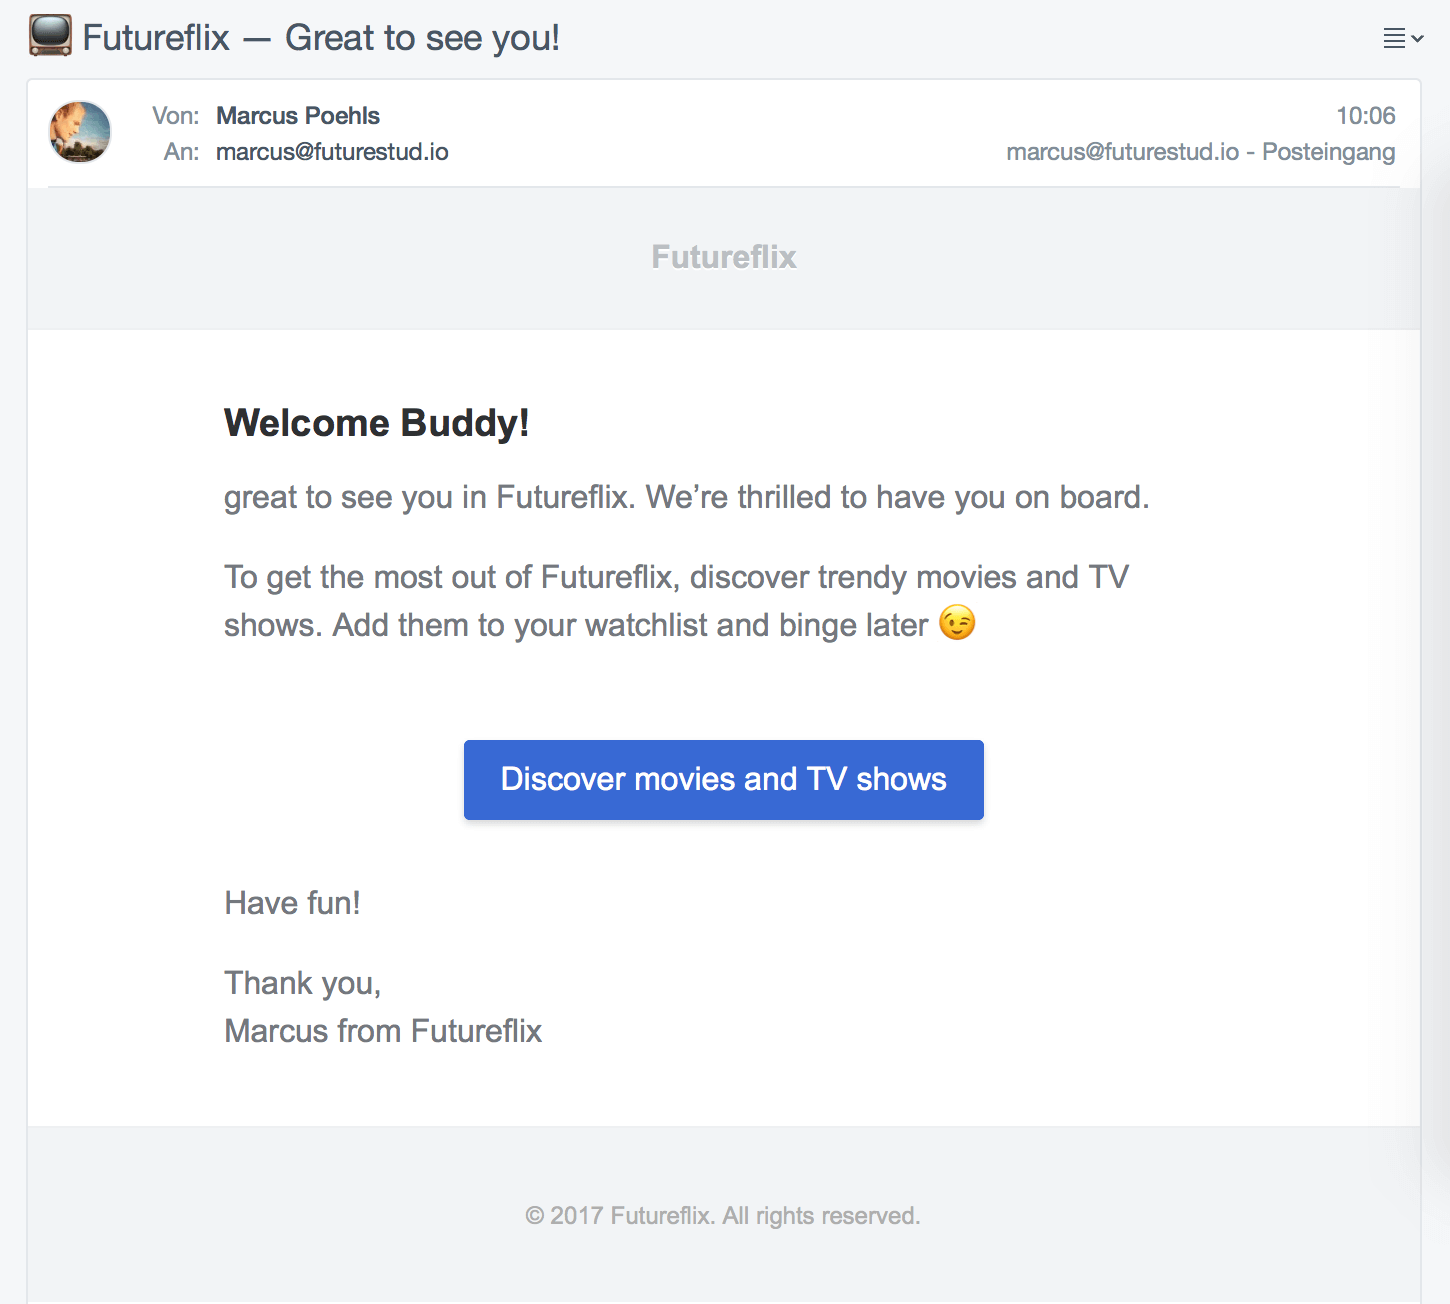
This is what the welcome email looks like in Postbox. A call to action in the welcome email is a good chance to navigate users to specific pages in your app. Use the user’s attention for good.
Your Tasks
Before moving on to the next tutorial, please make sure you can check off the following tasks:
- [ ✓ ] Sign up for a transactional email service
- [ ✓ ] Install the
nodemailerandnodemailer-postmark-transportdependencies. If you’re using another service, use the related transporter - [ ✓ ] Configure the environment variable(s) to store secrets for the email service
- [ ✓ ] Get to know and adjust the
welcomeemail template - [ ✓ ] Implement the mail sending process for a welcome email in your sign up handler
- [ ✓ ] Test the mailer by signing up for your Futureflix with your personal email
Proceed to the next lesson once you’ve completed all tasks.
Next Lesson
Sending emails from your Node.js application is a great way to react to specific events. Like, send a personalized welcome email on each sign up gives you the opportunity to ask questions or talk to the user. It’s a gateway to the inbox that you can use for good.
Don’t send emails to spam the user’s inbox. Make it comfortable to receive your emails, not work.
Mentioned Resources
- Postmark email delivery service
- Robot 3T (formerly Robomongo) is the free lightweight GUI for MongoDB
- Set up your environment variables and keep secrets outside the repository